Room Allocation
This feature allows you to control how many units of each room type and rate plan are allocated to a specific OTA.
How to Set Room Allocation
-
Go to the Room Allocation section.
-
Locate the room type and associated rate plan you wish to configure.
-
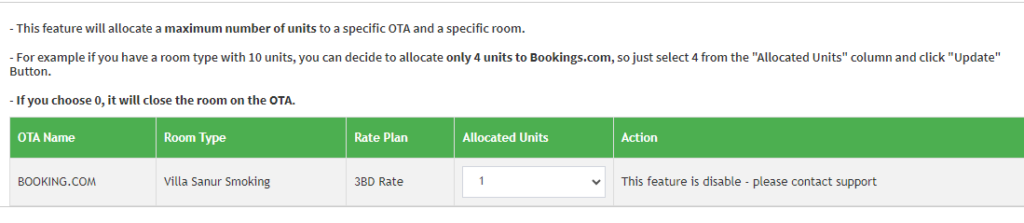
In the Allocated Units column, select the number of units you want to allocate to the OTA. Example: If you have a room type with 10 units and want to allocate only 4 units to Booking.com, select 4 under the Allocated Units column and click Update.
Note: This feature is disabled by default. To activate Room Allocation, please contact Bookandlink Support.
[!NOTE]
Troubleshooting Room Allocation Issues
"Update" button is not visible
- The Room Allocation feature may be disabled for your property.
- Please contact Bookandlink Support to request activation.
Allocated units cannot be changed or edited
- Make sure the Room Allocation feature has been activated.
- Refresh the page and try again after activation.
Changes to allocation do not reflect on OTA
- Ensure you clicked the Update button after setting the allocated units.
- Verify that the OTA is properly connected and mapped.
- Try performing an OTA Update from the relevant section (e.g., Monthly Deals or Yearly Deals).
Number of allocated units resets after saving
- This may occur if there is a sync delay with the OTA.
- Wait a few moments and refresh the page to check if the changes persist.
- Reapply the allocation and click Update again if needed.
Incorrect room type or rate plan shown
- Confirm that the mapping between internal room types/rate plans and the OTA is complete.
- Go to the Mapping section and verify that each rate plan is properly assigned.