Introduction
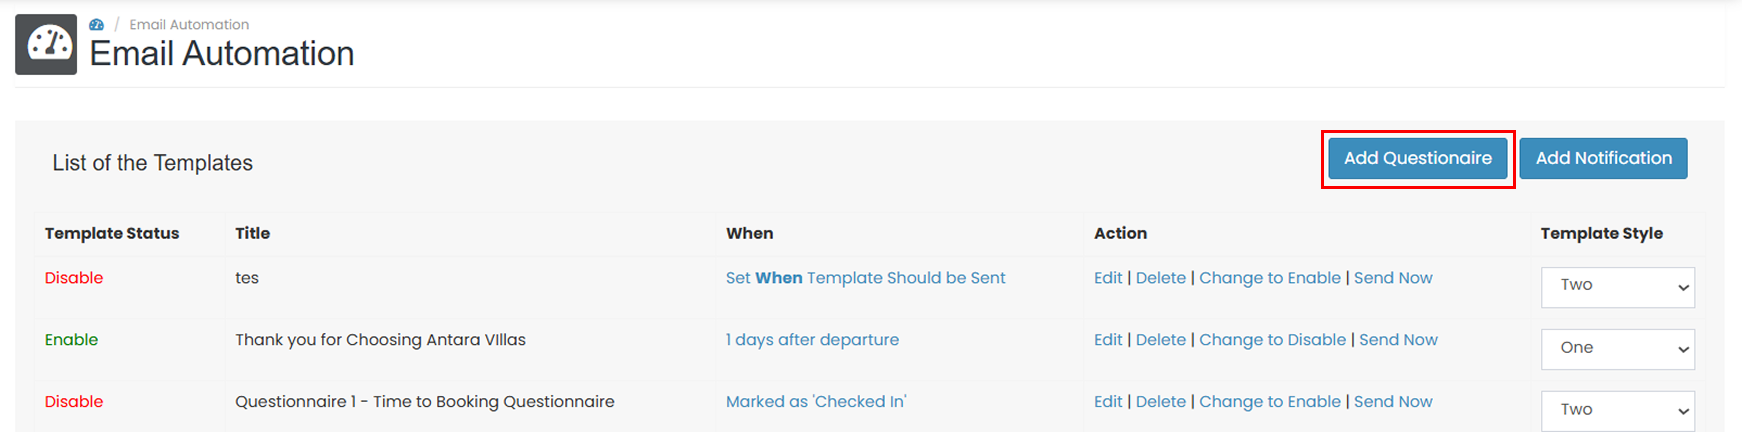
The Email Automation page allows you to create and manage questionnaire and notification email templates for guests and internal stakeholders. This feature helps automate guest communication and operational notifications based on predefined schedules.
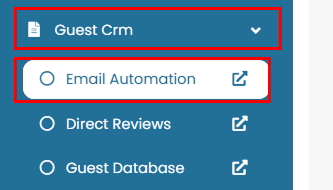
You can access this feature by navigating to Guest CRM > Email Automation.
Add New Questionnaire
A Questionnaire is an email sent to guests containing questions, typically used to collect feedback or required information. To create a new questionnaire template, follow these steps:
-
Click the Add Questionnaire button.
-
Fill in all the required fields
-
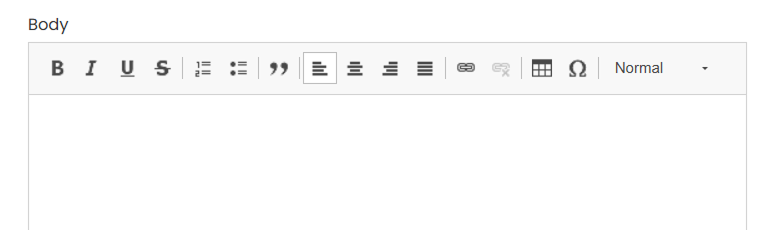
Body Email
Enter the main content of the email. You may use Email Template Tags available at the bottom of the editor to insert dynamic data into the email body. The text formatting tools are available for customization.
-
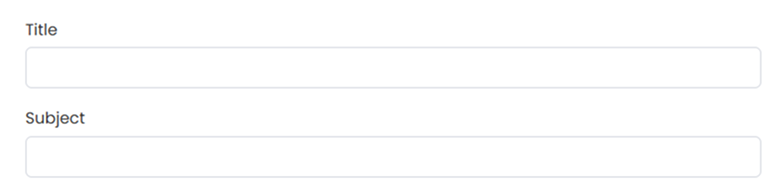
Title and Subject
Enter an internal email title and subject to identify the questionnaire template that will be visible to the recipient.
-
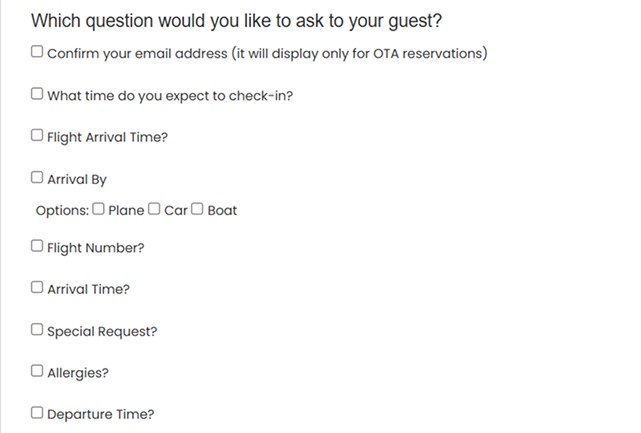
Question List
Select the predefined questions you want to include. You may select multiple questions.
-
Custom Question
Use this option to add custom questions based on your needs.
- Click Add Custom Question button to create a new question section.

- A new section will appear. You can choose the question type
- Input : Allows guests to type a free-text answer.
- Radio Button : Allows guests to select one option only (up to 6 options).
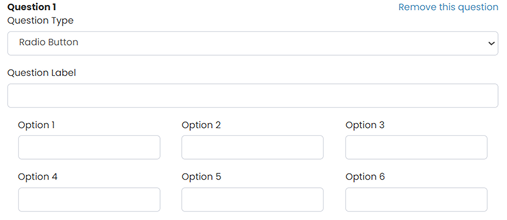
- Checkbox : Allows guests to select multiple options (up to 6 options).
- Enter the Question Label
You may add multiple custom questions or remove them as needed.
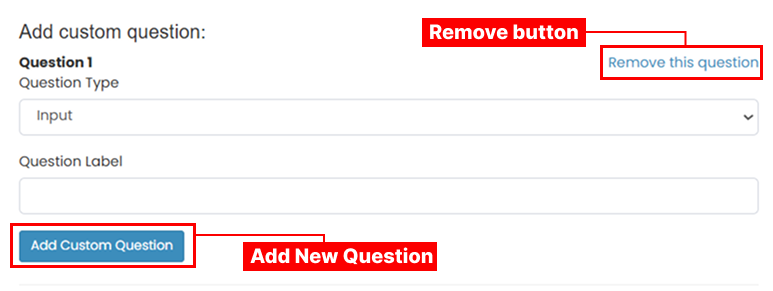
- Click Add Custom Question button to create a new question section.
-
Email Template Tag
Template tags allow you to insert dynamic information (e.g., guest name, booking number) into the email.
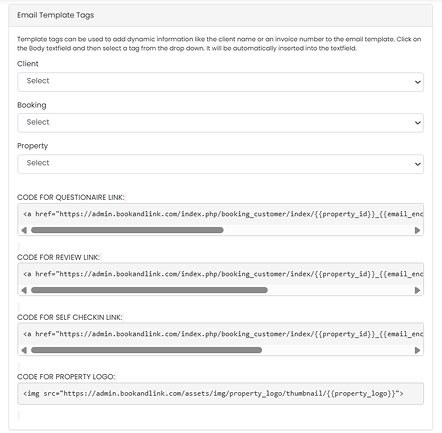
To use this tag:
- Click inside the Email Body field.
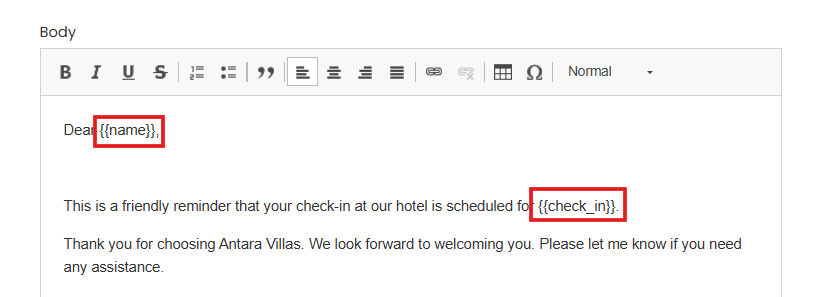
- Select a tag from the dropdown list. The tag will be inserted automatically. The example below shows the usage of template tags from the Client (name) and Booking (check in) categories.
 Available tag categories:
 - Client: Guest information such as name, phone number, and city, country, email, password etc.
- Booking: Booking-related data such as booking number, rate plan, total amount etc.
- Property: Property information (e.g., property logo or property ID).
- Link: Useful links such as questionnaire link, review link, self check-in link, or property logo.
-
-
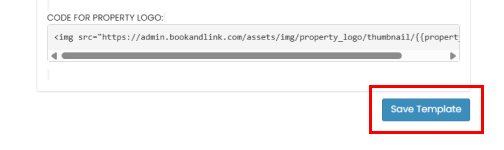
Click the Save Template button to create the questionnaire.
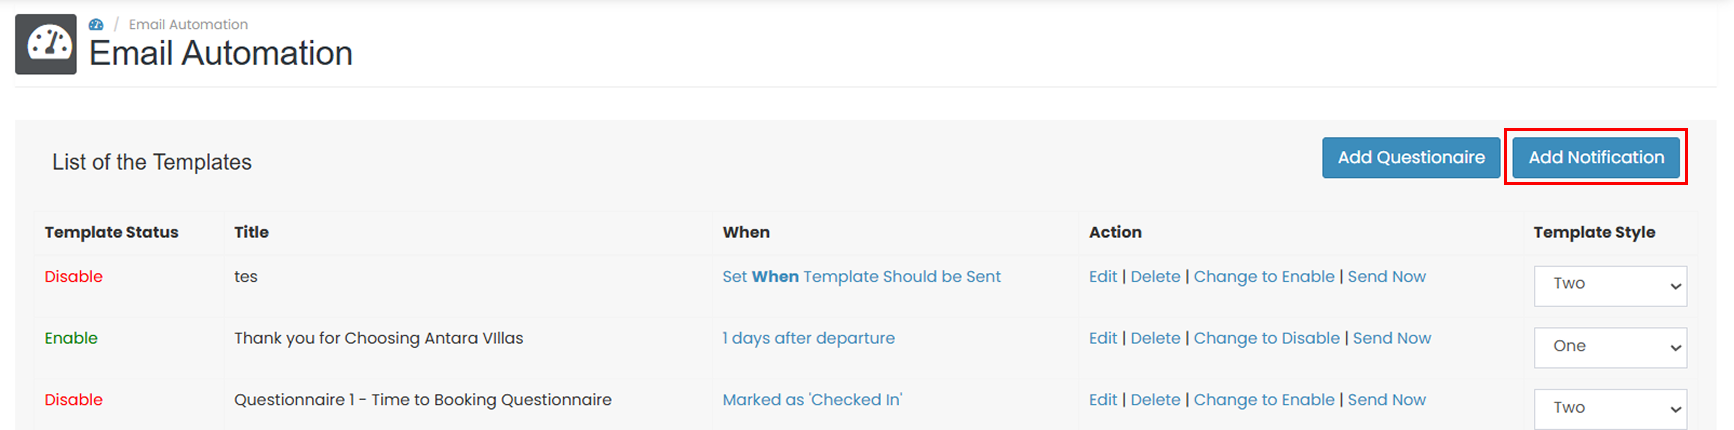
Add New Notification
A Notification is an email used to inform guests, hotels, or other recipients. Unlike questionnaires, notifications do not contain questions. To create a notification template:
- Click Add Notification button.
- Complete the required fields:
-
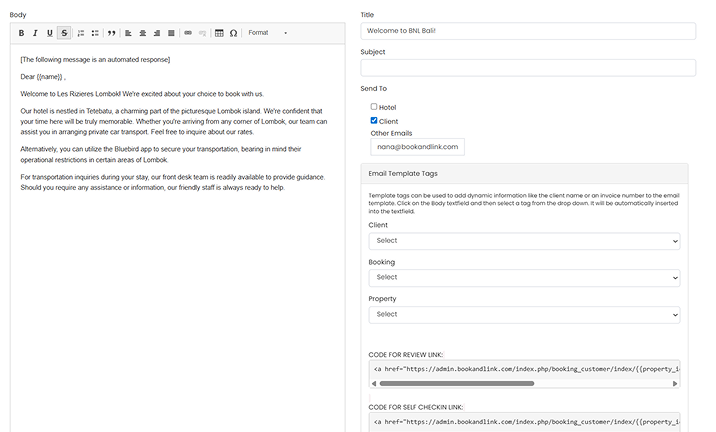
Body Email
Enter the main content of the email. You may use Email Template Tags available at the bottom of the editor to insert dynamic data into the email body. The text formatting tools are available for customization. -
Title and Subject
Enter an internal email title and subject to identify the questionnaire template that will be visible to the recipient. -
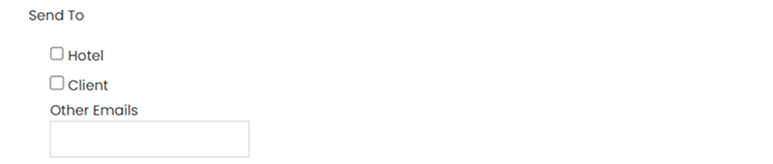
Recipient
Select the recipient type:- Hotel
- Client
- Other emails : Custom email address (manually entered)
-
Email Template Tags
Template tags allow you to insert dynamic information (e.g., guest name, booking number) into the email.
To use this tag:
- Click inside the Email Body field.
- Select a tag from the dropdown list. The tag will be inserted automatically. The example below shows the usage of template tags from the Client and Booking categories.
Available tag categories:
- Client: Guest information such as name, phone number, and city.
- Booking: Booking-related data such as booking number and rate plan.
- Property: Property information (e.g., property logo or property ID).
- Link: Useful links such as review link, self check-in link, or property logo.
-
- Click the Save Template button to store the notification template.
Set Email Automation Schedule
Each template can be scheduled to send automatically at a specific time.
- In the template list, locate the When column. Click the scheduled time of the template you want to update.
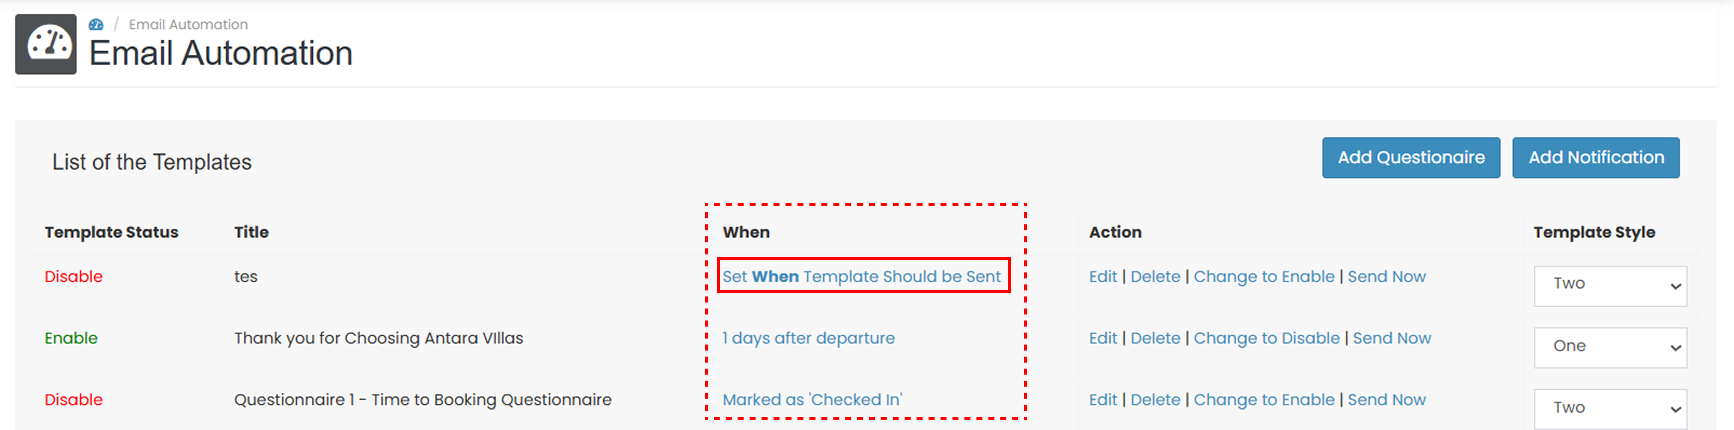
- A pop-up window will appear. Select the desired sending time (only one option can be selected).
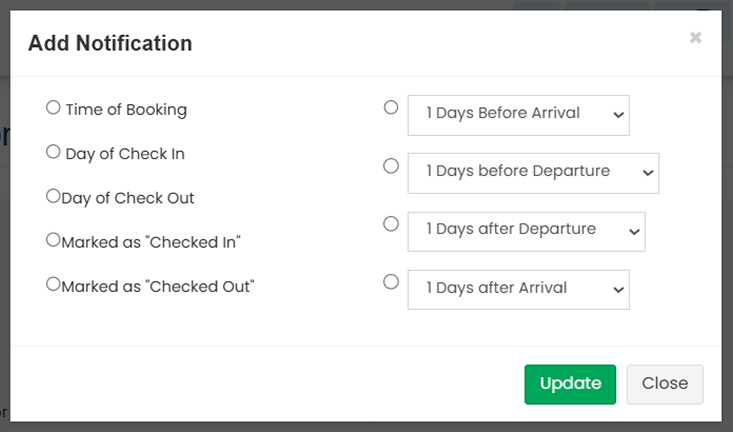
- Click Update to save the changes.
Edit Template
To update an existing template:
-
In the Template List, locate to the Action column, click Edit.

-
You will be redirected to the edit page, where you can update the required fields as necessary.
-
Click Save Template to apply the changes.
Remove Template
To delete a template:
- Locate the template you want to remove.
- In the Action column, click Delete.
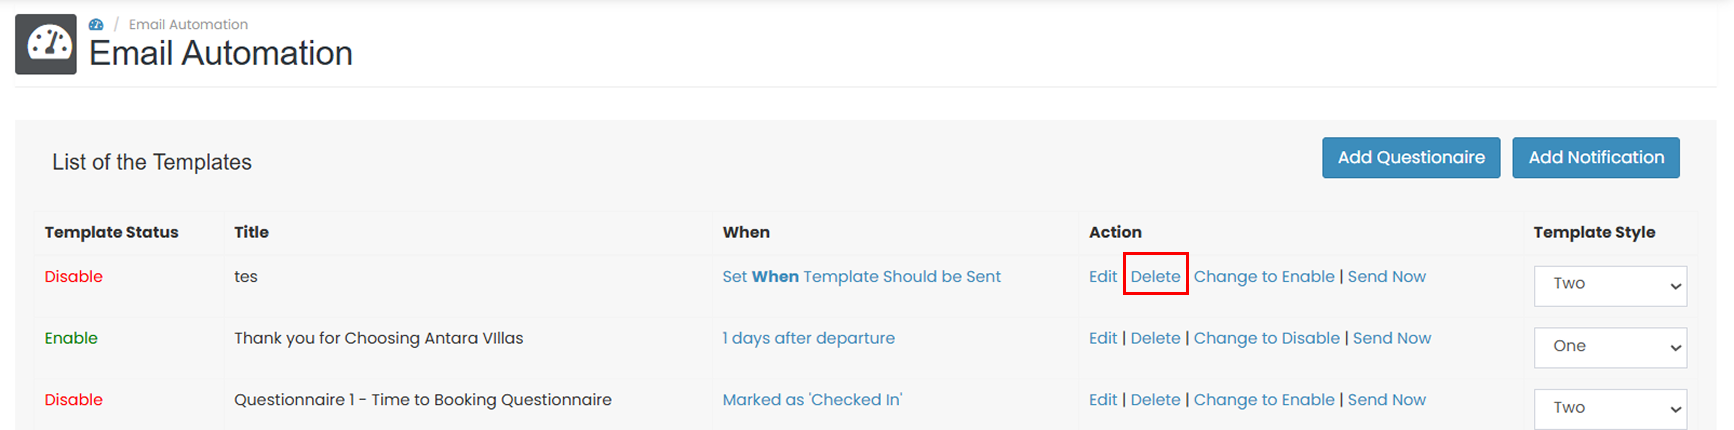
- A confirmation pop-up will appear. Click OK to confirm the deletion.
Manage Template Status
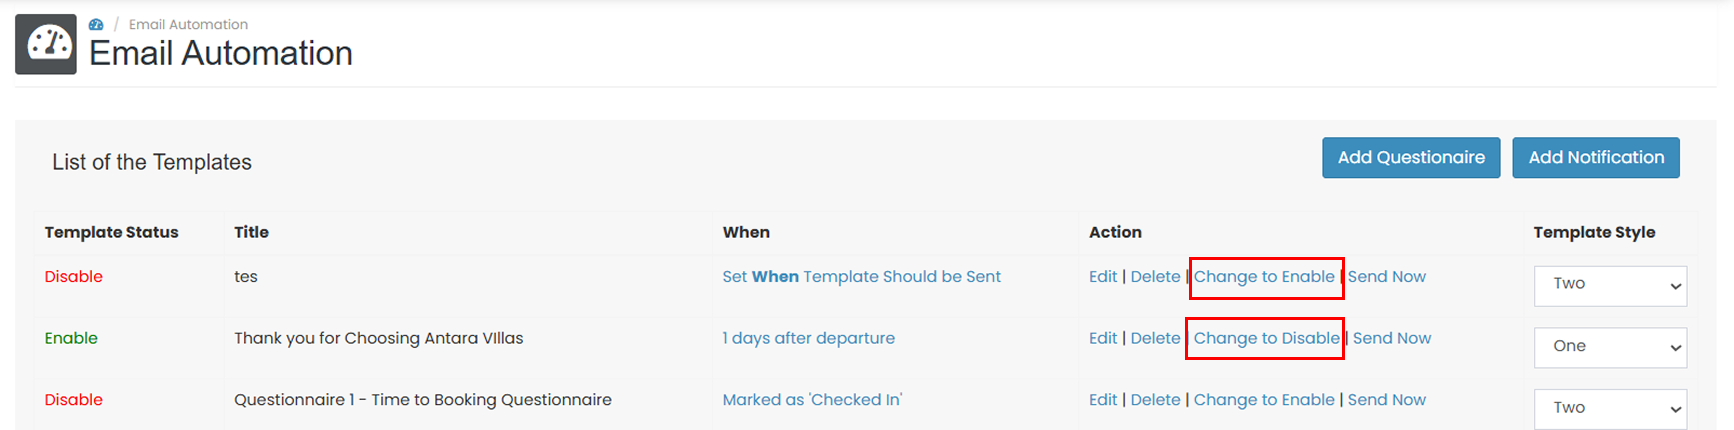 You can control whether a template is active or inactive.
- Click Change to Enable to activate the automation.
- Click Change to Disable to deactivate the automation.
Send Template Now
This option allows you to send an email immediately without waiting for the scheduled time.
- Locate the template in the list.
- In the Action column, click Send Now.
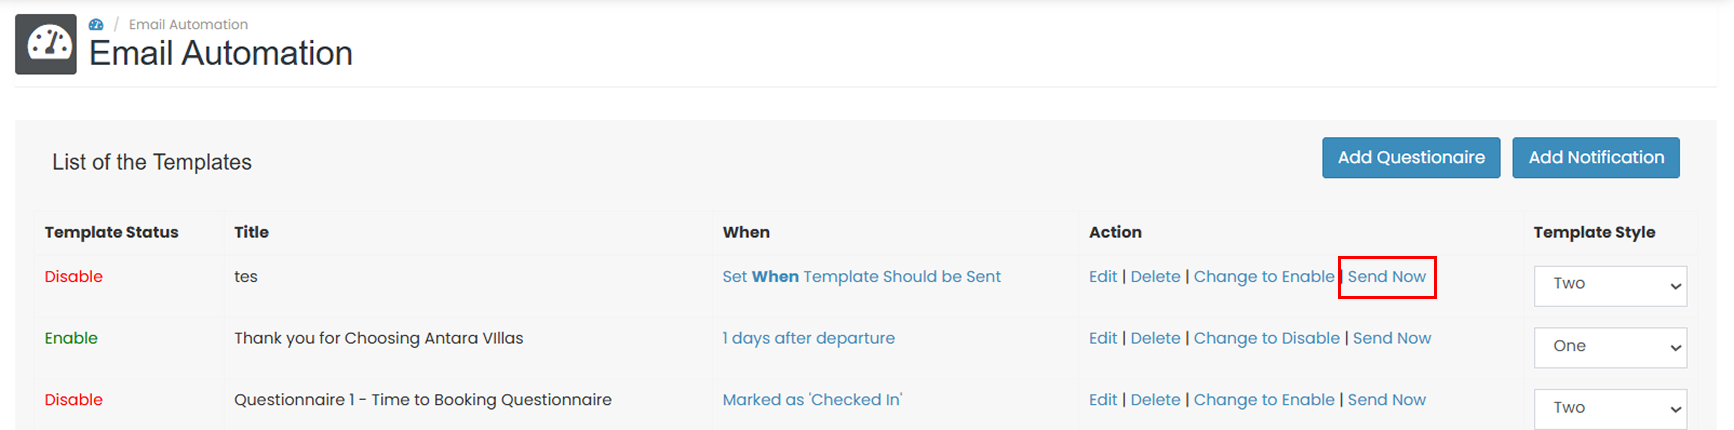
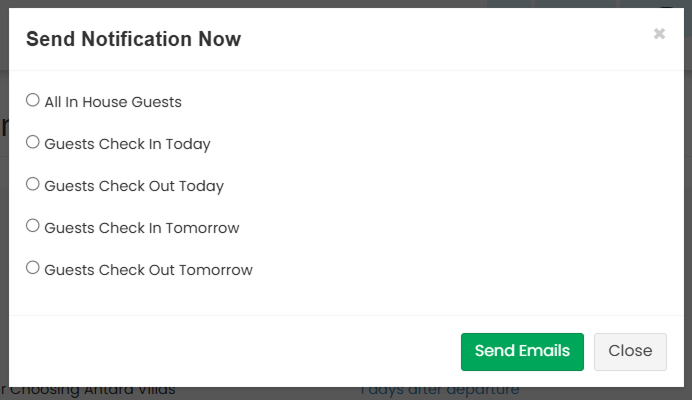
- Select the recipient. Then click Send Emails to proceed.
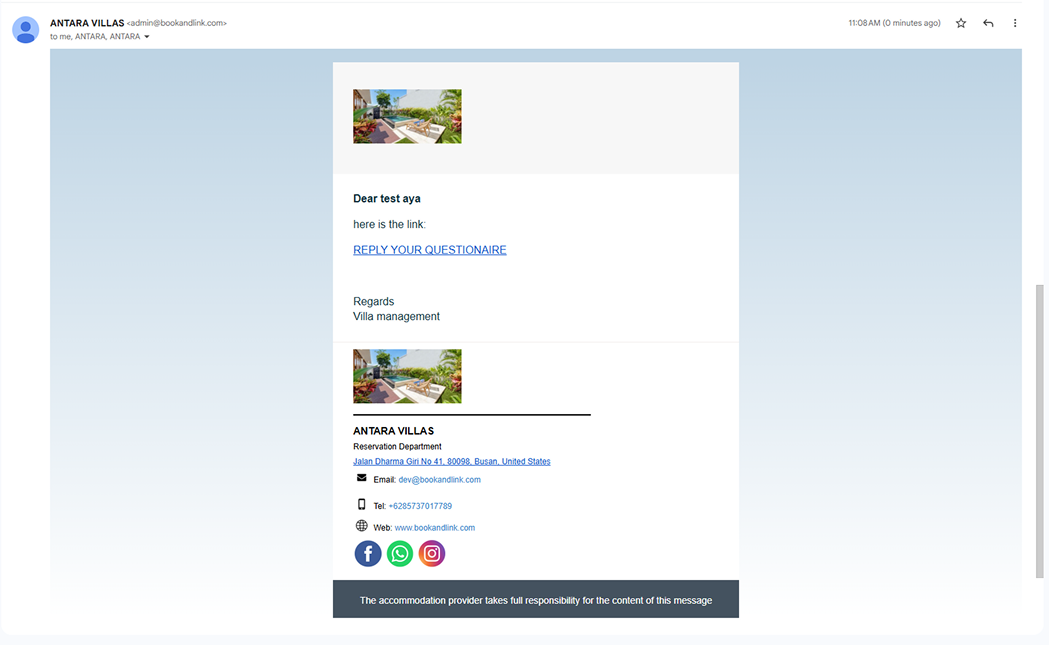
Change Template Style
To update the visual style of an email template:
- Locate the template you want to update.
- In the Template column, click the dropdown menu.
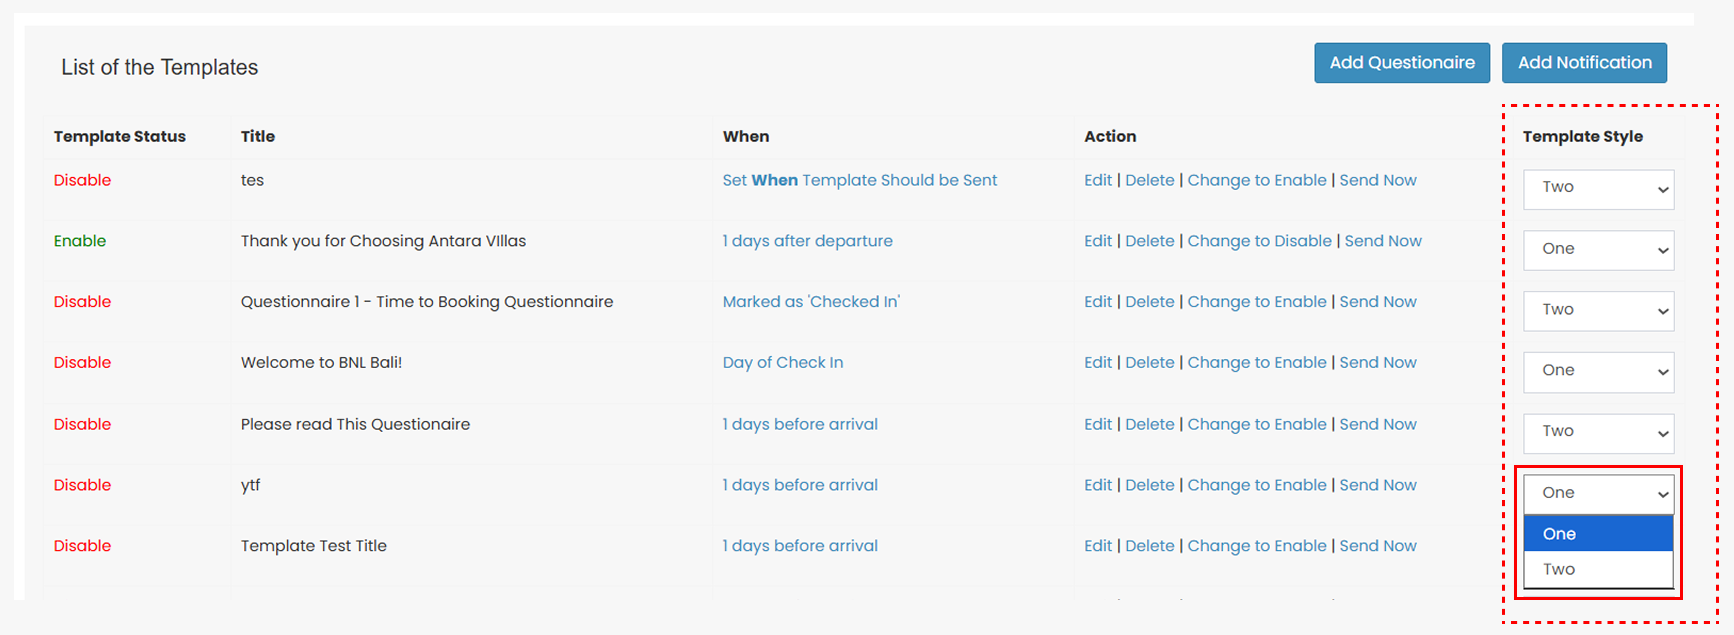
- Select the template style
- The following image shows an example of the displayed questionnaire using template One.
- Below is an example of the displayed questionnaire using template Two.

- The following image shows an example of the displayed questionnaire using template One.