Introduction
The Property Settings page allows property managers to manage essential information about their property, including general details, descriptions, location, features, services, and images. Maintaining accurate and complete property settings ensures better visibility, enhances guest trust, and improves synchronization across connected OTA channels. All updates made in this section directly impact how the property is presented online and how reservation systems interact with the property profile.
General
The General tab under Property Settings is used to manage the core identity and contact information of the property. It includes fields such as property name, address, phone number, email, website, currency, time zone, and PMS integration options.
Accurate information in this section is crucial because it defines how the property details are displayed on OTAs, internal reports, and booking communications.
How to Update General Property Information
Follow these steps to update the general information of your property:
- Go to Settings > Property from the main menu.

- Under the General tab, fill in or update the following fields:
- Property Name: Enter the full name of your property.
- Accommodation Type: Select the type of accommodation (e.g., Villa, Apartment, Bungalow, Hotel, Unit, Guesthouse, House).
- Preferred Currency: Select the main currency used for the property's transactions.
- This setting defines how amounts such as deposit, due, and total are displayed but does not convert the actual reservation currency.
- Quantity of Villa: Displays the number of villas or units. (This field is not editable.)
- Time Zone: Select the local time zone where your property operates.
- Primary Email Address: Displays the registered main email address. (This field cannot be updated manually. Please contact support to request changes.)
- CC Emails: Enter additional email addresses for CC purposes. Press Enter after typing each email to add multiple addresses.
- Accounting Email Address: Enter the email address for financial and accounting communication.
- Mobile Number: Select the country code (e.g., Indonesia +62) and input the mobile number in the provided field.
- Enable CVV: Choose whether to require CVV for guest card payments (Enable or Disable).

- Primary Phone: Select the country code and input the primary phone number for your property.
- Website Address: Input the URL of your property's official website.
- Country: Select the property's country location.
- State/Region: Enter the state or regional area of the property.
- City/Location: Input the city where the property is located.
- Street Address: Fill in the complete street address.
- Postal/Zip Code: Enter the postal code.
- Prefix Booking Number: Define a prefix for booking numbers.
- The prefix will appear on the Booking List and FOS (Front Office System) to help distinguish bookings (e.g., "BL-12345").
- Hotel Tax Number: Enter the hotel's tax registration number. The tax number will be displayed on the FOS PDF invoice for guest billing purposes.
- PMS Partner: Choose the PMS integration option:
- No → No integration.
- XML API → Connects using XML-based API.
- JSON API → Connects using JSON-based API.
- Currency Prefix: Choose the position of the currency symbol:
- Yes → Display the currency before the amount (e.g., IDR 500,000).
- No → Display the currency after the amount (e.g., 500,000 IDR).
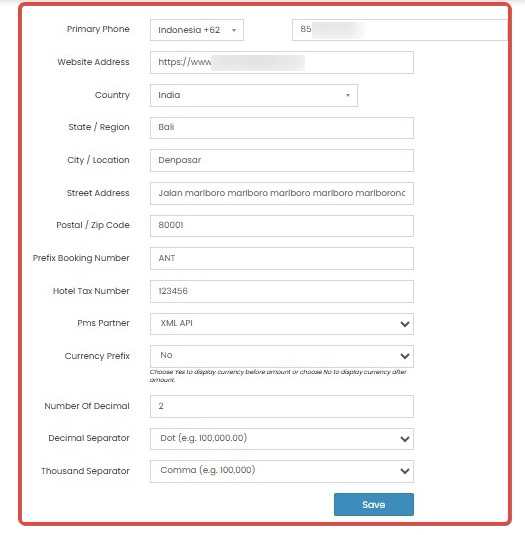
- After completing or editing the fields, click the Save button to apply the changes.
[!NOTE]
Troubleshooting Updating General Property Information
Unable to edit the "Quantity of Villa" or "Primary Email Address" fields
- These fields are non-editable by users. To update the primary email address, please contact support for assistance.
Changes are not saved after clicking the "Save" button
- Ensure all required fields are filled in correctly, especially mandatory fields such as Property Name and Country.
- Check your internet connection. A stable connection is required to successfully save updates.
- Refresh the page and try updating the information again.
New CC Email or Accounting Email is not added after typing
- After typing each email address, press the Enter key to register it before saving.
- Verify that each email address follows the correct email format (e.g., name@example.com).
Dropdown selections (e.g., Time Zone, Country, PMS Partner) are not appearing
- Refresh the page to reload the latest dropdown options.
- If the issue persists, clear your browser cache or try using a different browser.
Incorrect format for Website Address or Mobile Number
- Ensure the website address starts with
http://orhttps://.- When entering a mobile number, select the correct country code and input the number without any special characters like
+,-, or spaces.Hotel Tax Number or Prefix Booking Number not displayed in FOS after update
- Make sure you saved the changes after entering the information.
- Check the FOS system after a few minutes. There might be a short synchronization delay.
Description
The Description tab allows property managers to set property descriptions in multiple languages, add social media links, and upload visual branding such as logos and thumbnails.
This information enhances the property's presentation across OTAs and other booking platforms.
How to Update Property Description and Images
Follow these steps to update your property's description and media:
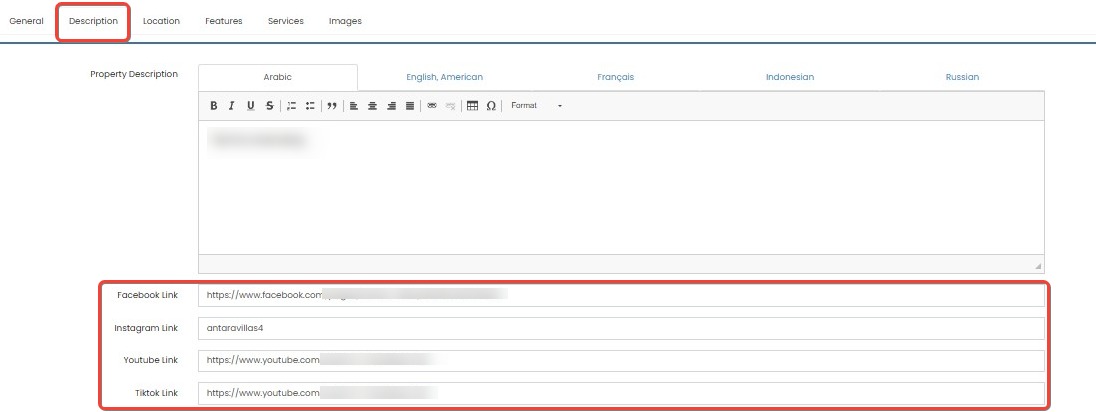
- Click the Description tab.
- Update the Property Description:
- Write the property's description using the rich-text editor provided.
- You can format the text using options like Bold, Italic, Underline, Lists, and Alignment.
- Descriptions can be set separately for different languages: Arabic, English (American), Français, Indonesian, Russian.
- Click each language tab to input and format the description for that language individually.

- Fill in the Social Media Links:
- Facebook Link: Enter the URL of your property's Facebook page.
- Instagram Link: Enter the URL of your property's Instagram account.
- YouTube Link: Enter the URL of your property's YouTube channel.
- TikTok Link: Enter the URL of your property's TikTok account.
- Upload Property Logo:
- Click Upload Logo to upload your property's logo.
- Requirements: Upload an image in landscape format, where the width is at least 200px larger than the height (width > height).
- After uploading, a Remove Logo button will appear to delete the logo if needed.
Clicking Remove Logo will trigger a confirmation pop-up before deletion.
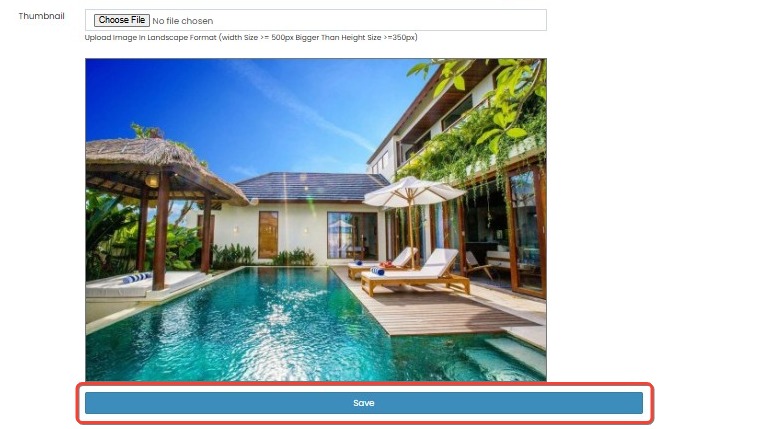
- Upload Thumbnail:
- Click Upload Thumbnail to set a header image for the property.
- Requirements: Upload an image in landscape format, with minimum dimensions of 500px width and 350px height.
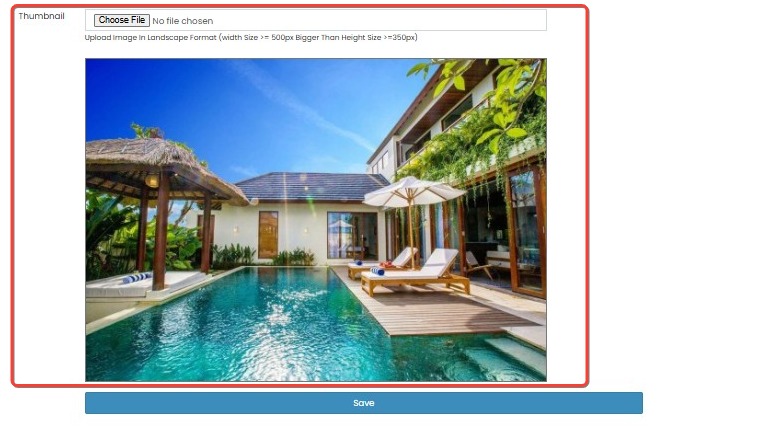
- After completing the description entries and uploading images, click the Save button to apply the changes.
[!important]
- Each language description must be manually input and saved for proper multilingual display.
- Make sure uploaded images meet the required dimensions to prevent display errors.
- Formatting options (bold, italic, lists) help enhance the readability of your property description.
- Deleting the property logo requires user confirmation to avoid accidental removal.
[!NOTE]
Troubleshooting Updating Property Description and Images
Formatted description not saved properly in specific language
- Ensure you are on the correct language tab before inputting or editing content.
- Click Save after updating each language tab to preserve individual entries.
Text formatting (bold, italic, alignment) not applied in description editor
- Ensure you're selecting the text before applying formatting options.
- If formatting still doesn’t appear, try refreshing the page or using a different browser.
Uploaded image does not appear in Property Logo or Thumbnail section
- Check that the uploaded image meets the specified format and size requirements:
- Logo: Must be landscape with width greater than height, and minimum width at least 200px more than height.
- Thumbnail: Minimum dimensions of 500px width and 350px height.
- Use supported image file types such as
.jpg,.jpeg, or.png."Remove Logo" button not showing after uploading logo
- Wait a few seconds after the upload to let the system refresh.
- Refresh the page if the button still does not appear.
Error message when uploading images
- Ensure the image file size is not too large (typically below 5MB is recommended).
- If using a slow connection, wait until the upload completes or try again later.
Accidentally deleted property logo
- Once deleted, the logo cannot be recovered automatically. Re-upload the correct image and click Save.
Social media links are not saved or not displaying
- Double-check that each URL is complete and starts with
https://orhttp://.- Invalid URLs may be rejected by the system and not saved.
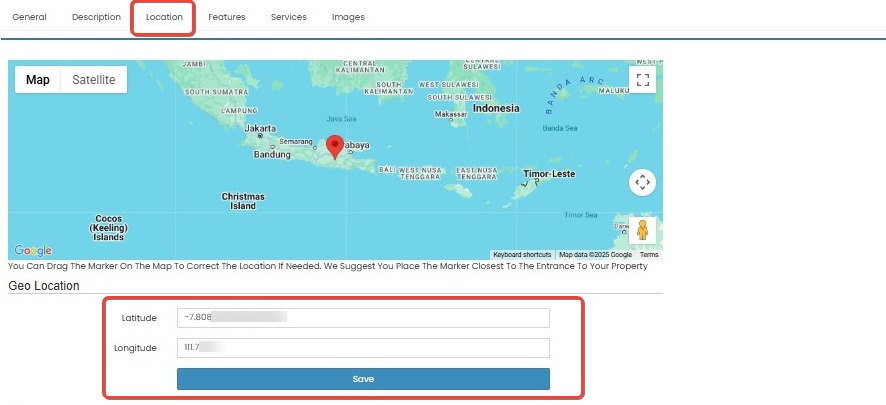
Location
The Location tab allows property managers to manually set the geographic coordinates of their property. Entering the correct latitude and longitude ensures accurate property placement on OTA maps and supports location-based searches.
How to Update Property Location
Follow these steps to update your property's location:
- Click the Location tab.
- In the Latitude field, input the property's latitude coordinate.
- In the Longitude field, input the property's longitude coordinate.
- After entering both values, click the Save button to apply the changes.
[!NOTE]
Troubleshooting Updating Property Location
Latitude or Longitude values are not saving
- Ensure both Latitude and Longitude fields are filled before clicking Save.
- Check for any extra spaces or invalid characters (letters or symbols) in the input fields.
Incorrect property location displayed on the map
- Verify that the latitude and longitude coordinates entered are accurate.
- Use online tools like Google Maps to confirm the correct coordinates before input.
Error message appears after saving location
- Make sure the input fields only contain valid decimal numbers.
- Example format:
-8.409518(Latitude),115.188919(Longitude).Saved location not updating on the system
- After saving, refresh the page to check if the new coordinates have been applied.
- If the location still doesn't update, try clearing your browser cache and attempt again.
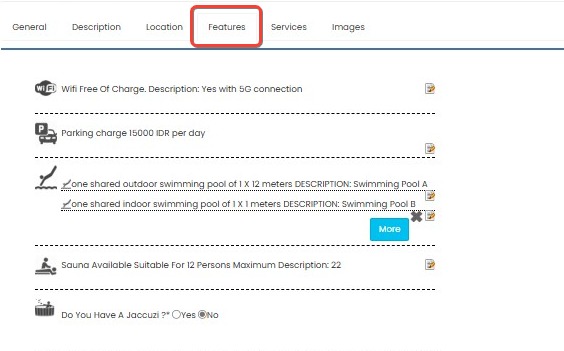
Features
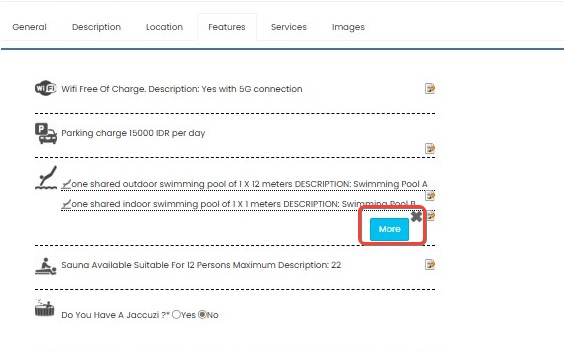
The Features tab allows property managers to configure whether specific facilities or property features are available. Each feature is listed with a Yes/No toggle for quick selection. Some features include additional information or configurations.
How to Set Property Features
Follow these steps to manage the features for your property:
-
Click the Features tab.
-
A list of predefined property features will appear.
-
For each feature:
- Choose Yes or No to indicate whether the feature is available at your property.

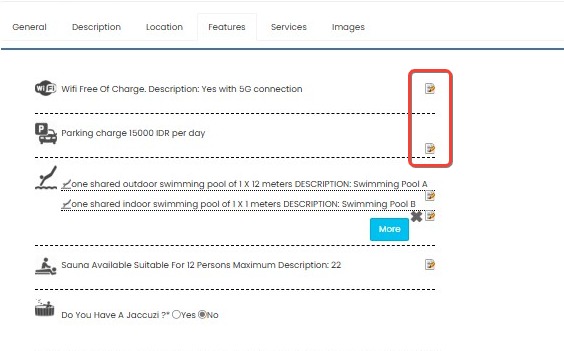
- If a note icon is shown next to a feature,
- Click the icon to open a follow-up Yes/No question related to that service.
- Answer the additional question accordingly.
- If a more icon is shown, click to expand additional input fields or settings specific to that feature.
- Choose Yes or No to indicate whether the feature is available at your property.
-
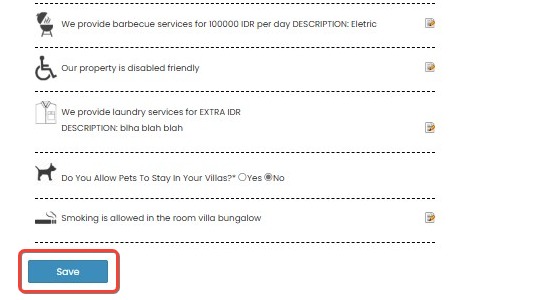
After updating all desired feature settings, scroll to the bottom and click the Save button to apply your changes.
[!NOTE]
Troubleshooting Setting Property Features
Changes to features are not saving
- Ensure that you click the Save button after making any updates.
- Wait a few seconds after clicking Save to allow the system to process the changes.
Follow-up question does not appear after clicking the note icon
- Check your internet connection; a stable connection is required to load additional questions.
- Refresh the page and try clicking the note icon again.
More settings are not expanding after clicking the more icon
- Ensure that your browser allows pop-up elements or expandable sections.
- Try refreshing the page or clearing your browser cache.
Updated features are not reflected on the property profile
- Confirm that you saved the changes successfully after making selections.
- Refresh the page to verify if the updated features are displayed.
Services
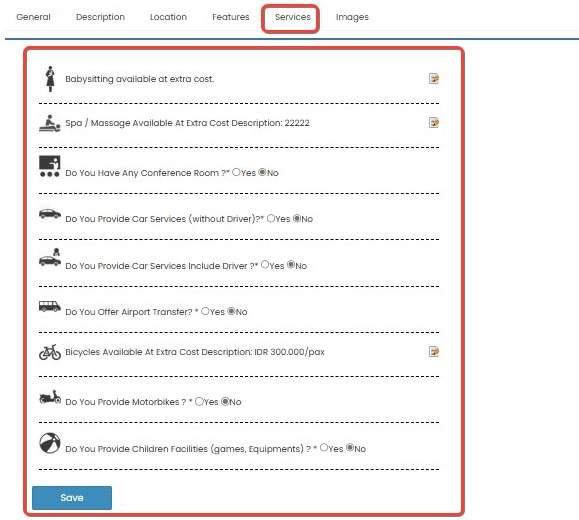
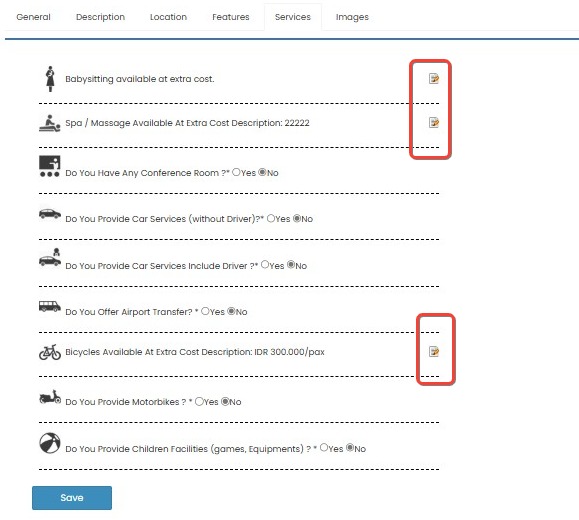
The Services tab enables property managers to define the specific services available at the property. Each item can be toggled with Yes/No, and some items include follow-up questions that appear when the info icon is clicked.
How to Configure Services
-
Click the Services tab.
-
Review the list of available service options.
-
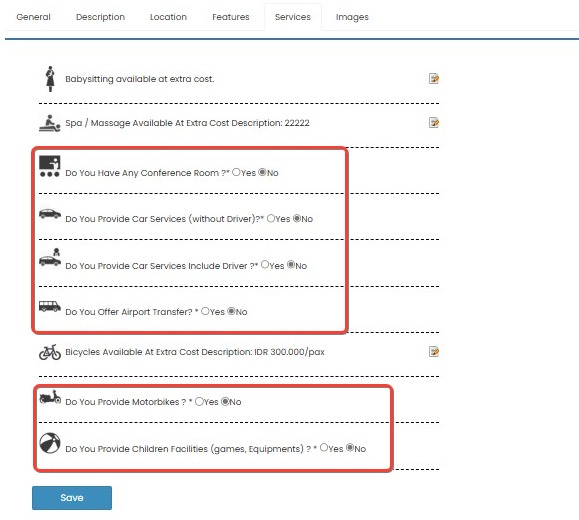
For each service:
-
Select Yes if the service is offered at your property.
-
Select No if the service is not available.
-
-
Some services include a note icon beside them:
-
Click the icon to open a follow-up Yes/No question related to that service.
-
Answer the additional question accordingly.

-
-
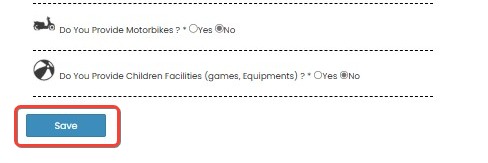
After updating your selections, scroll down and click the Save button to apply the changes.
[!NOTE]
Troubleshooting Configuring Services
Service selections are not saving
- Make sure you scroll to the bottom and click the Save button after updating your selections.
- Wait a few seconds to ensure the system registers the changes before leaving the page.
Follow-up question does not appear after clicking the note icon
- Check if your internet connection is stable. Follow-up questions require online access to load.
- Refresh the page and click the icon again if it doesn’t respond initially.
Updated service availability is not reflected in the system
- Confirm that you selected Yes or No for each service as required.
- After saving, refresh the page to verify if the updates are displayed correctly.
Page becomes unresponsive after selecting multiple services
- Try updating a few services at a time, then save before continuing.
- If the issue persists, clear your browser cache or switch to a different browser.
Images
The Images tab allows property managers to upload and organize property photos that appear on OTAs and booking platforms. You can upload multiple images, reorder them, and add optional tooltip text for better accessibility or description.
How to Upload and Manage Property Images
- Click the Images tab.

- Click Choose Image to add one or more property photos.
- When uploading, make sure the image follows the required format and dimension guidelines.
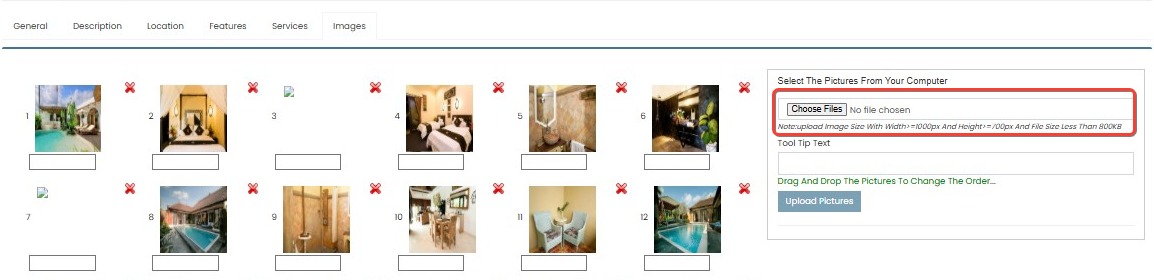
- Optionally, fill in the Tooltip Text field before uploading:
- If filled, the text will appear below the image.
- If left empty, the text area below the image remains blank.
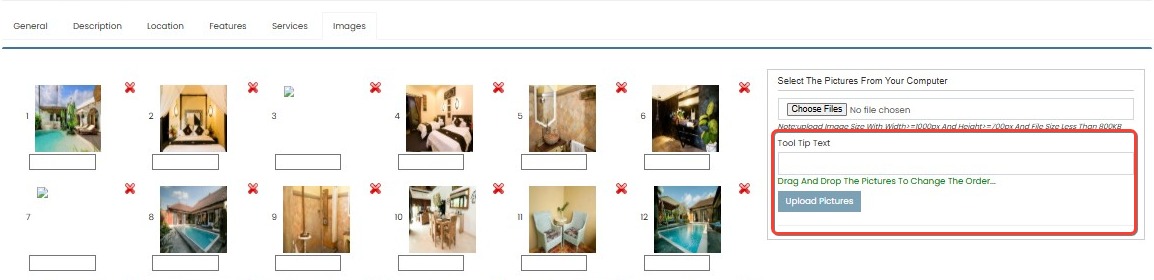
- After uploading:
- You can drag and drop to reorder images by clicking and holding an image, then moving it to the desired position.
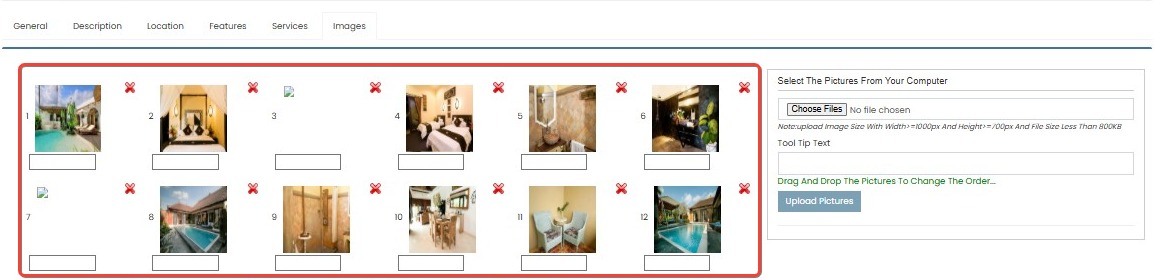
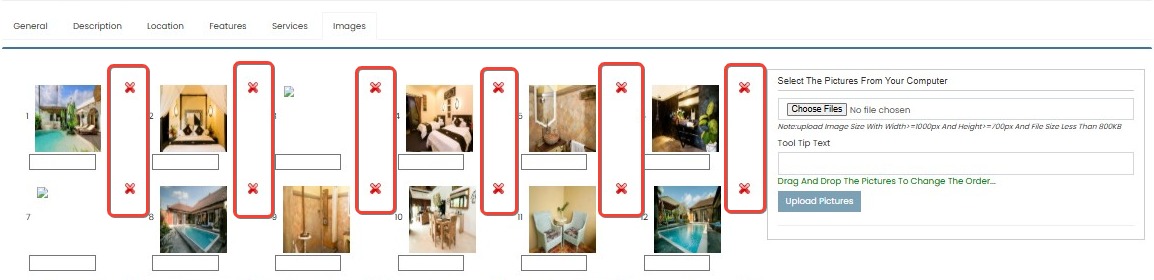
- To delete an image, click the X icon on the top-right corner of the image.
- A confirmation message will appear; click Yes to confirm deletion.
- A confirmation message will appear; click Yes to confirm deletion.
- You can drag and drop to reorder images by clicking and holding an image, then moving it to the desired position.
- Once all uploads, tooltip text, or reorder actions are complete, click the Save Orders and Labels button at the bottom of the page.

[!NOTE]
Troubleshooting Upload and Manage Property Images
Image fails to upload
- Make sure the image meets the required format and size specifications.
- Check your internet connection and try uploading the image again.
Tooltip text does not appear after upload
- Ensure the Tooltip Text field is filled before uploading the image.
- If the text was added after upload, make sure to click Save Orders and Labels to apply changes.
Unable to reorder images using drag-and-drop
- Confirm you're clicking and holding the image before dragging.
- If drag-and-drop still doesn’t work, try refreshing the page or using a different browser.
Deleted image still appears after confirmation
- Wait a few seconds after confirming deletion to allow the system to update.
- If the image remains, refresh the page to check if it was successfully removed.
Changes not saved after uploading or reordering
- Always click the Save Orders and Labels button after making any changes to image order or labels.
- If the save button is unresponsive, check your internet connection and try again.