Introduction
The Rules Setup feature allows users to automate rate adjustments based on predefined conditions and specific date ranges. To access this feature, navigate to Channel Manager > Rules Setup.
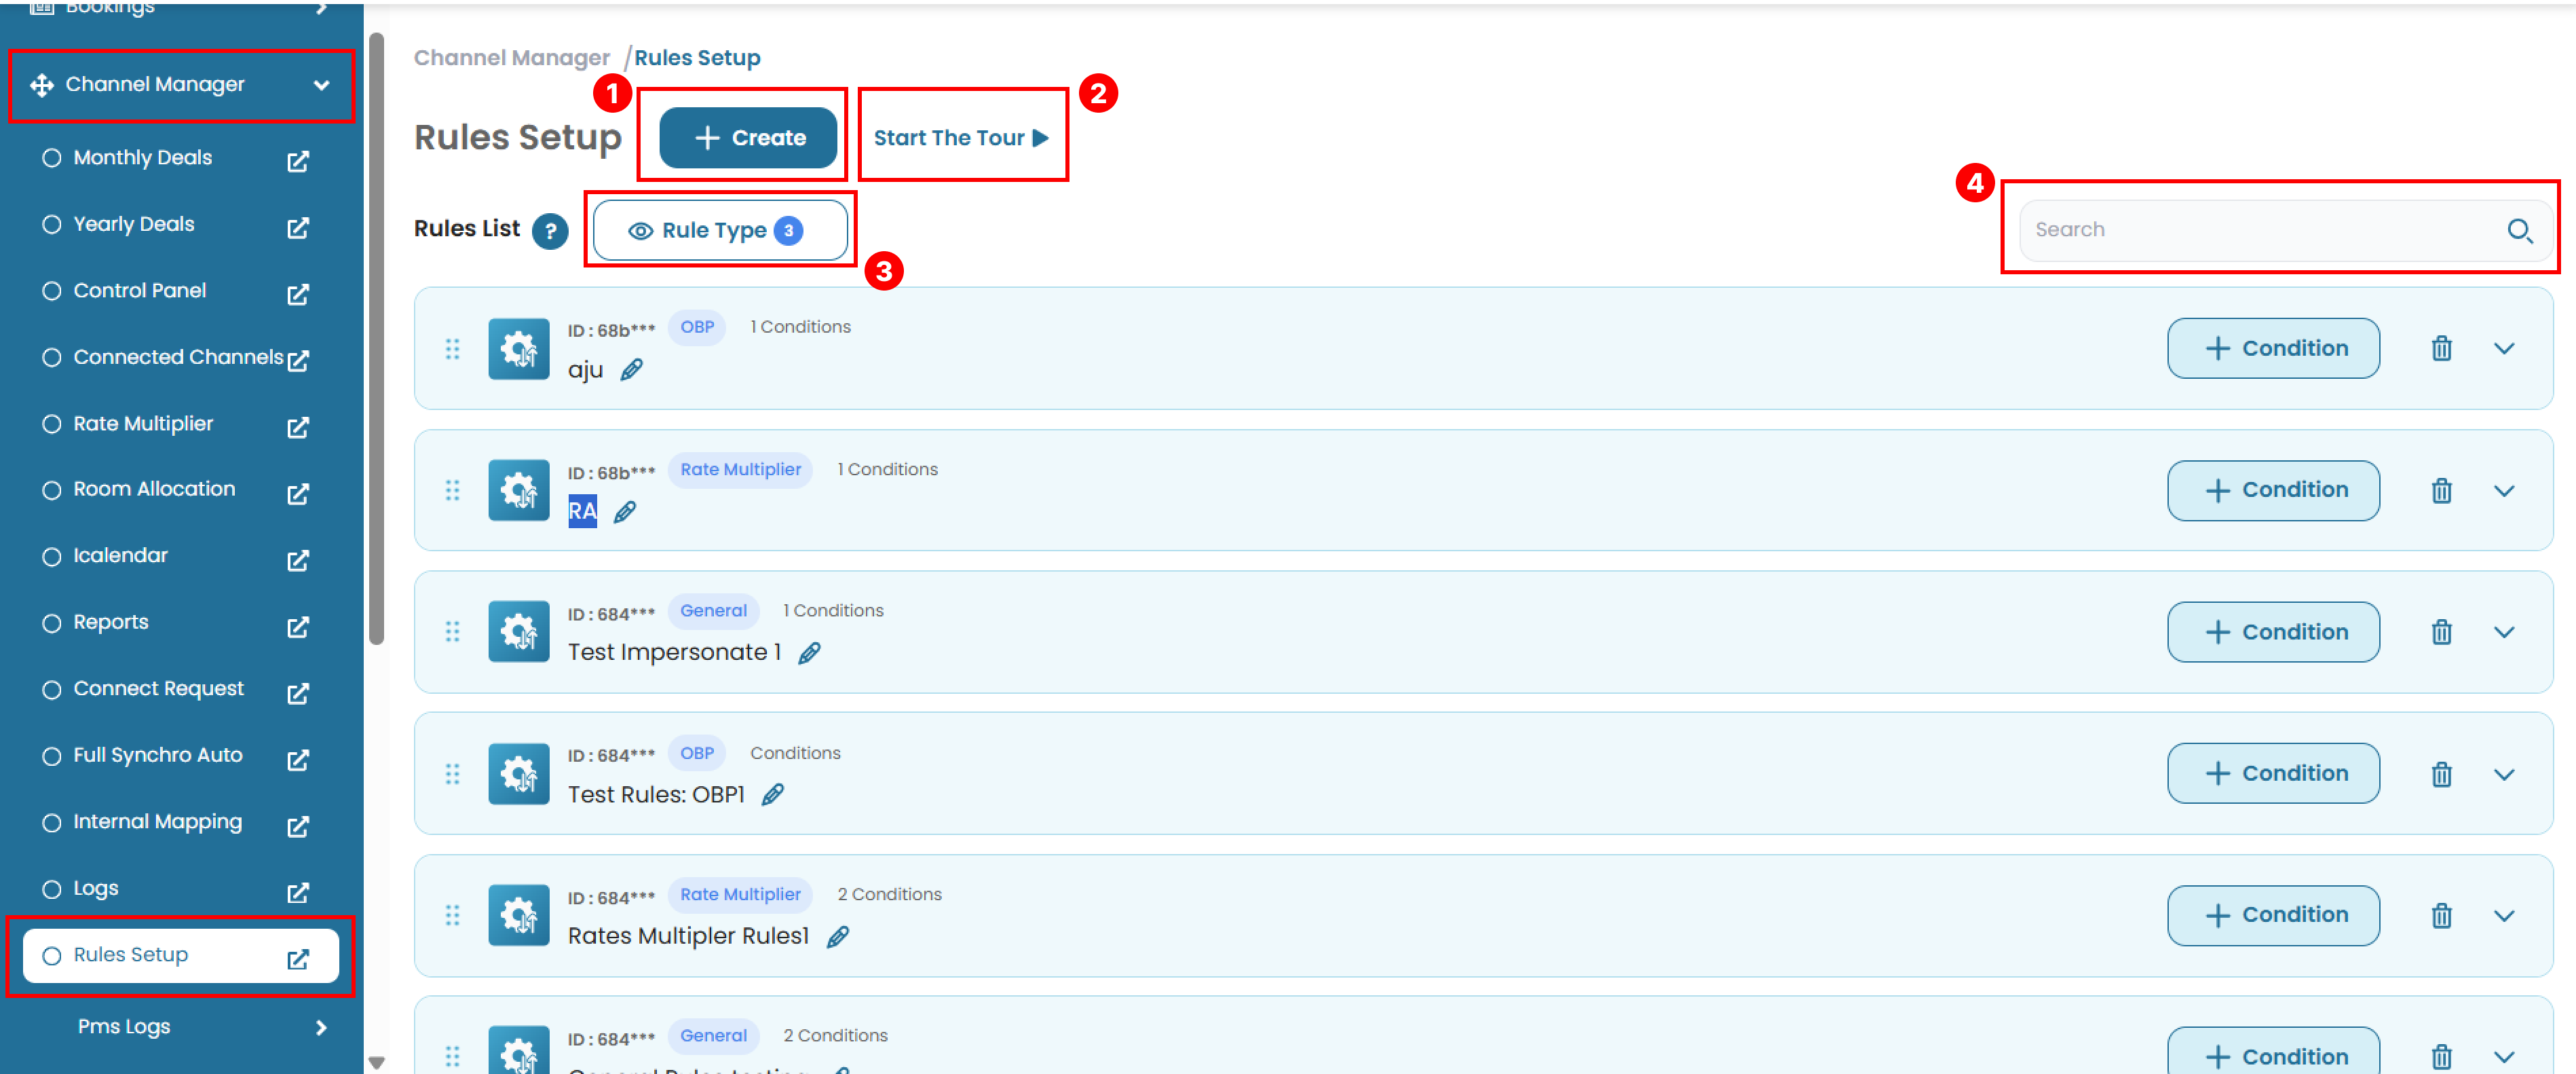 On this page, you will find various tools to create, manage, and apply rate rules.
- Opens a pop-up window to add a new rule.
- Start the Tour: Launches an interactive guide for this page.
- Rule Type: Controls item visibility. You can filter which rule types are displayed on the page.
- Search: Find matching data by typing a keyword into the search bar
Create New Rules
To create a new rule:
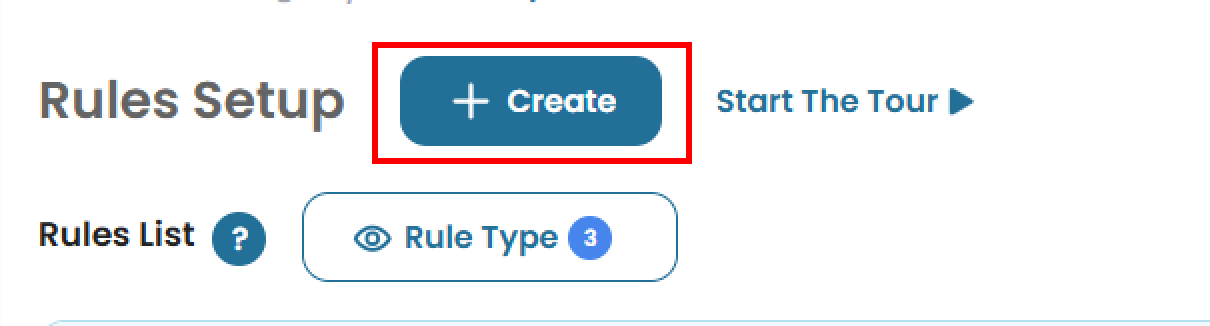
- Click the + Create button.
- A pop-up window will appear. Fill in the form:
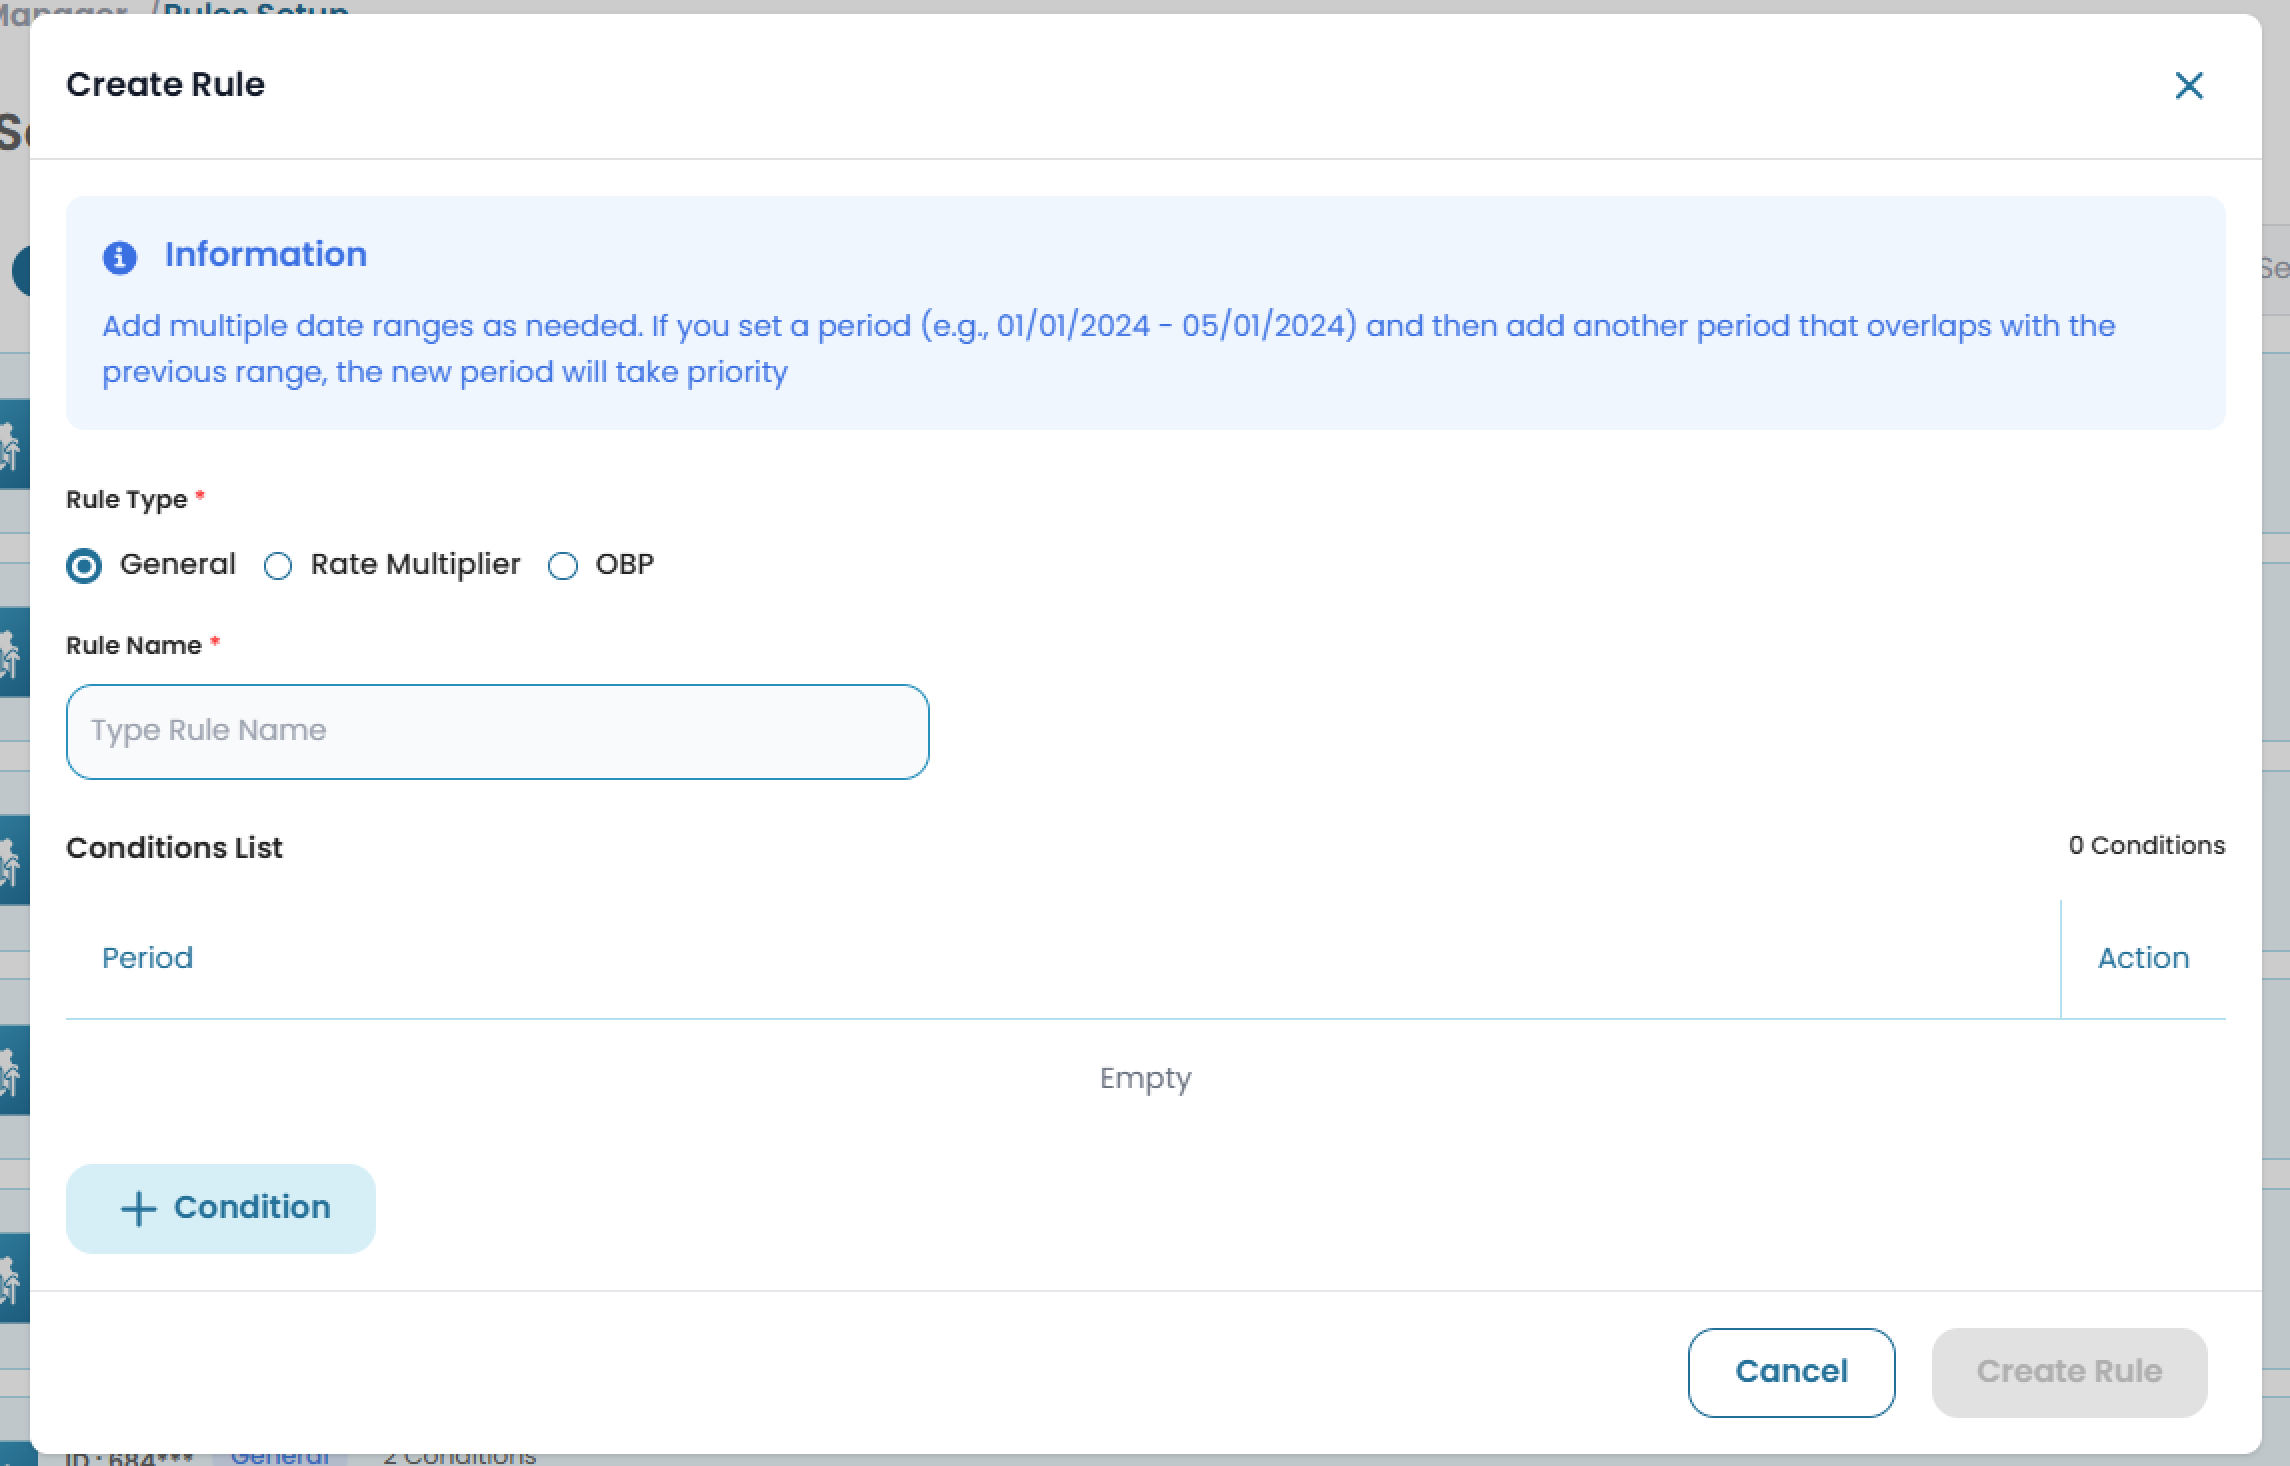
- Rule Type: Choose one of the three available options
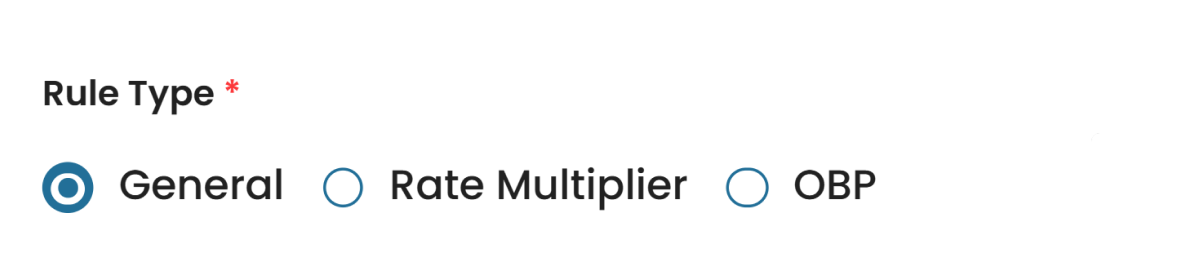
- General Used to define specific periods without applying any price adjustments. This rule type only requires setting the date range and applicable days.
- Rate Multiplier Used to automatically adjust prices by increasing or decreasing the rate based on either a fixed amount (IDR) or a percentage (%). Suitable for dynamic pricing strategies.
- OBP (Occupancy-Based Pricing) Used to set different price values based on the number of guests (pax). You can specify the pax count and assign a price adjustment value for that pax level.
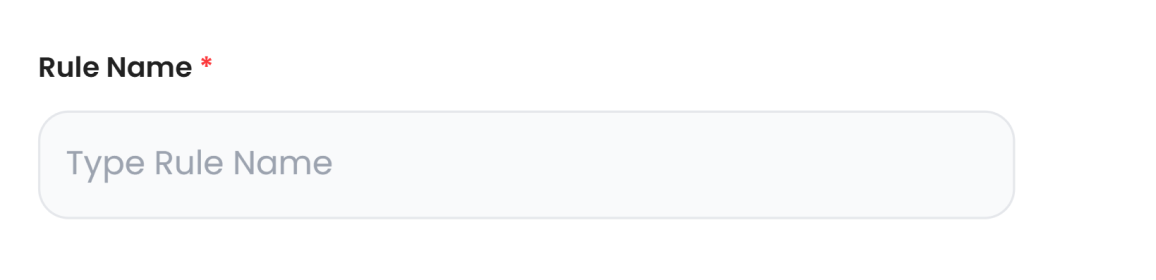
- Rule Name: Enter a name for the rule.
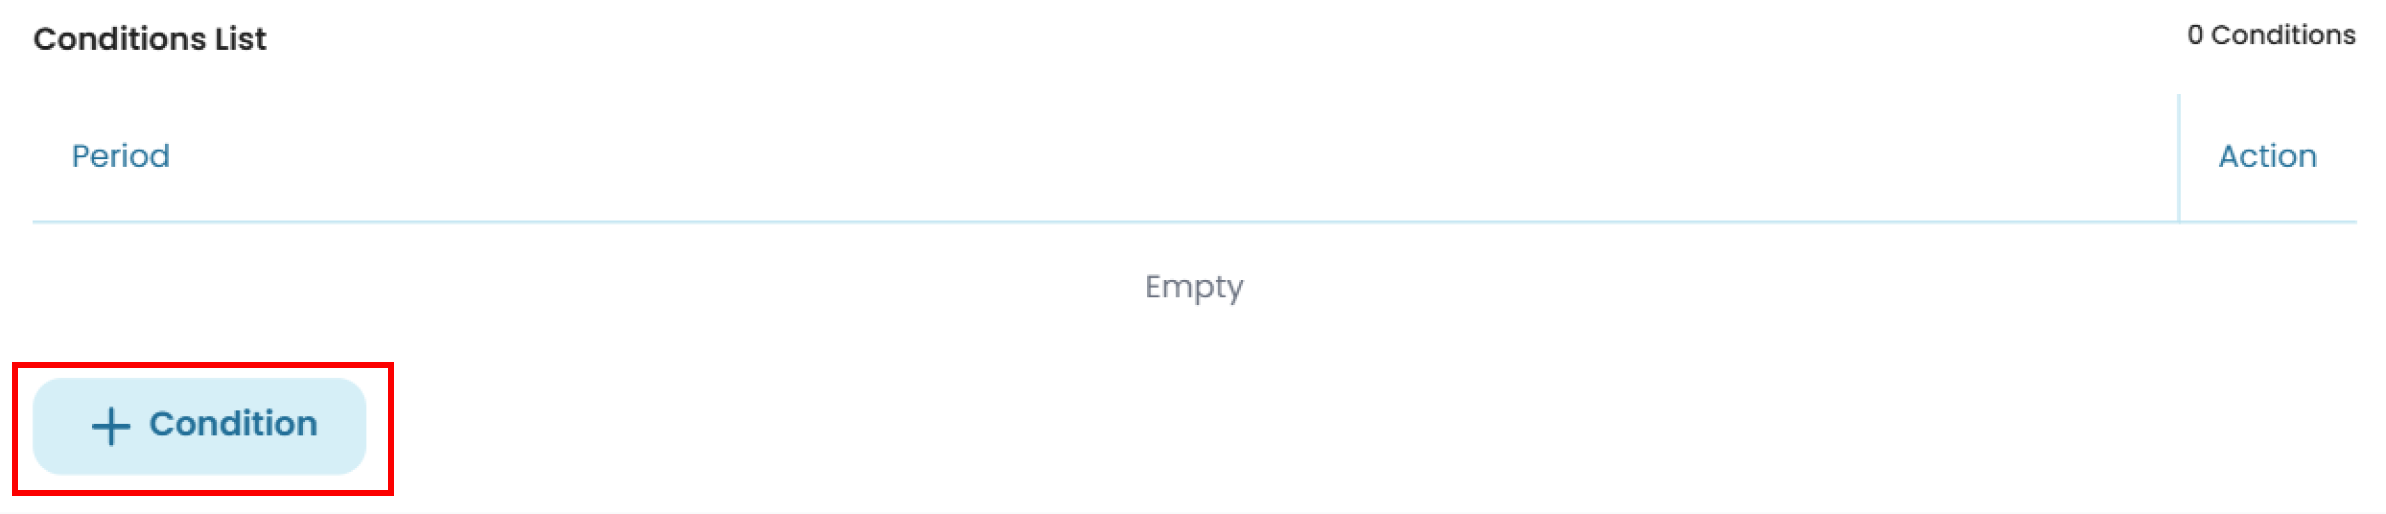
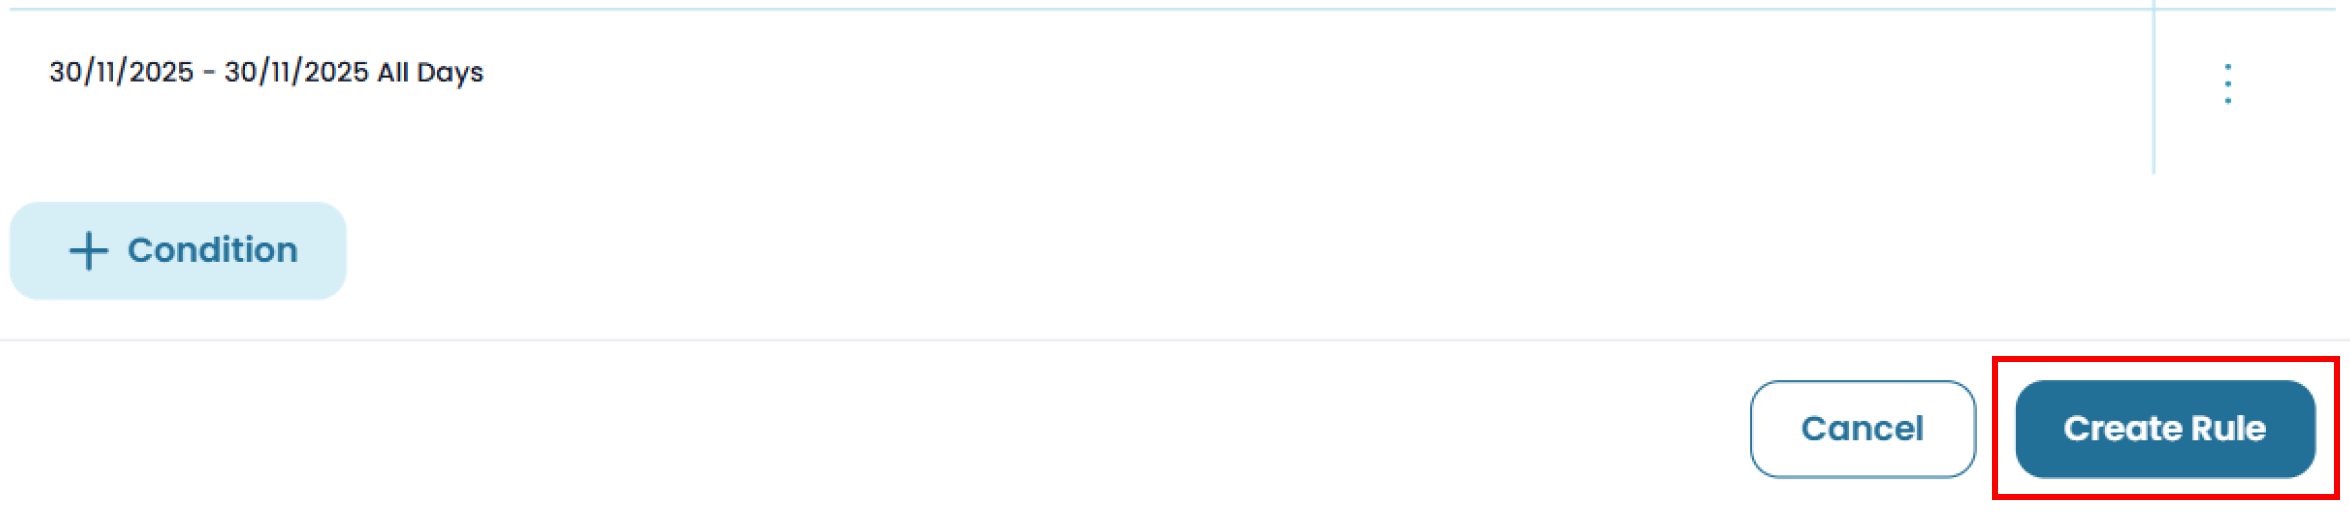
- Condition List: Add one or more conditions using the + Condition button. A new pop-up window will appear. See How to Add Condition for details.
- Rule Type: Choose one of the three available options
- After completing all required fields, click Create Rule.
How to Add Condition
The condition fields shown will depend on the selected rule type:
- General
 If you choose this rule type, you only need to configure the Period. See How to Set Period for more details.
 - Rate Multiplier
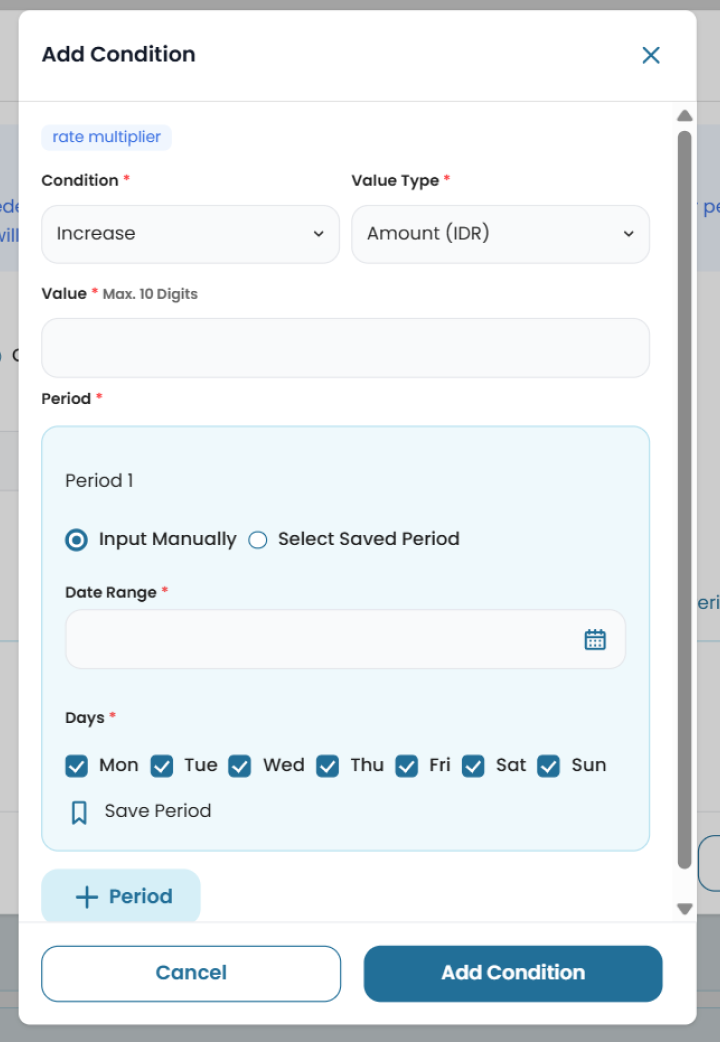 You must fill in the following fields:
- Condition: Choose Increase or Decrease.
- Value Type: Choose Amount (IDR) or Percentage (%).
- Amount / Percentage: Enter the value (Maximum: 10 digits for IDR, 100% for percentage)_.
- Period: See How to Set Period for more details.
- OBP
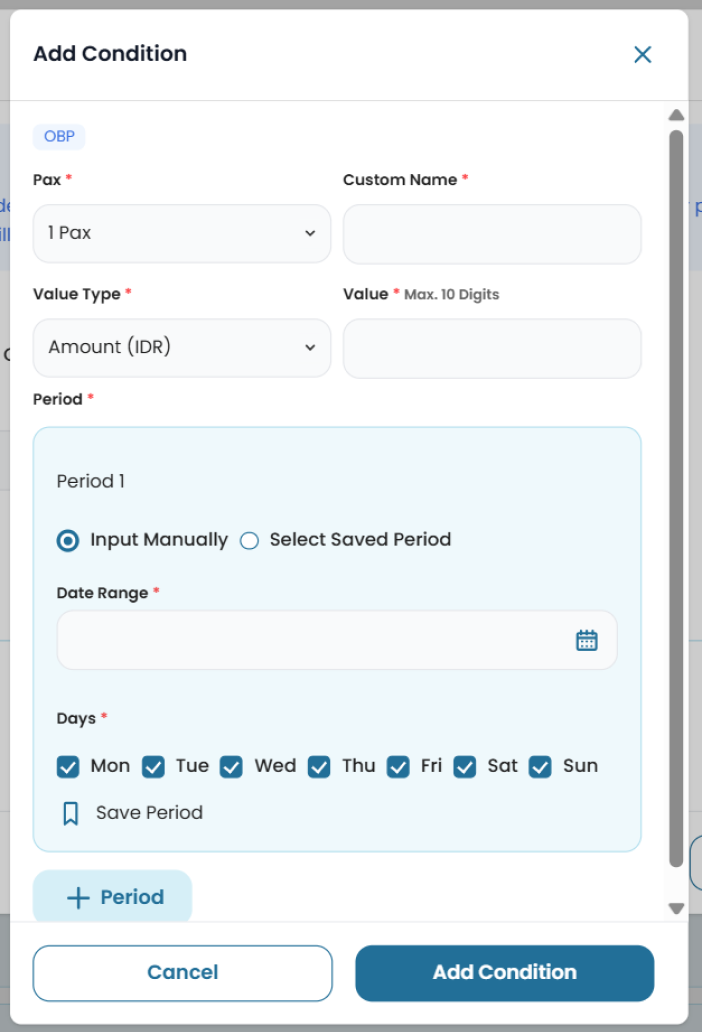 You must complete the following fields:
- Pax: Select between 1–20 pax.
- Custom: Enter the custom name.
- Value Type: Choose Amount (IDR) or Percentage (%).
- Amount / Percentage: Enter the value (Maximum: 10 digits for IDR, 100% for percentage)_.
- Period: See How to Set Period for more details.
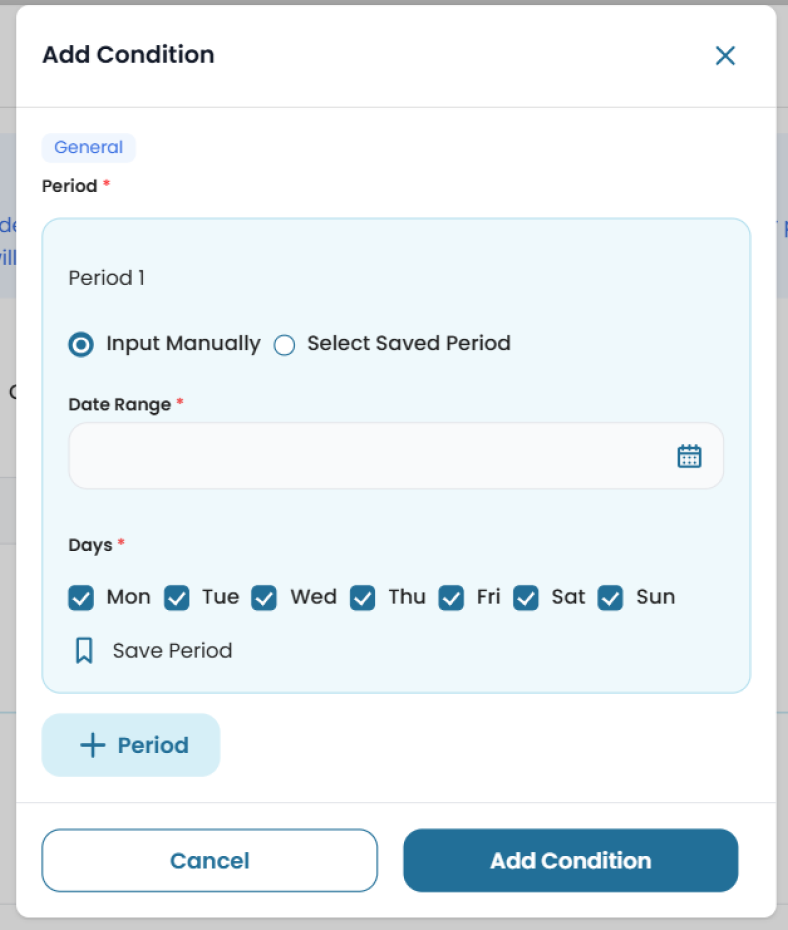
How to Set Period
Each condition can have one or more periods. If you set multiple periods and any of them overlap (e.g., 01/01/2024–05/01/2024 overlaps with another range), the most recently added period will take priority.
-
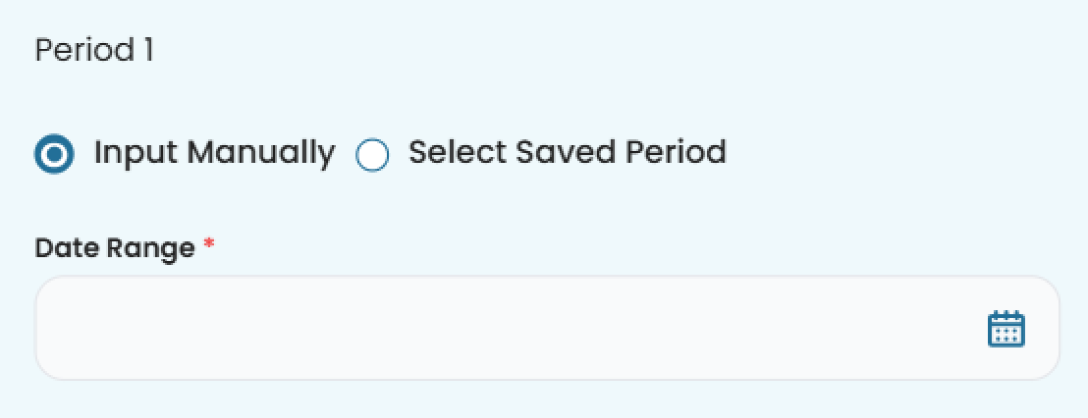
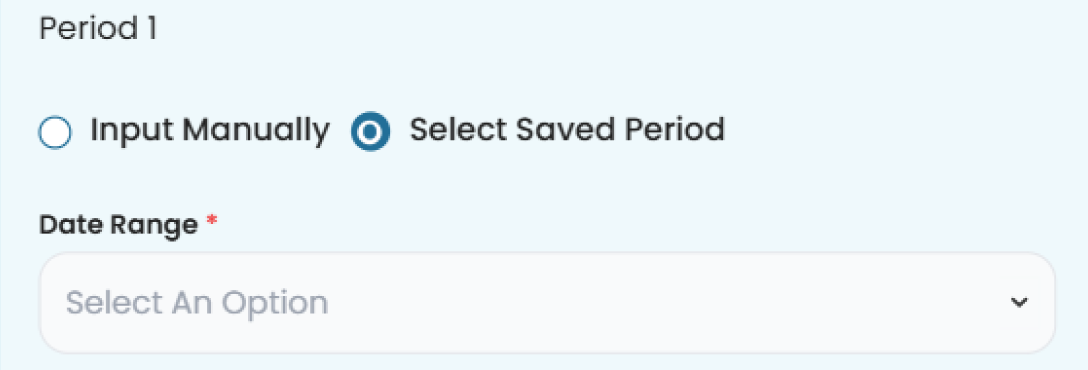
To set a period:
- You can choose to input the date manually or select from an existing saved period.
- Manual Input: Select the date range in the date range field.
- Saved Period: Choose a previously saved period from the dropdown list.
- Manual Input: Select the date range in the date range field.
- Days Field: Select the days on which the period applies. You must select at least one day.

- You can choose to input the date manually or select from an existing saved period.
-
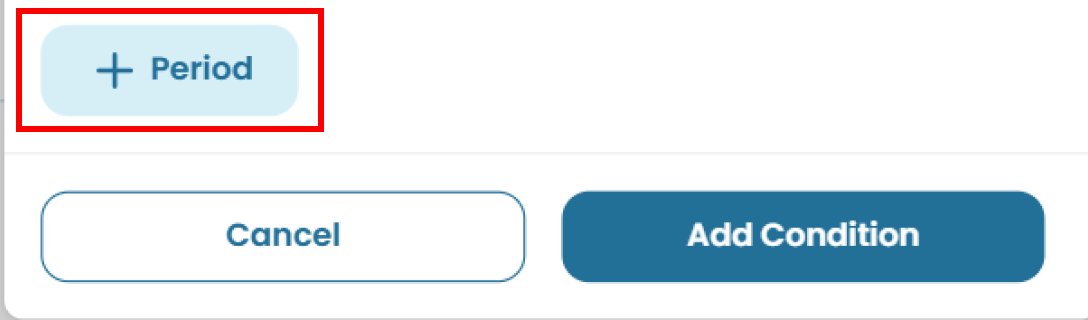
You can add additional periods by clicking + Period, which will create a new period section. Fill in the fields as needed.
-
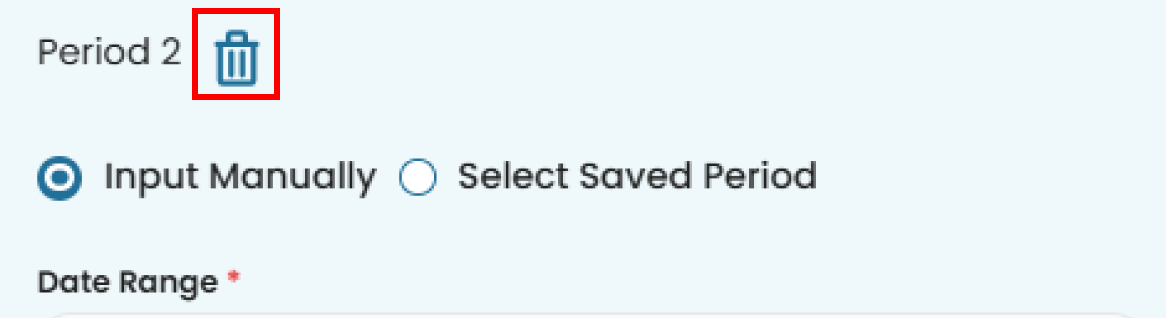
To delete a period, click the trash icon.
-
You may also save a period by clicking the save button (bookmark icon), making it available in the Saved Period dropdown list for future use.

Add New Condition
You can add a new condition to any existing rule.
- Click the + Condition button within the rule item.

- A pop-up window will appear. Fill in the required fields. Refer to How to Add Condition for more detailed steps about how to add condition.
Edit Rules
Rename Rule
To edit a rule’s name:
- Click the pencil icon next to the rule name.

- A pop-up window will appear containing the name field.
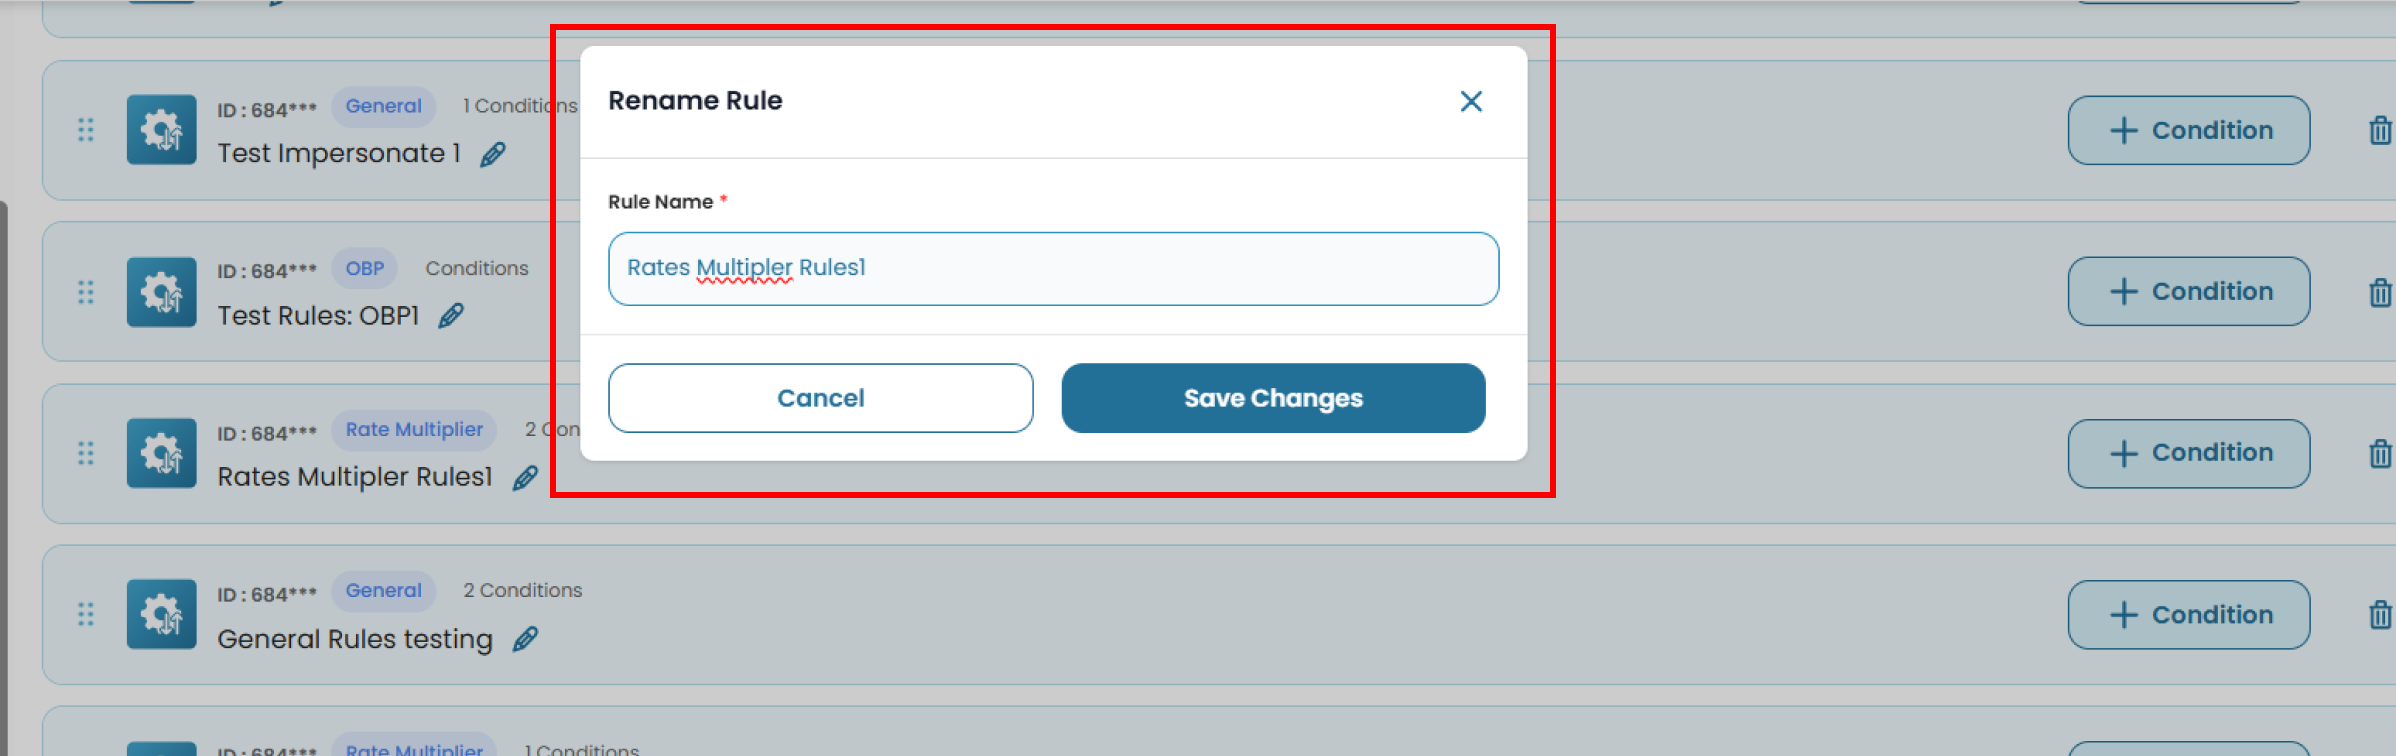
- Modify the name as needed, then click Save Changes to apply the update or Cancel to discard it.
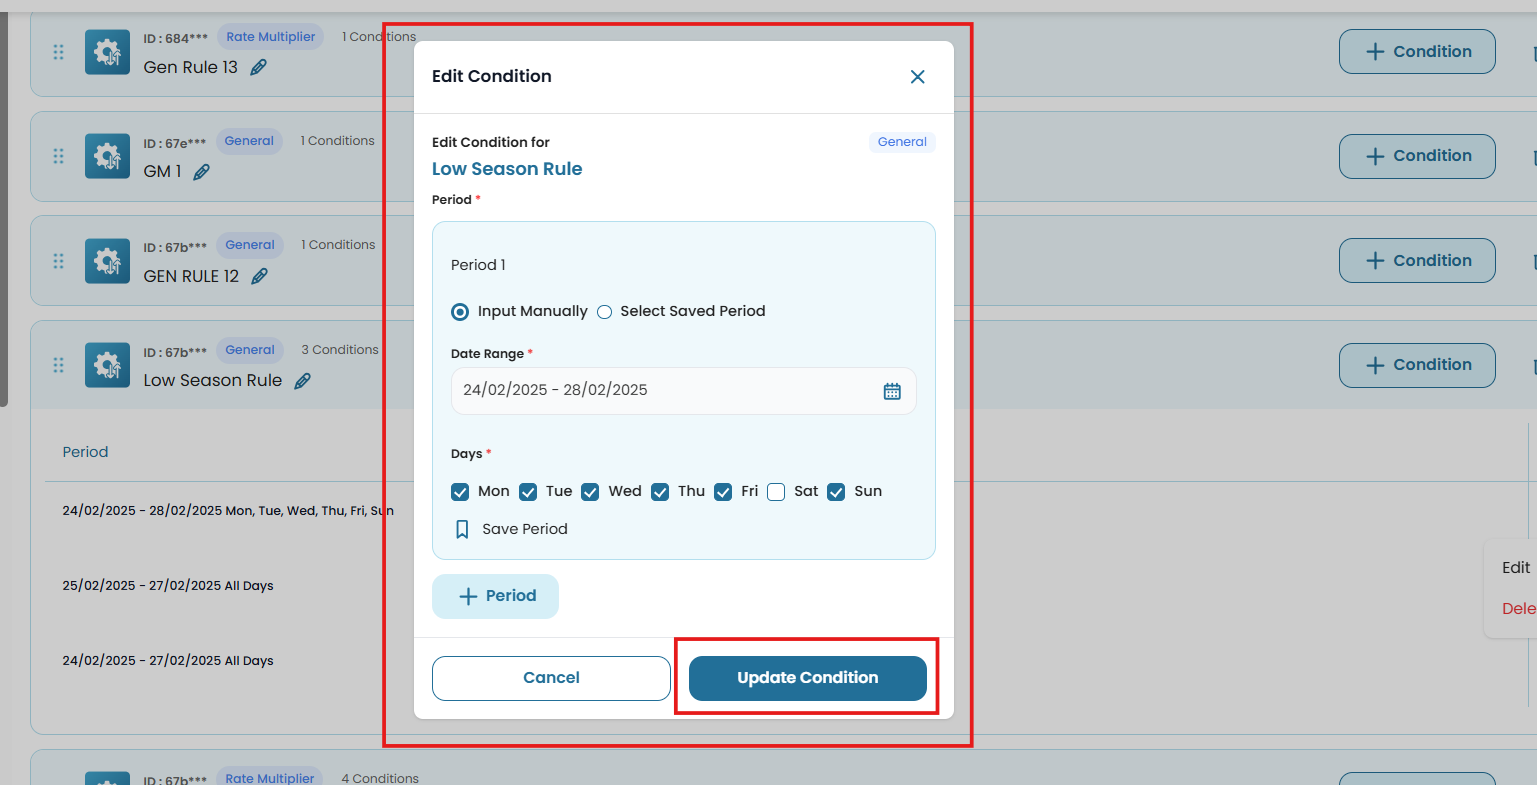
Edit Condition on Rules
To edit a specific condition within a rule:
- Expand the rule by clicking the arrow icon on the right side.
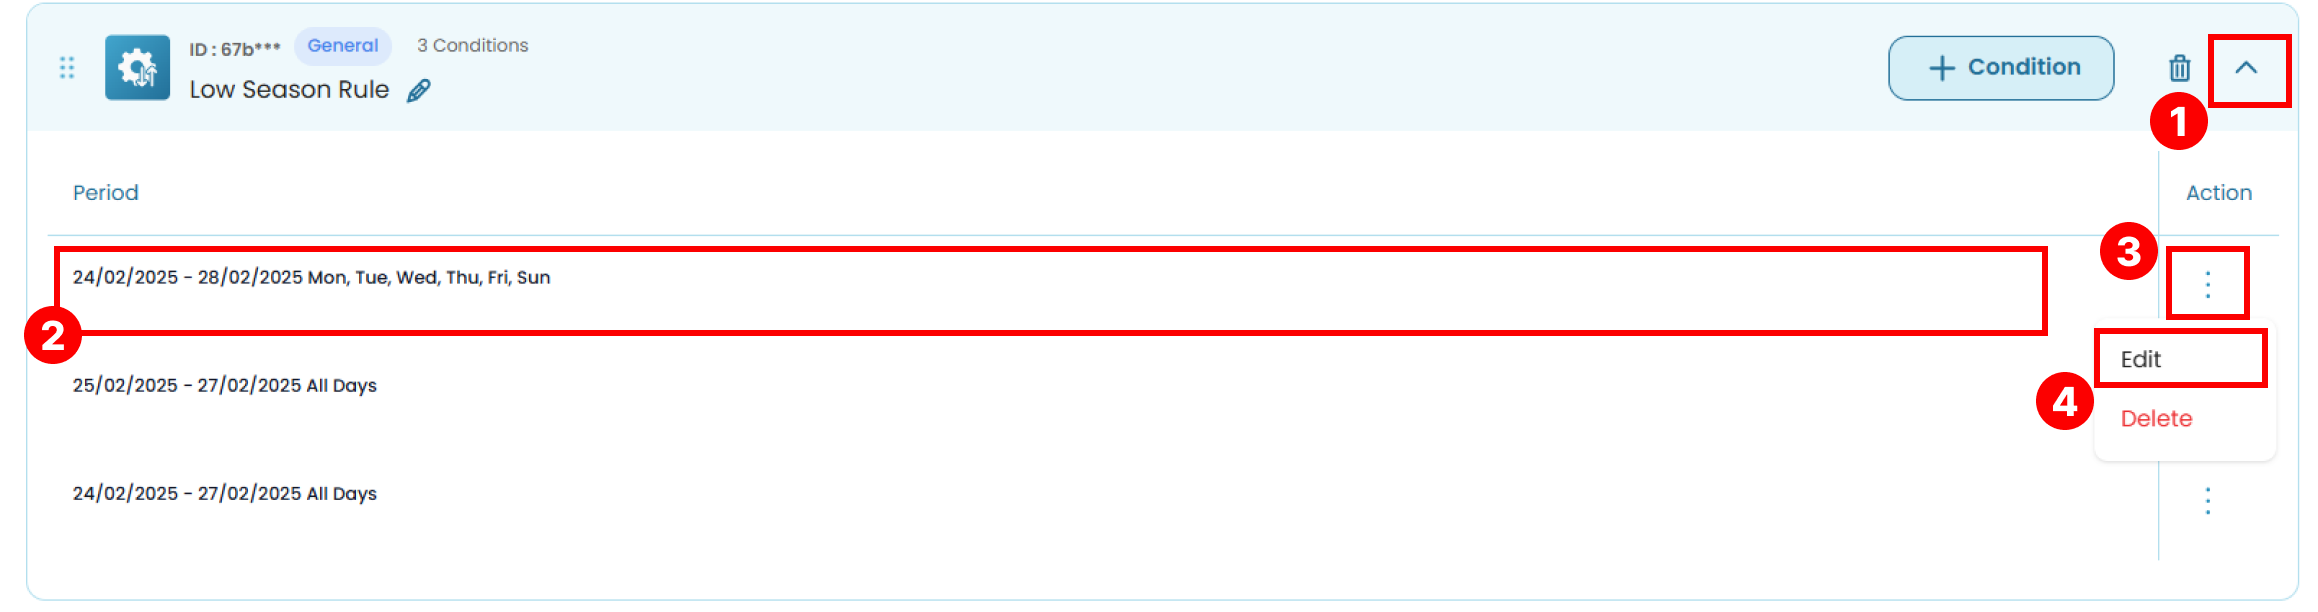
- In the condition list, find the condition you want to edit.
- In the Action column, click the three-dots menu (⋮).
- Select Edit. A pop-up window will appear.
- Update the necessary fields. Then click Update Condition to save and apply the changes.
Delete Item
Delete Condition
To delete a condition:
- Expand the rule by clicking the arrow icon on the right side.
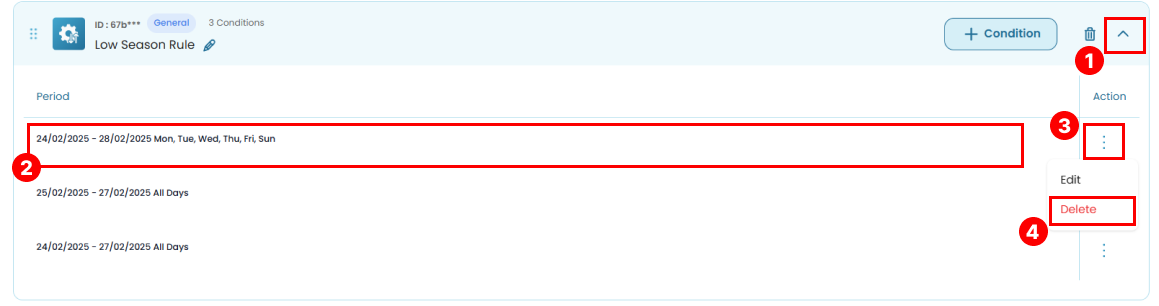
- Locate the condition you want to remove.
- In the Action column, click the three-dot menu (⋮).
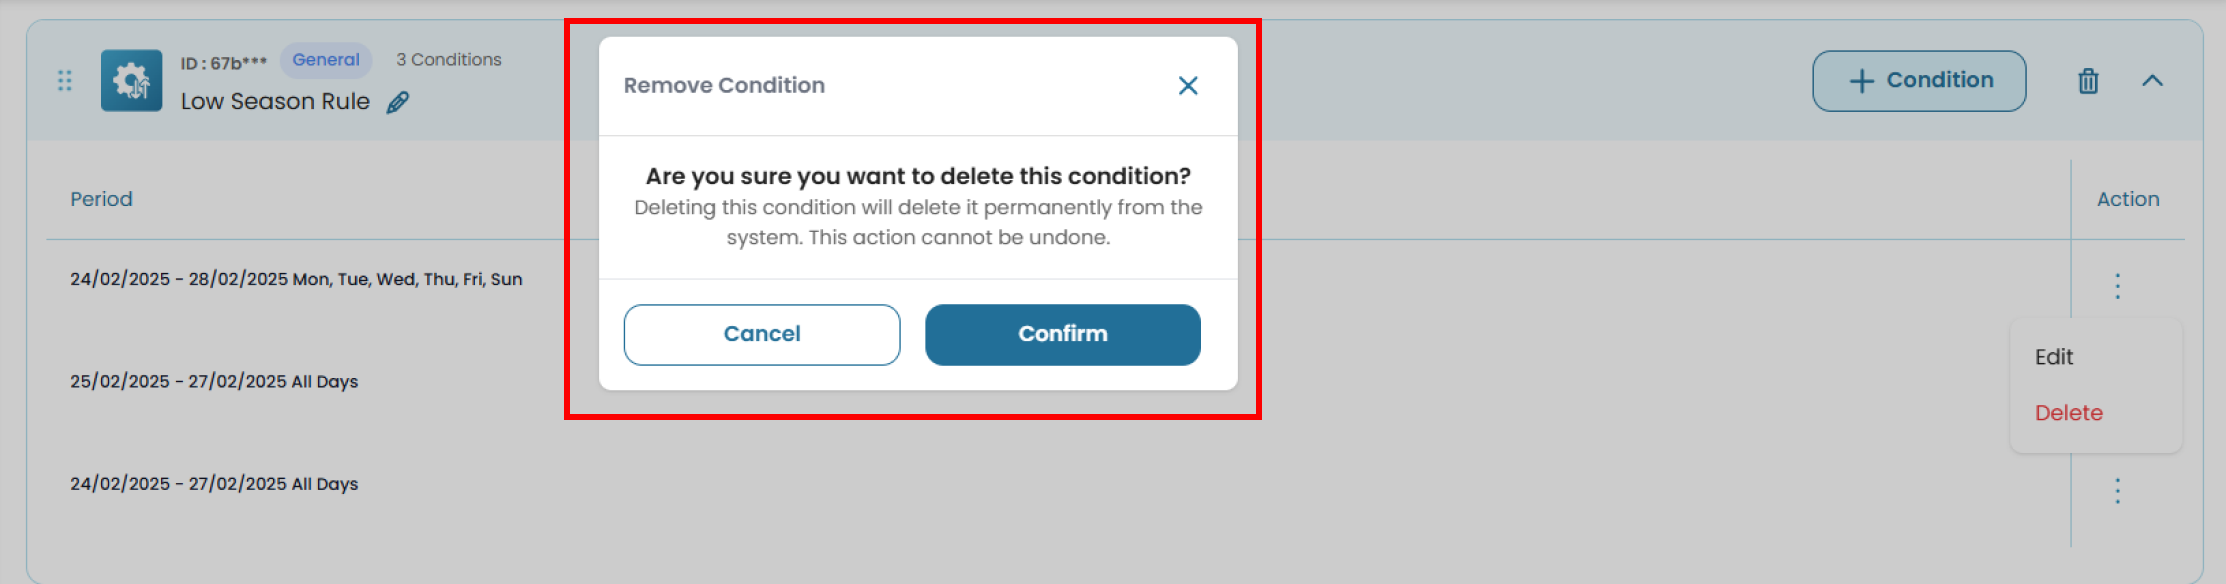
- Select Delete to remove the condition.
- Confirm the deletion by clicking Confirm in the confirmation pop-up, or click Cancel to discard.
Delete Rule
To delete a rule:
- Click the trash icon on the right side of the rule item.

- Confirm the deletion by clicking Confirm in the confirmation pop-up, or click Cancel to discard.
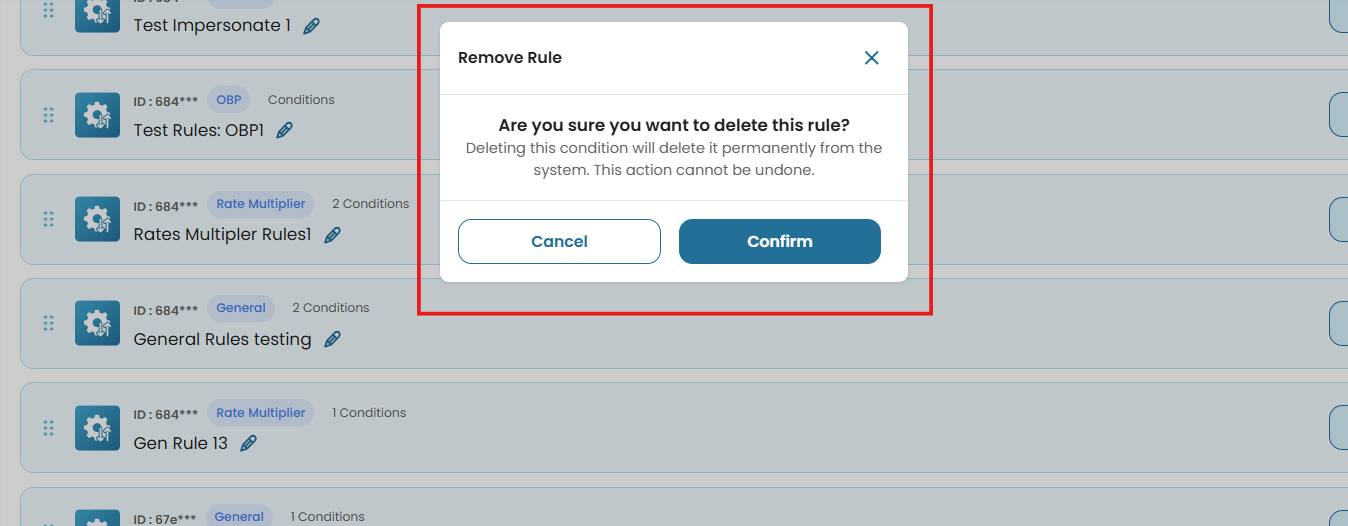
[!warning]
Deleting a rule will automatically remove all conditions associated with it.