Introduction
The Extras Only feature allows you to create and manage invoices for additional items or services sold independently, without associating them with room bookings. This can be user for manage transactions such as selling spa services, meals, or other amenities directly to guests.
View and Navigate
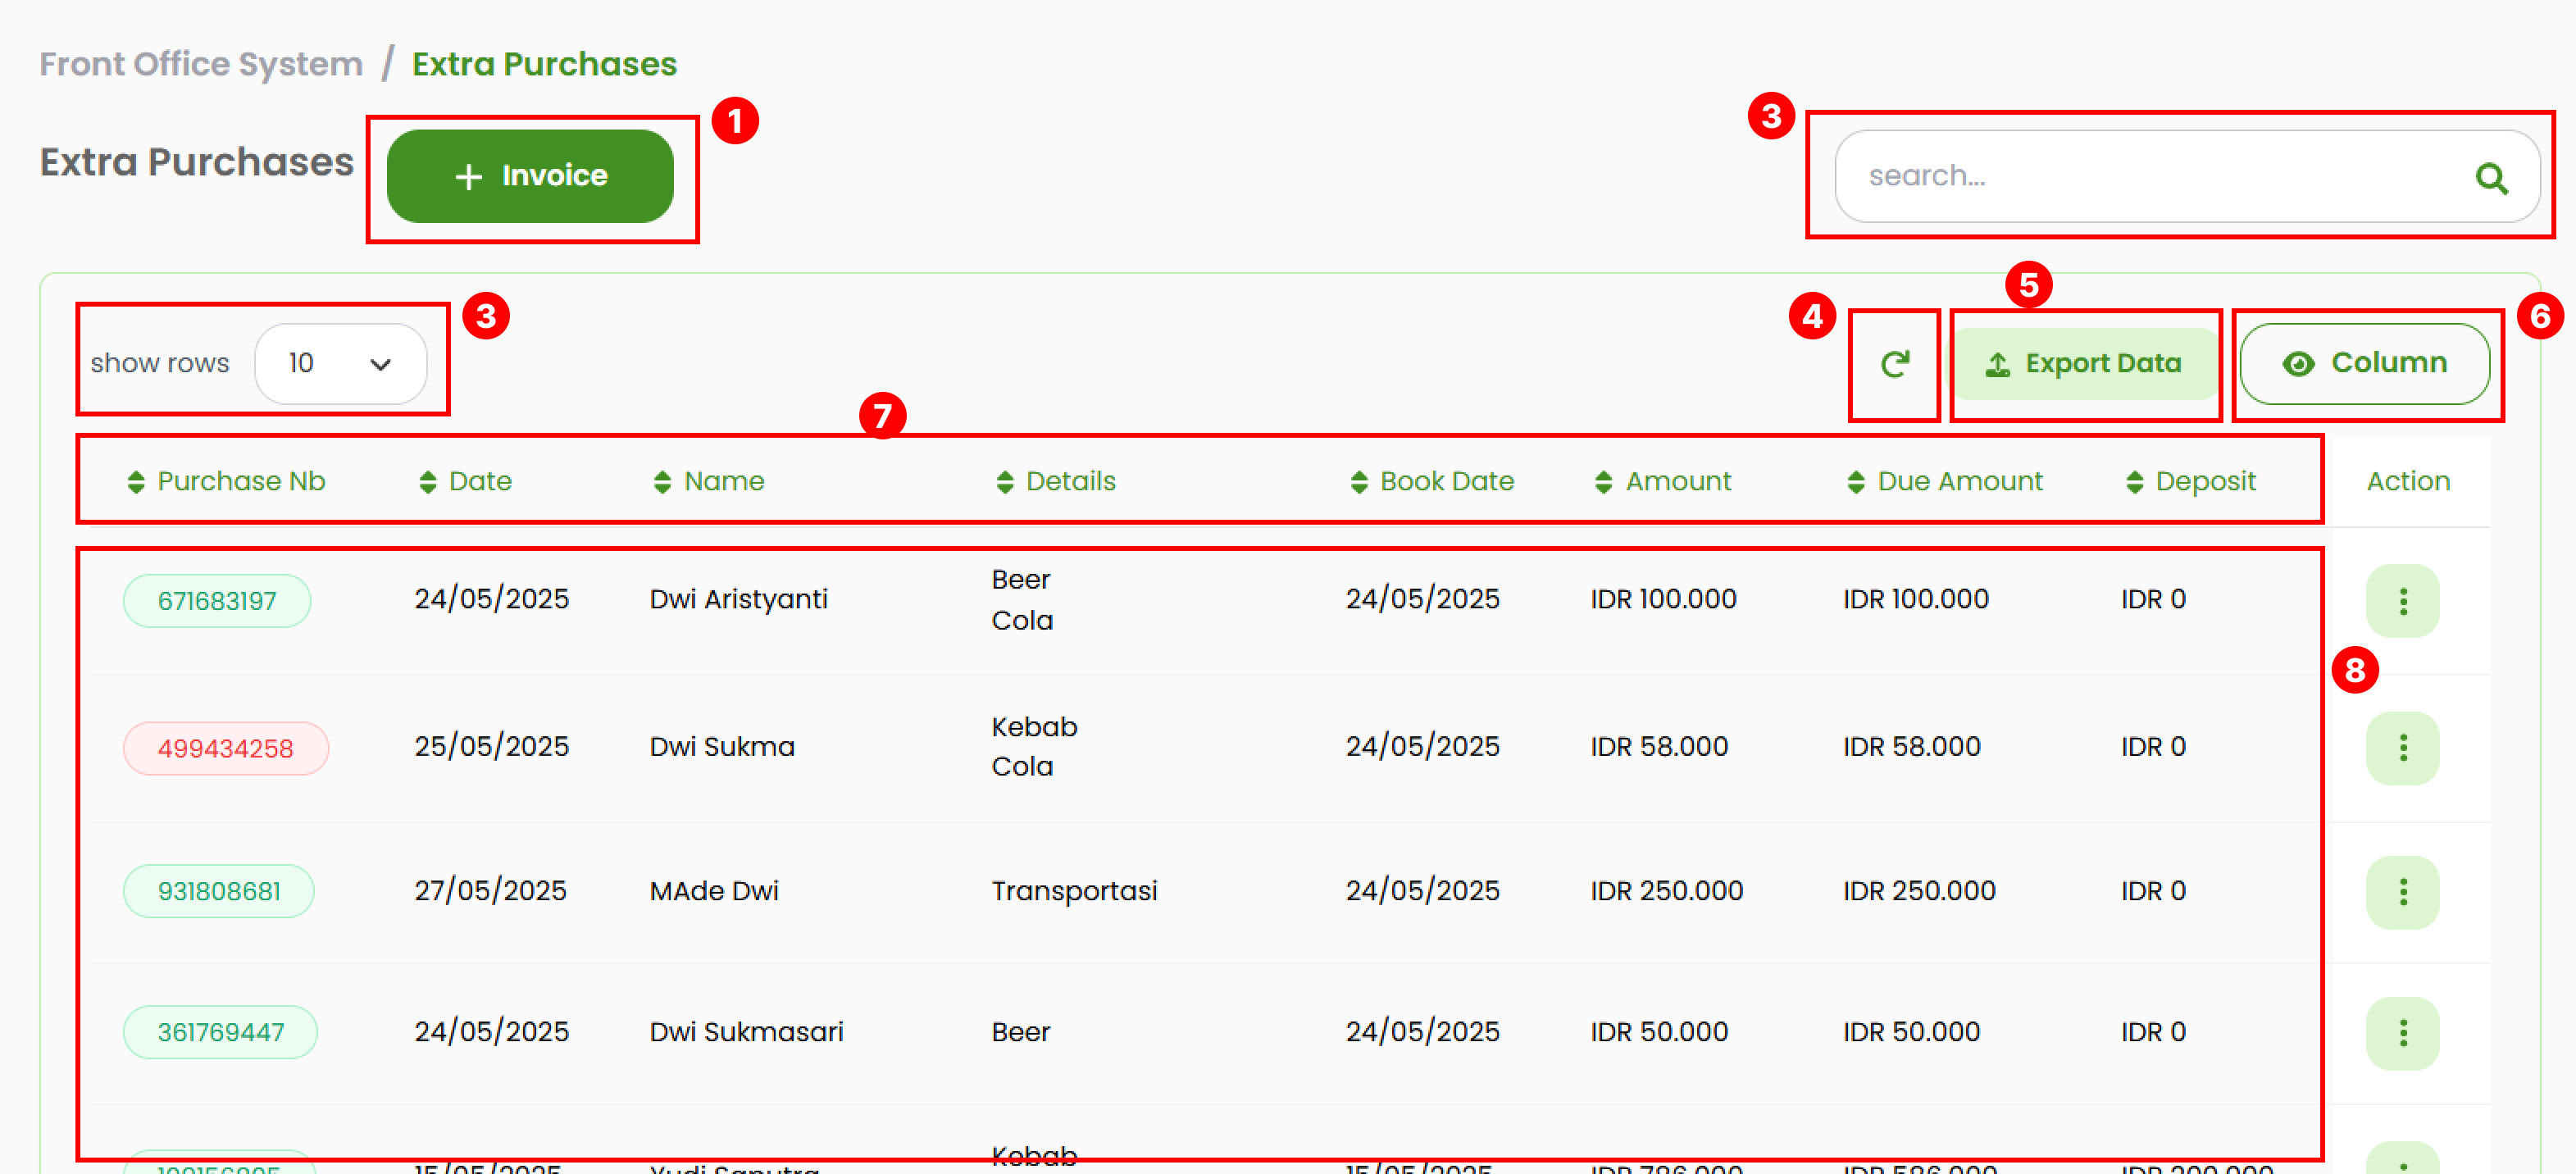
- Button Add Invoice used to opens a pop-up form for creating a new standalone invoice.
- Search Bar, allows you to look up specific invoices using keywords such as purchase ID, date, guest name, item details, booking date, amount, amount date, or deposit. The table will automatically display all matching results.
- Adjusts the number of rows displayed in the invoice list by clicking the Show rows. Available options are 10, 25, 50, 75, 100, or all.
- Refresh button allows you to resets the table back to its default order after you have applied sorting.
- Use the Export button to exports the current list into an .xlsx file.
- Show column allows you to choose which columns should be visible in the table. Tick the columns you want to display.
- Sort the data in table by clicking the column header.
- Invoice List Displays all invoices created through Extras Only. The Purchase Nb column includes color indicators:
- Green : Indicates a confirmed invoice.
- Red : Indicates a canceled invoice.
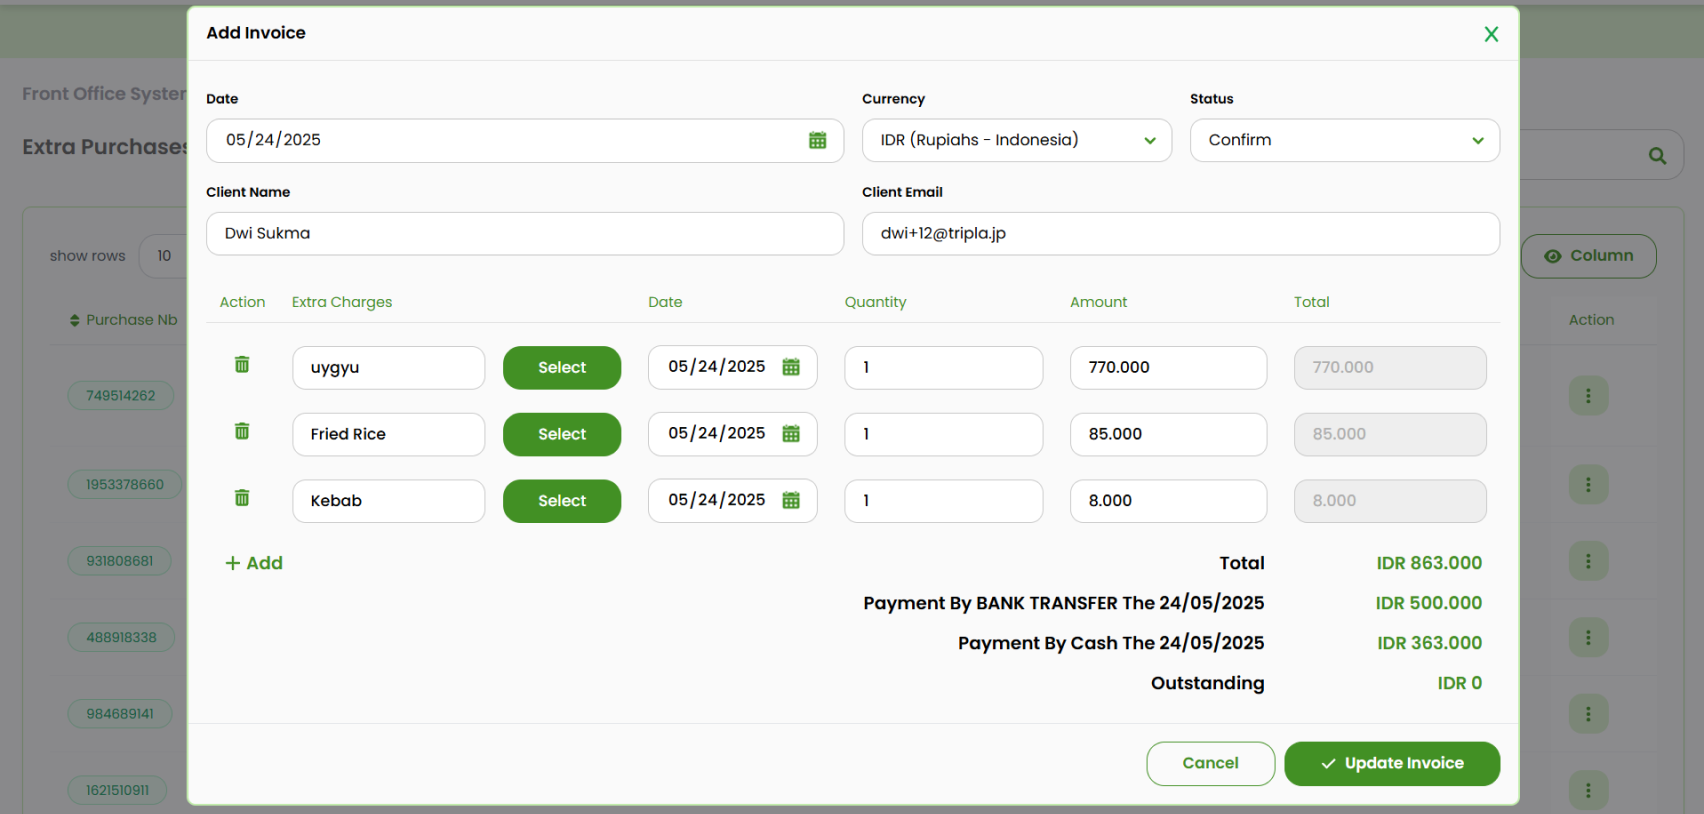
Add New Invoice
- Click on the + Invoice to open the invoice creation form.

- Complete the Guest Details section:
 a. Date : Select the transaction date.
b. Currency : Choose the desired currency (e.g IDR, USD, etc).
c. Status : Set the invoice status between Confirm or Cancel.
d. Client name : Enter the client's name.
e. Client email : Enter the valid client's email.
a. Date : Select the transaction date.
b. Currency : Choose the desired currency (e.g IDR, USD, etc).
c. Status : Set the invoice status between Confirm or Cancel.
d. Client name : Enter the client's name.
e. Client email : Enter the valid client's email. - Add item on the list
- Click the add button.

- A new row will appear. Complete the following fields:
- Charges name : Type the name manually, or

- Click Select to choose an item from the list. You can expand the category using the arrow button, then click Select to add the item.

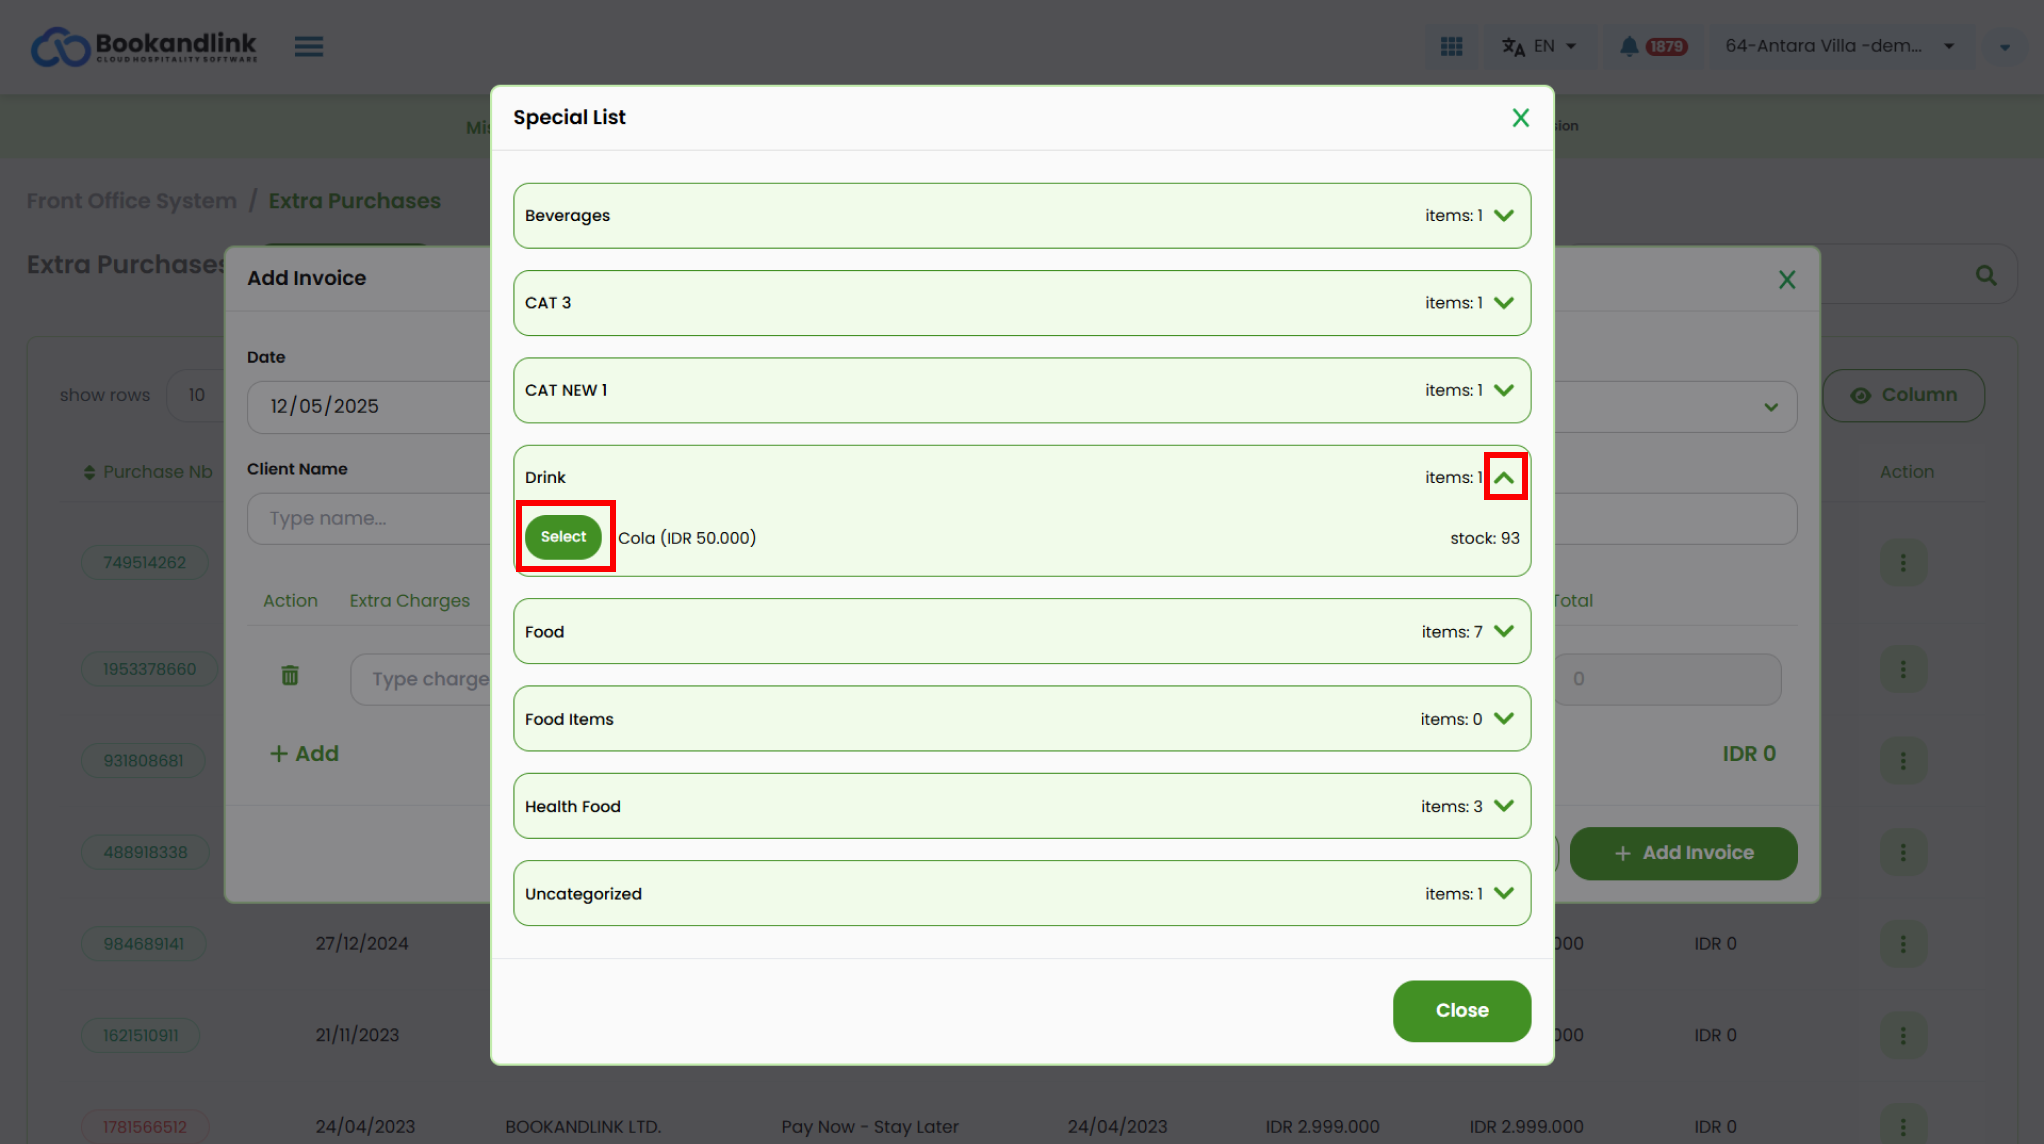
- Date : Enter the transaction date
- Quantity : Enter the quantity of the purchased item.
- Amount : Enter the price. This field is filled automatically when selecting a predefined item.
- Charges name : Type the name manually, or
- The Total field is automatically calculated based on the item’s Quantity and Amount.
- Click + Add Invoice to add the new invoice on the list.
Note:
You may add multiple items as needed, the system will calculate the overall total.

- Click the add button.
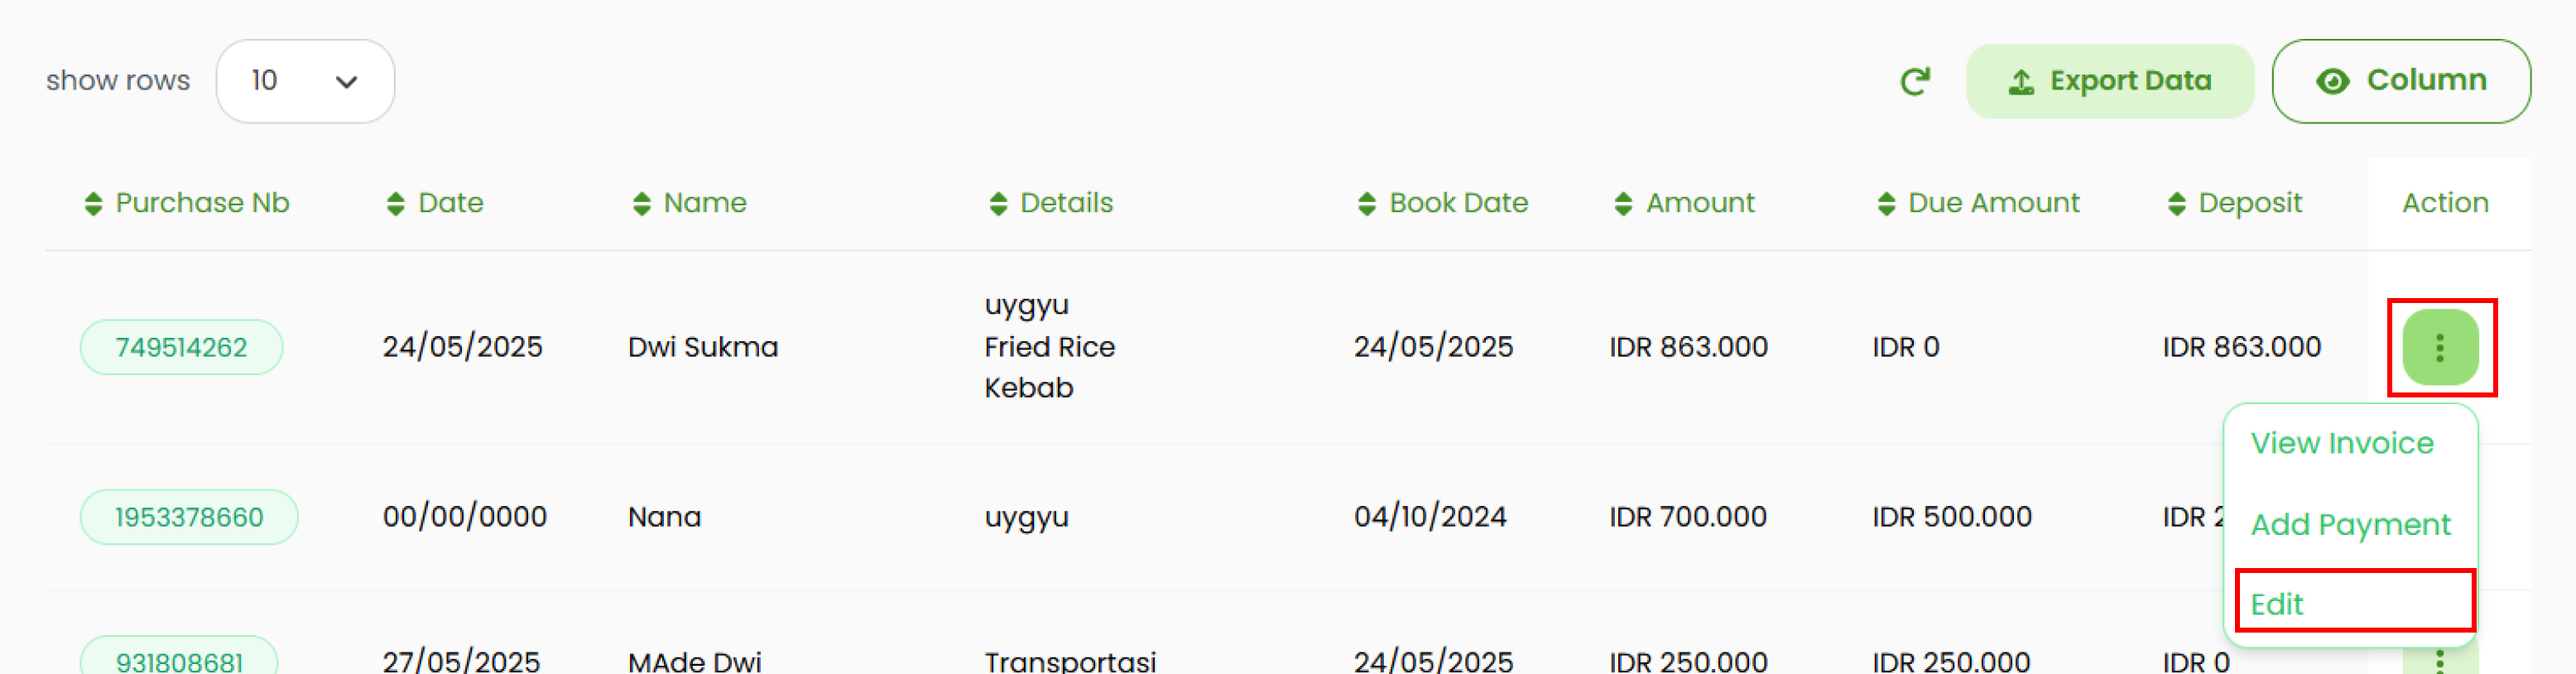
View Invoice Detail
Navigate to the invoice list.
- Select the invoice you want to view.
- On the action column, click on the three-dots button.
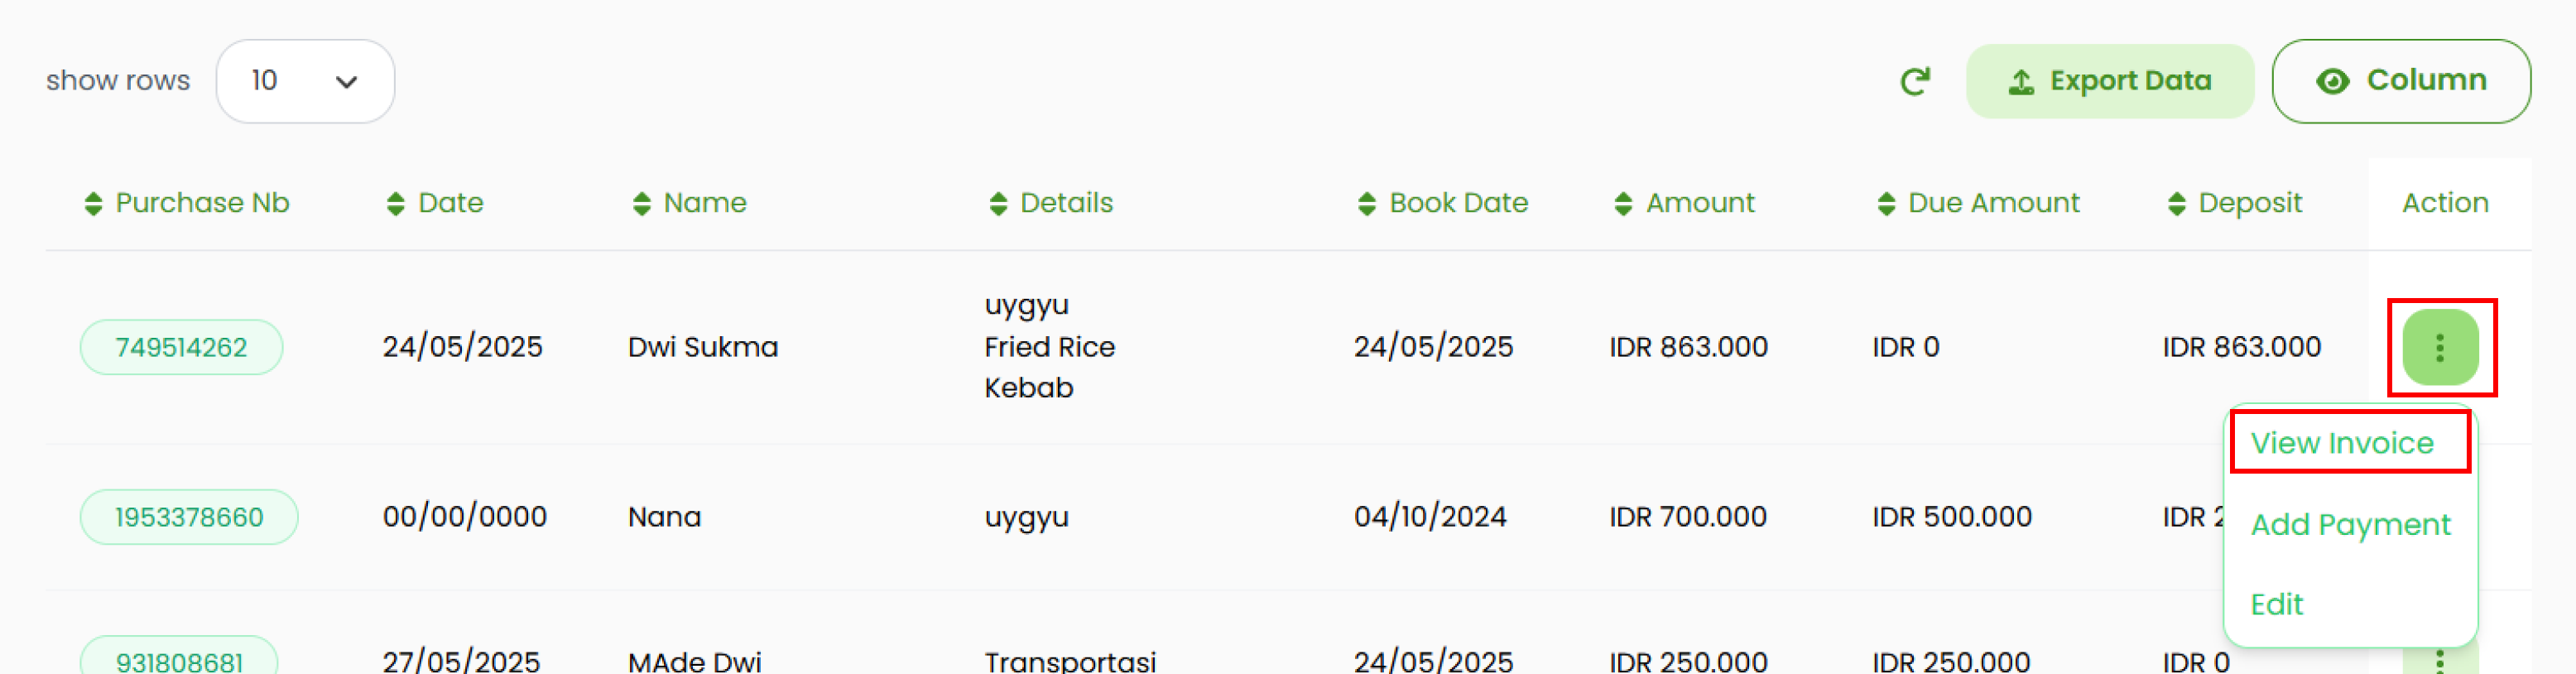
- Select View Invoice.
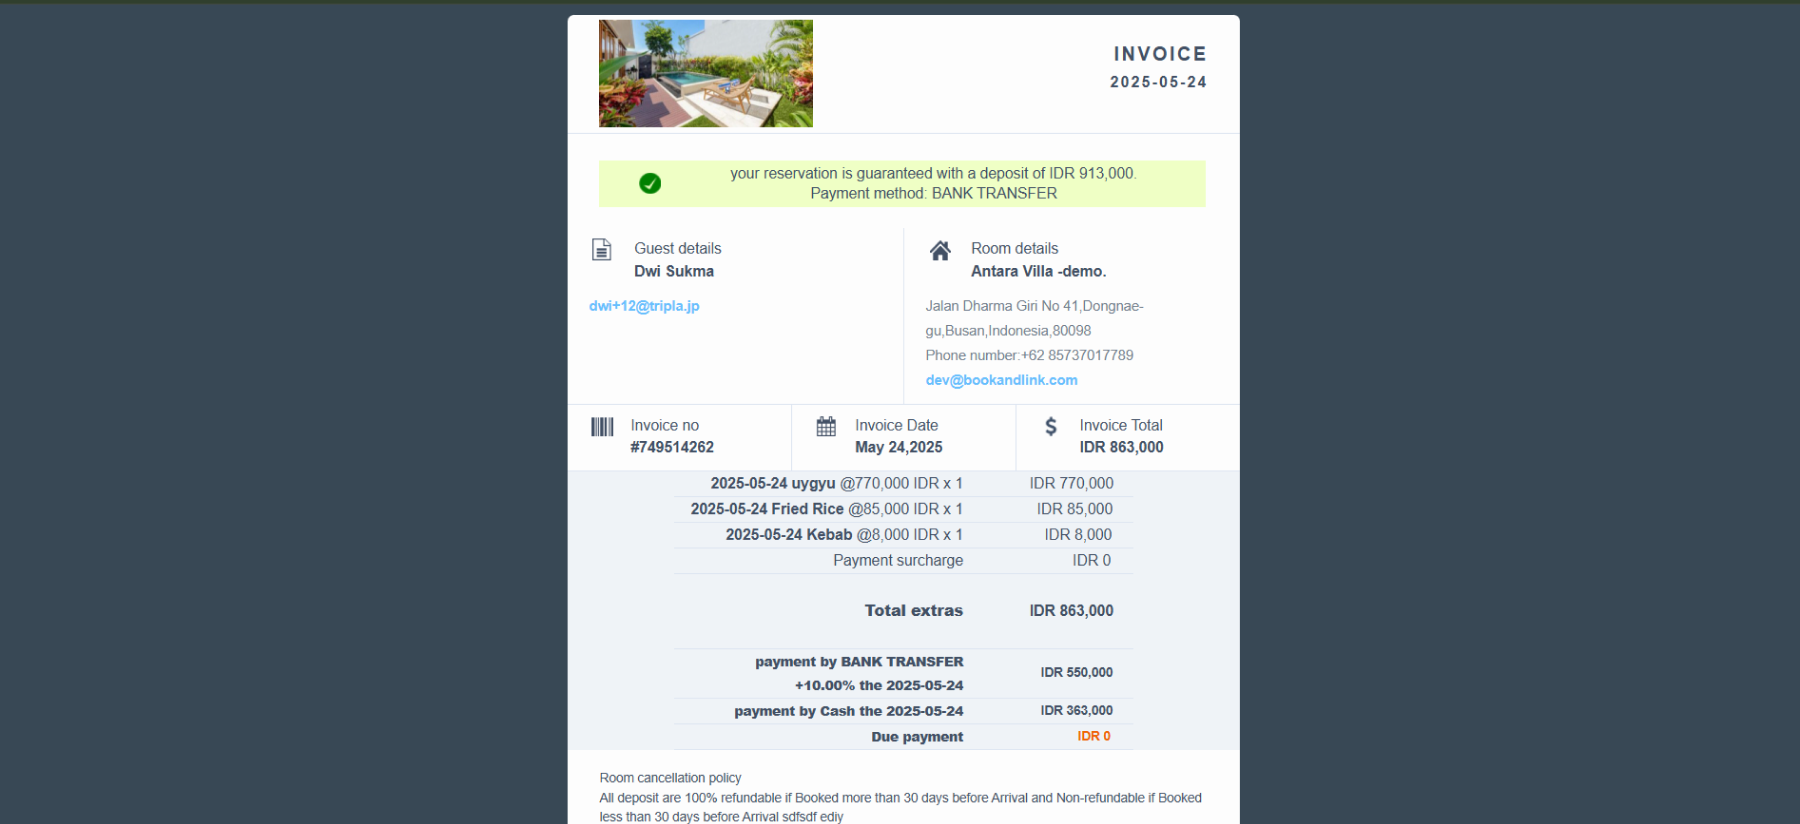
- You will be redirected to the invoice detail page.
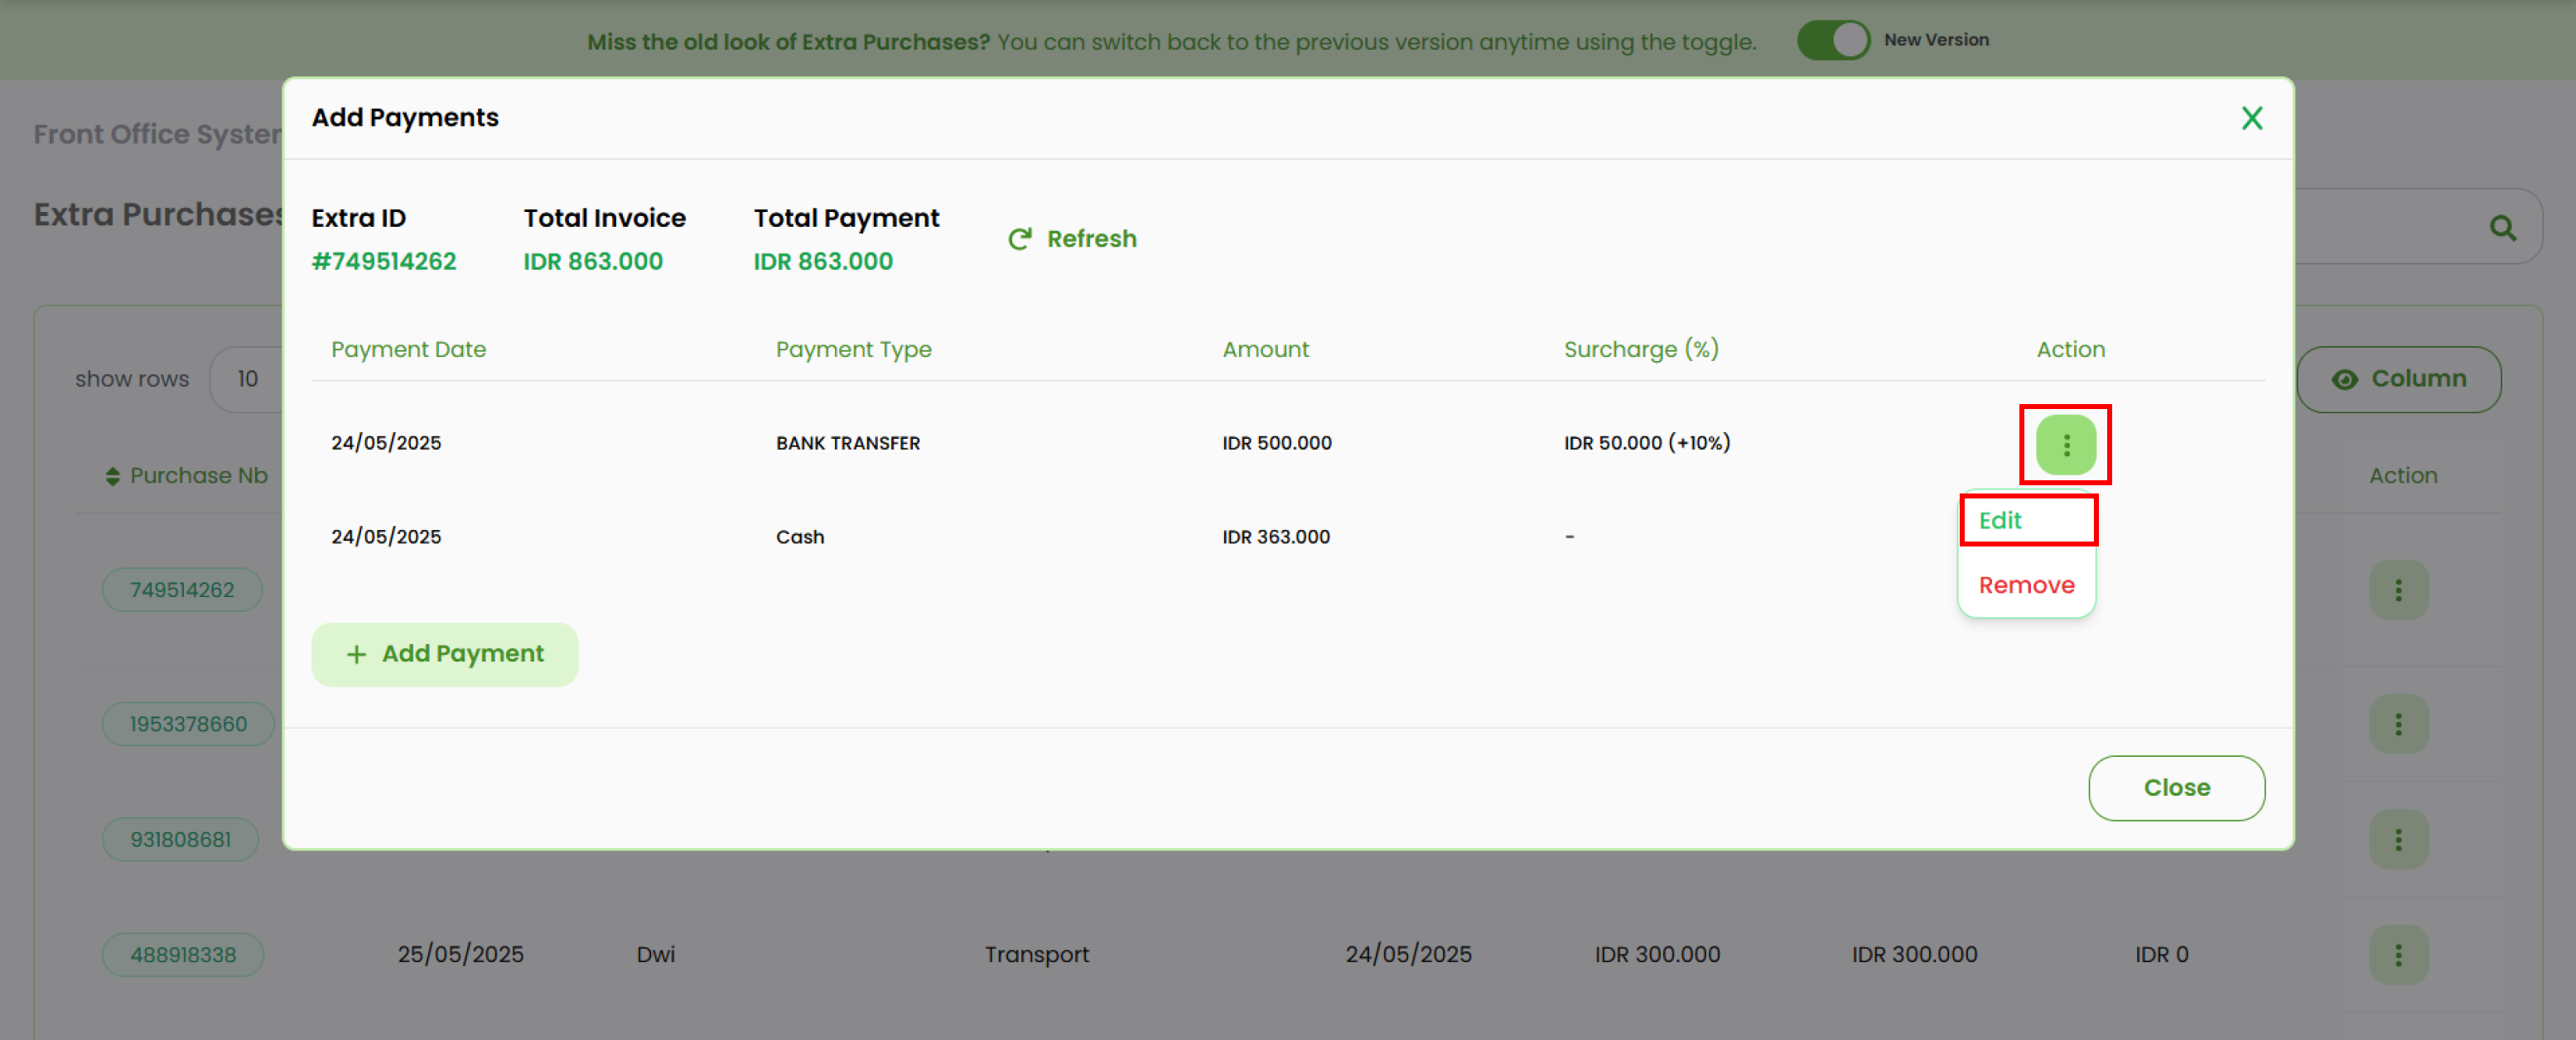
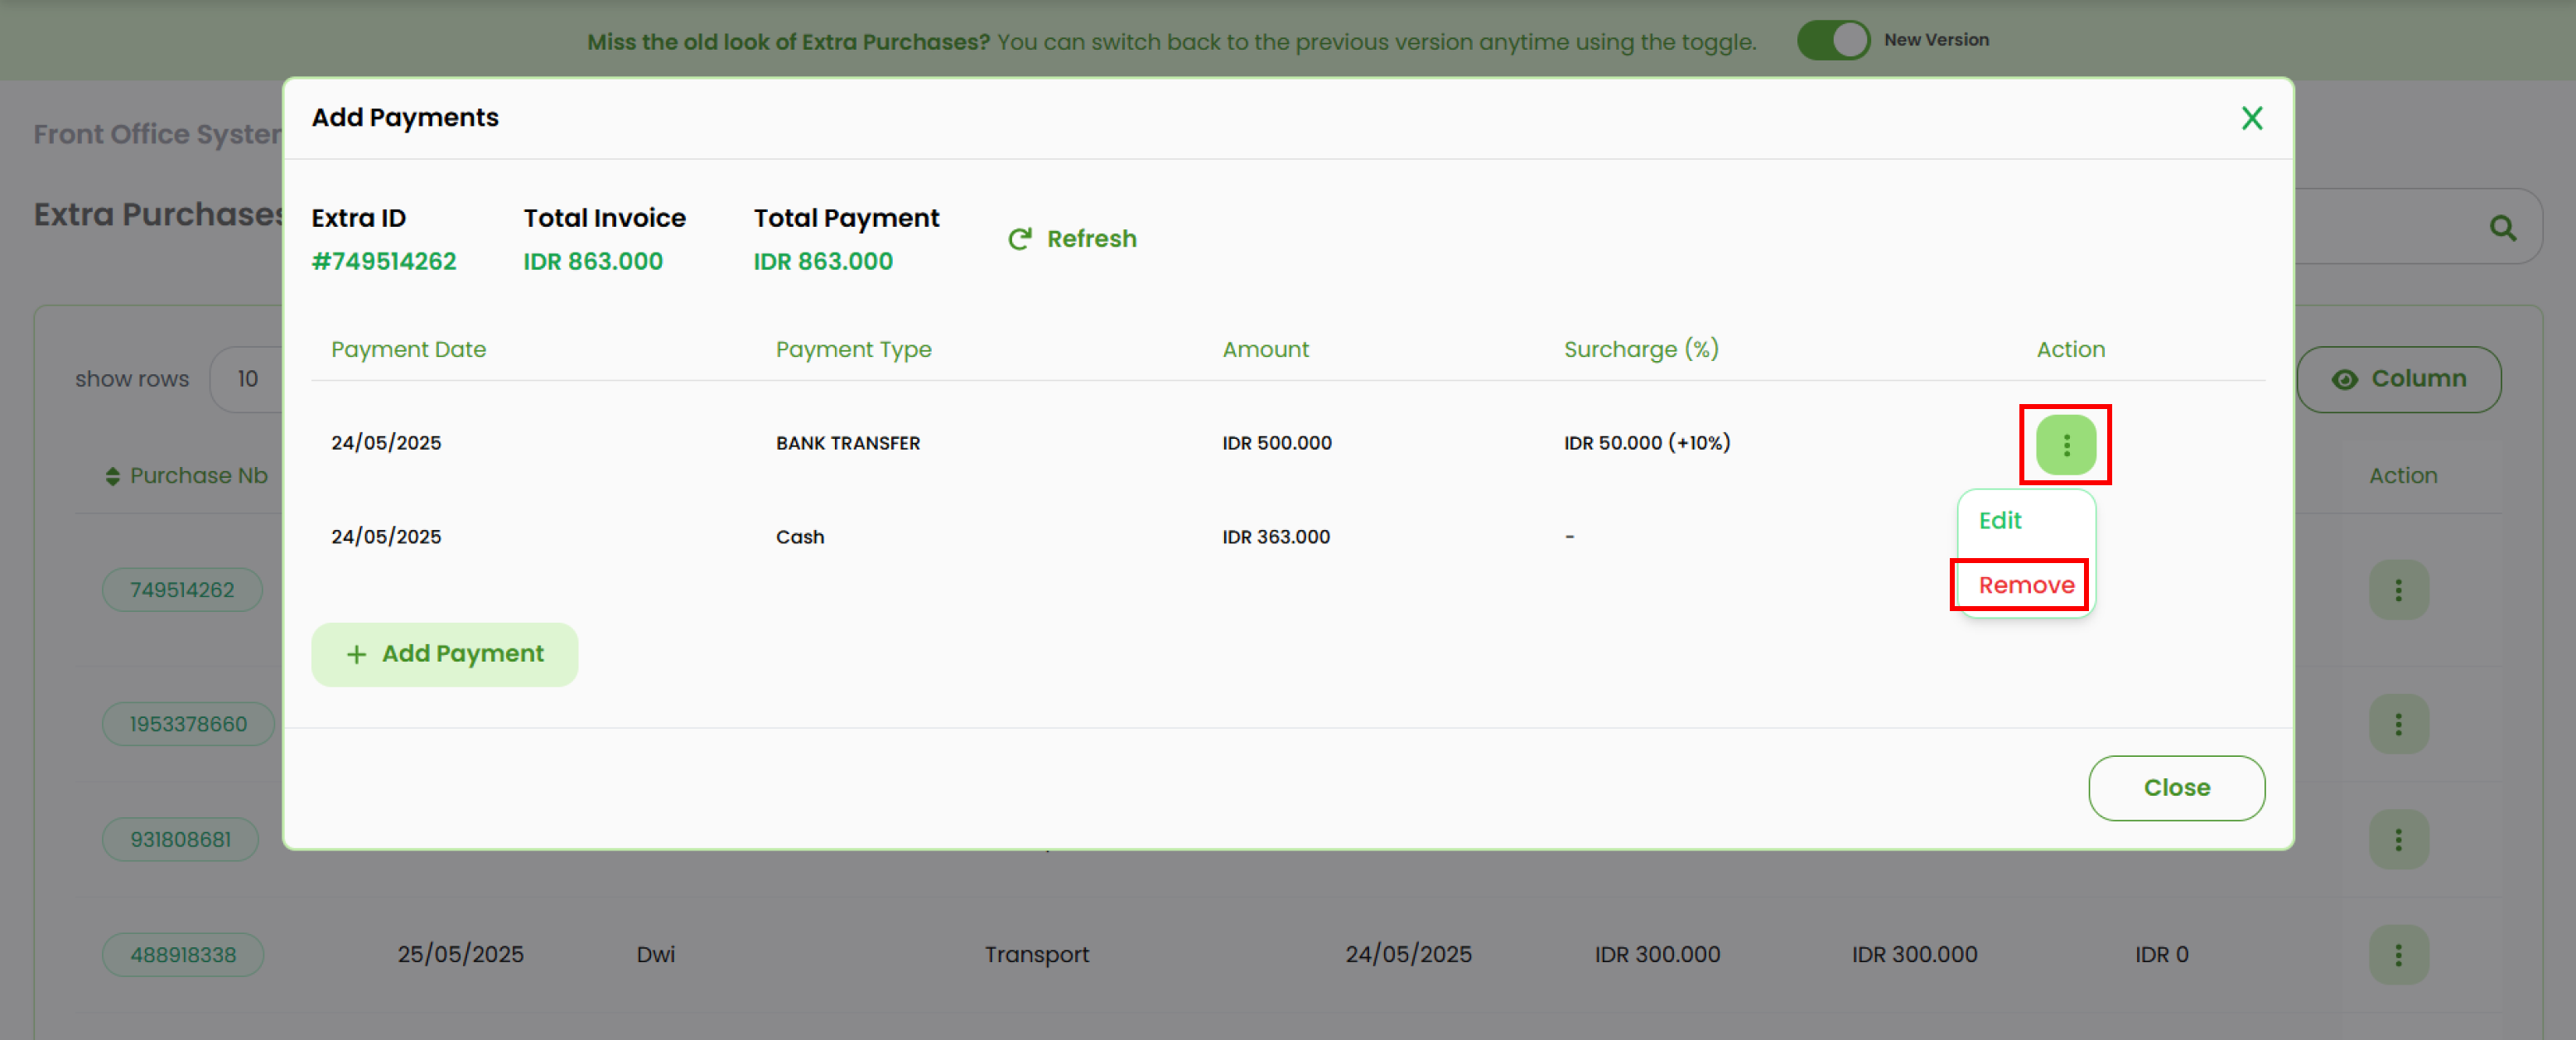
Add Payment
Navigate to the invoice list.
- Select the invoice you want to add a payment to.
- Click the three-dots button in the Action column.
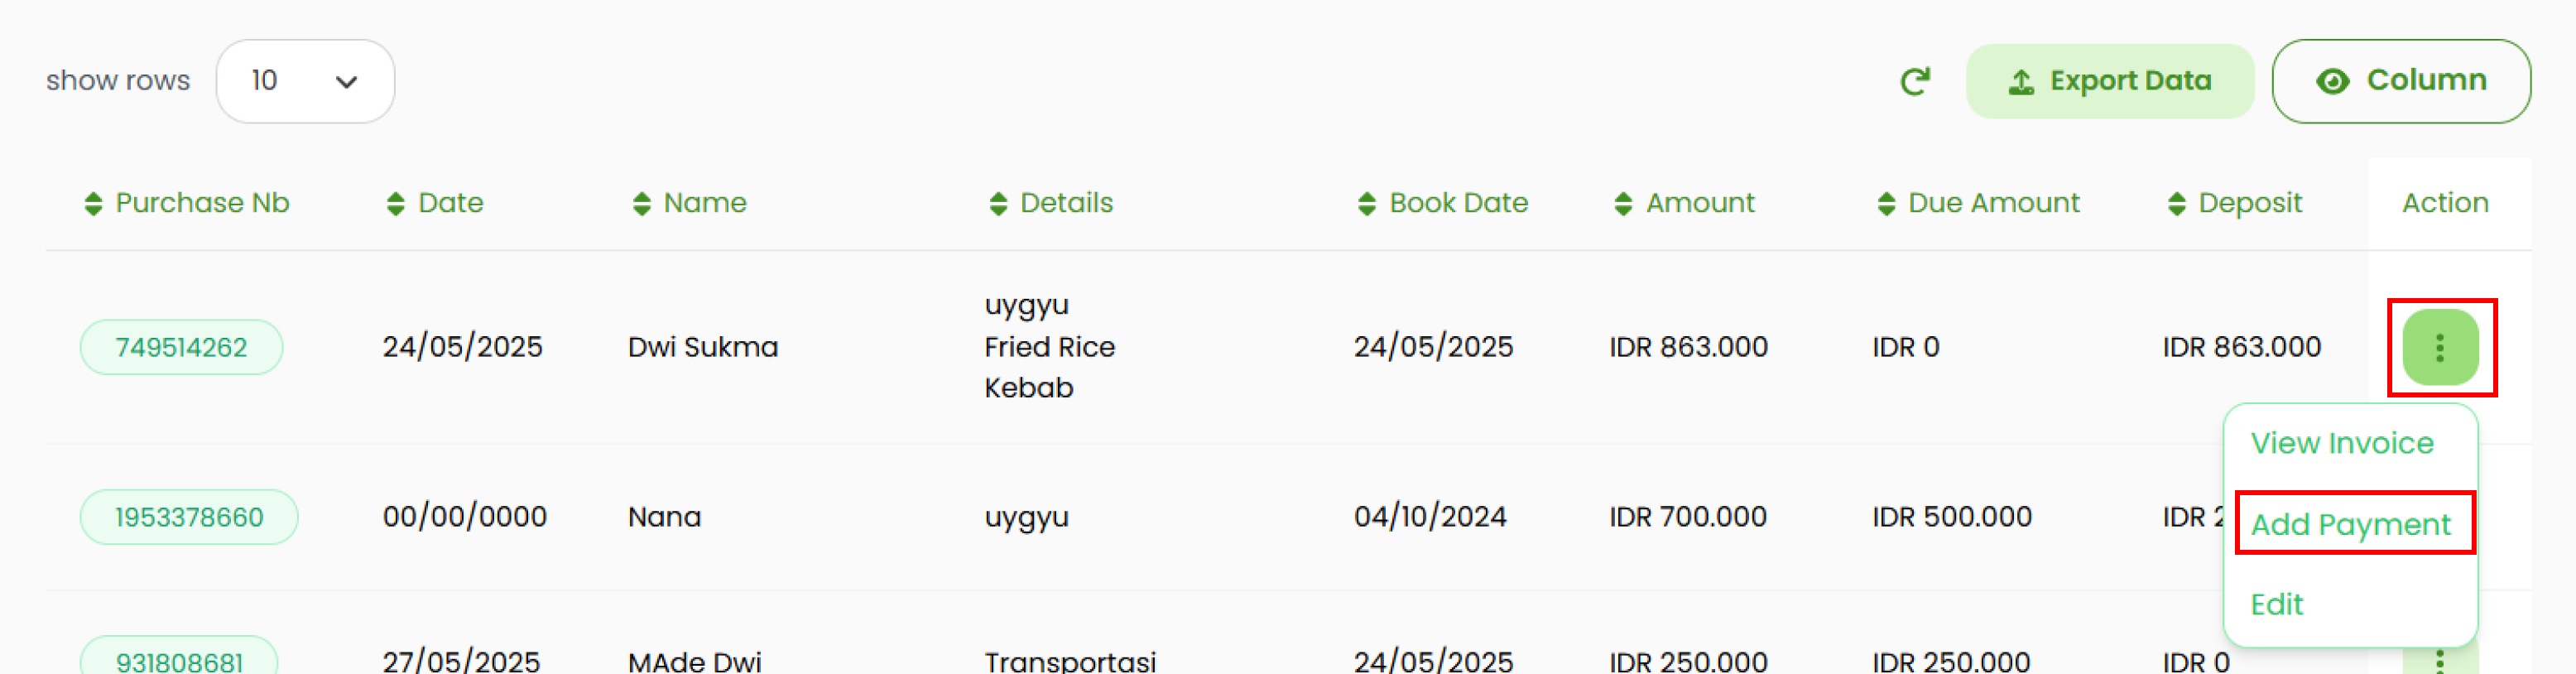
- Select Add Payment.
- A payment management pop-up will appear, where you can add, edit, or remove payment records.
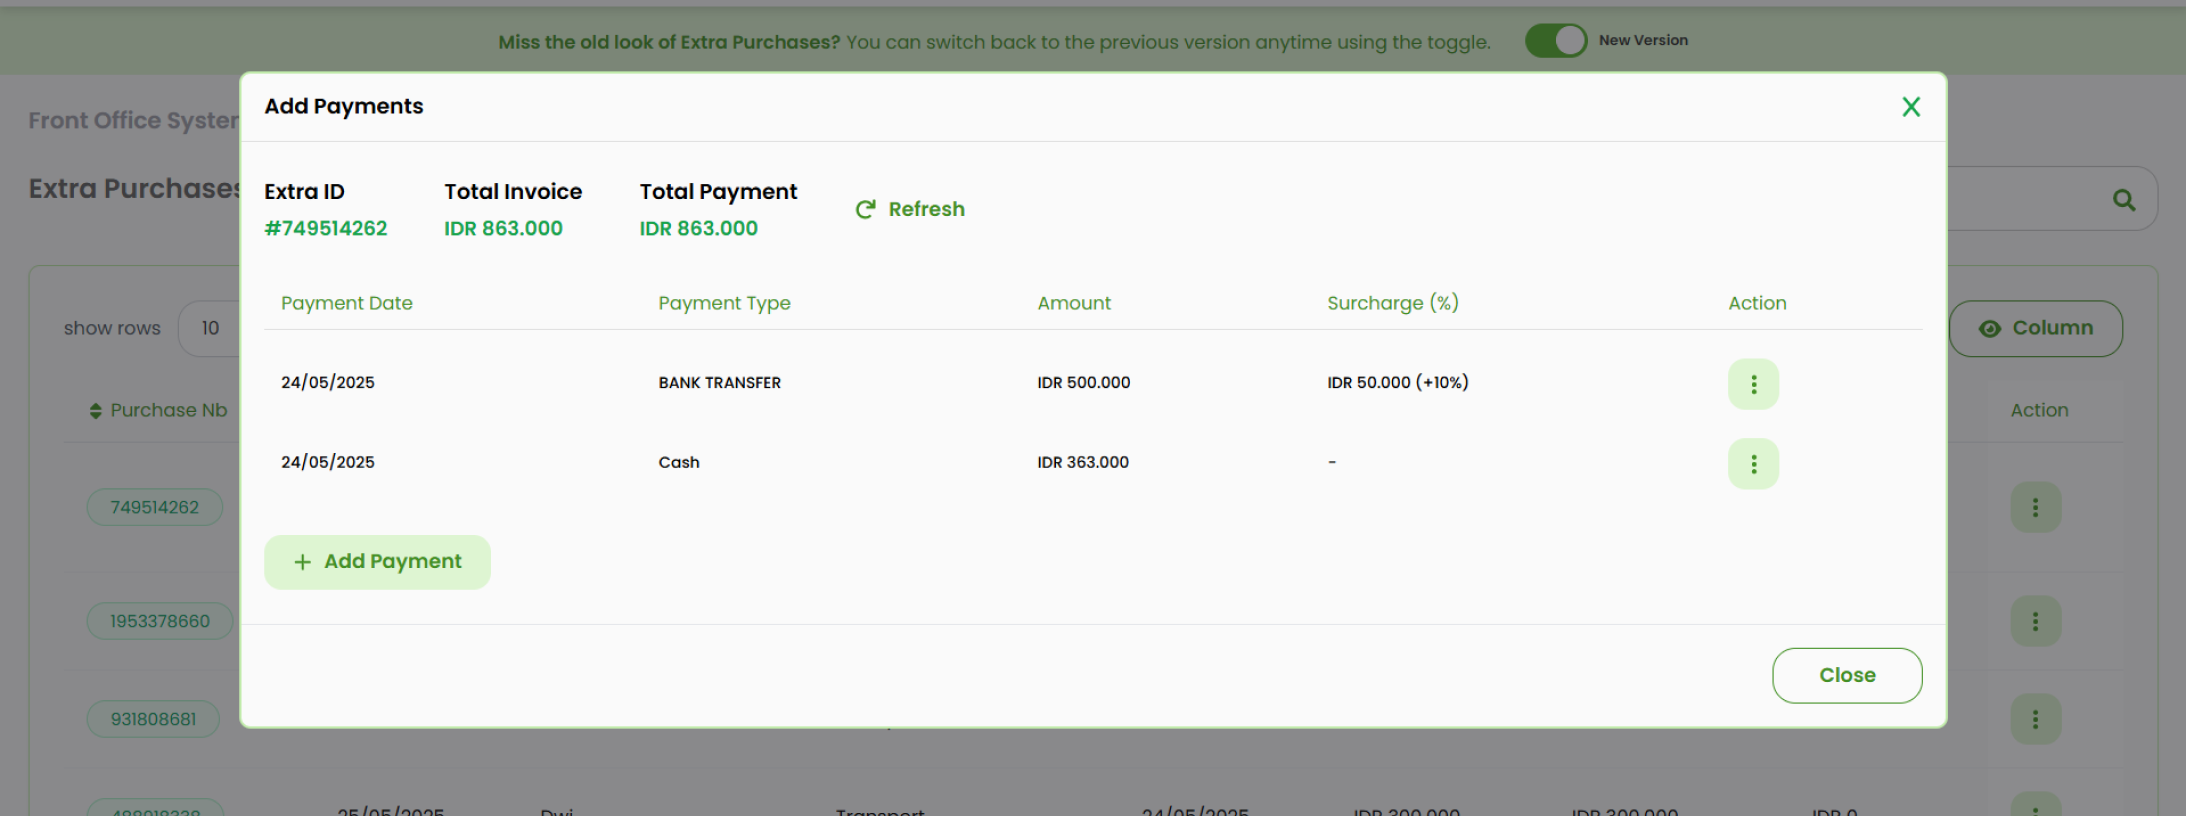
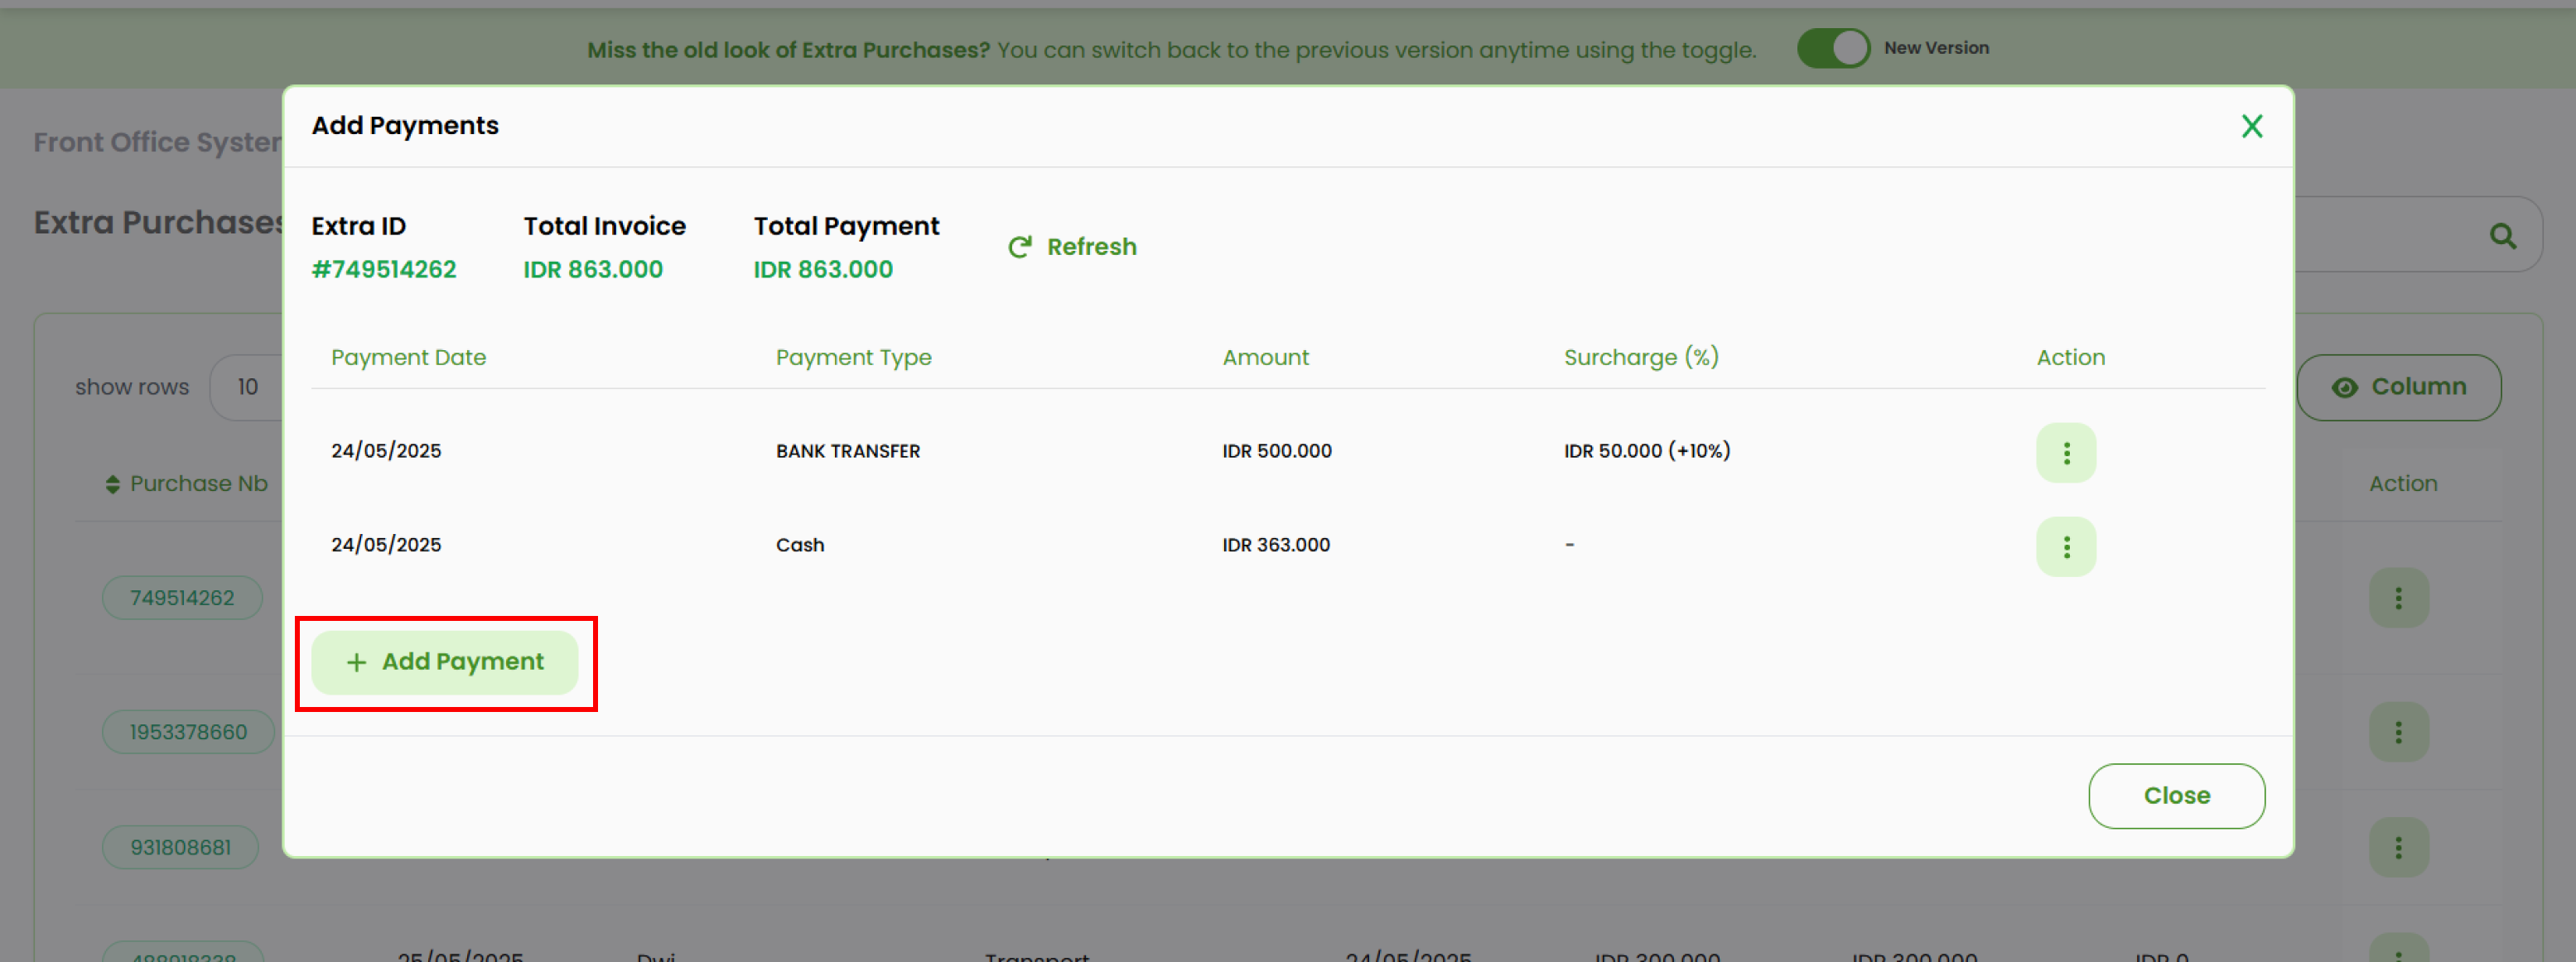
Add New Payment
- In the payment pop-up, click + Add Payment.
- Complete all the required fields:
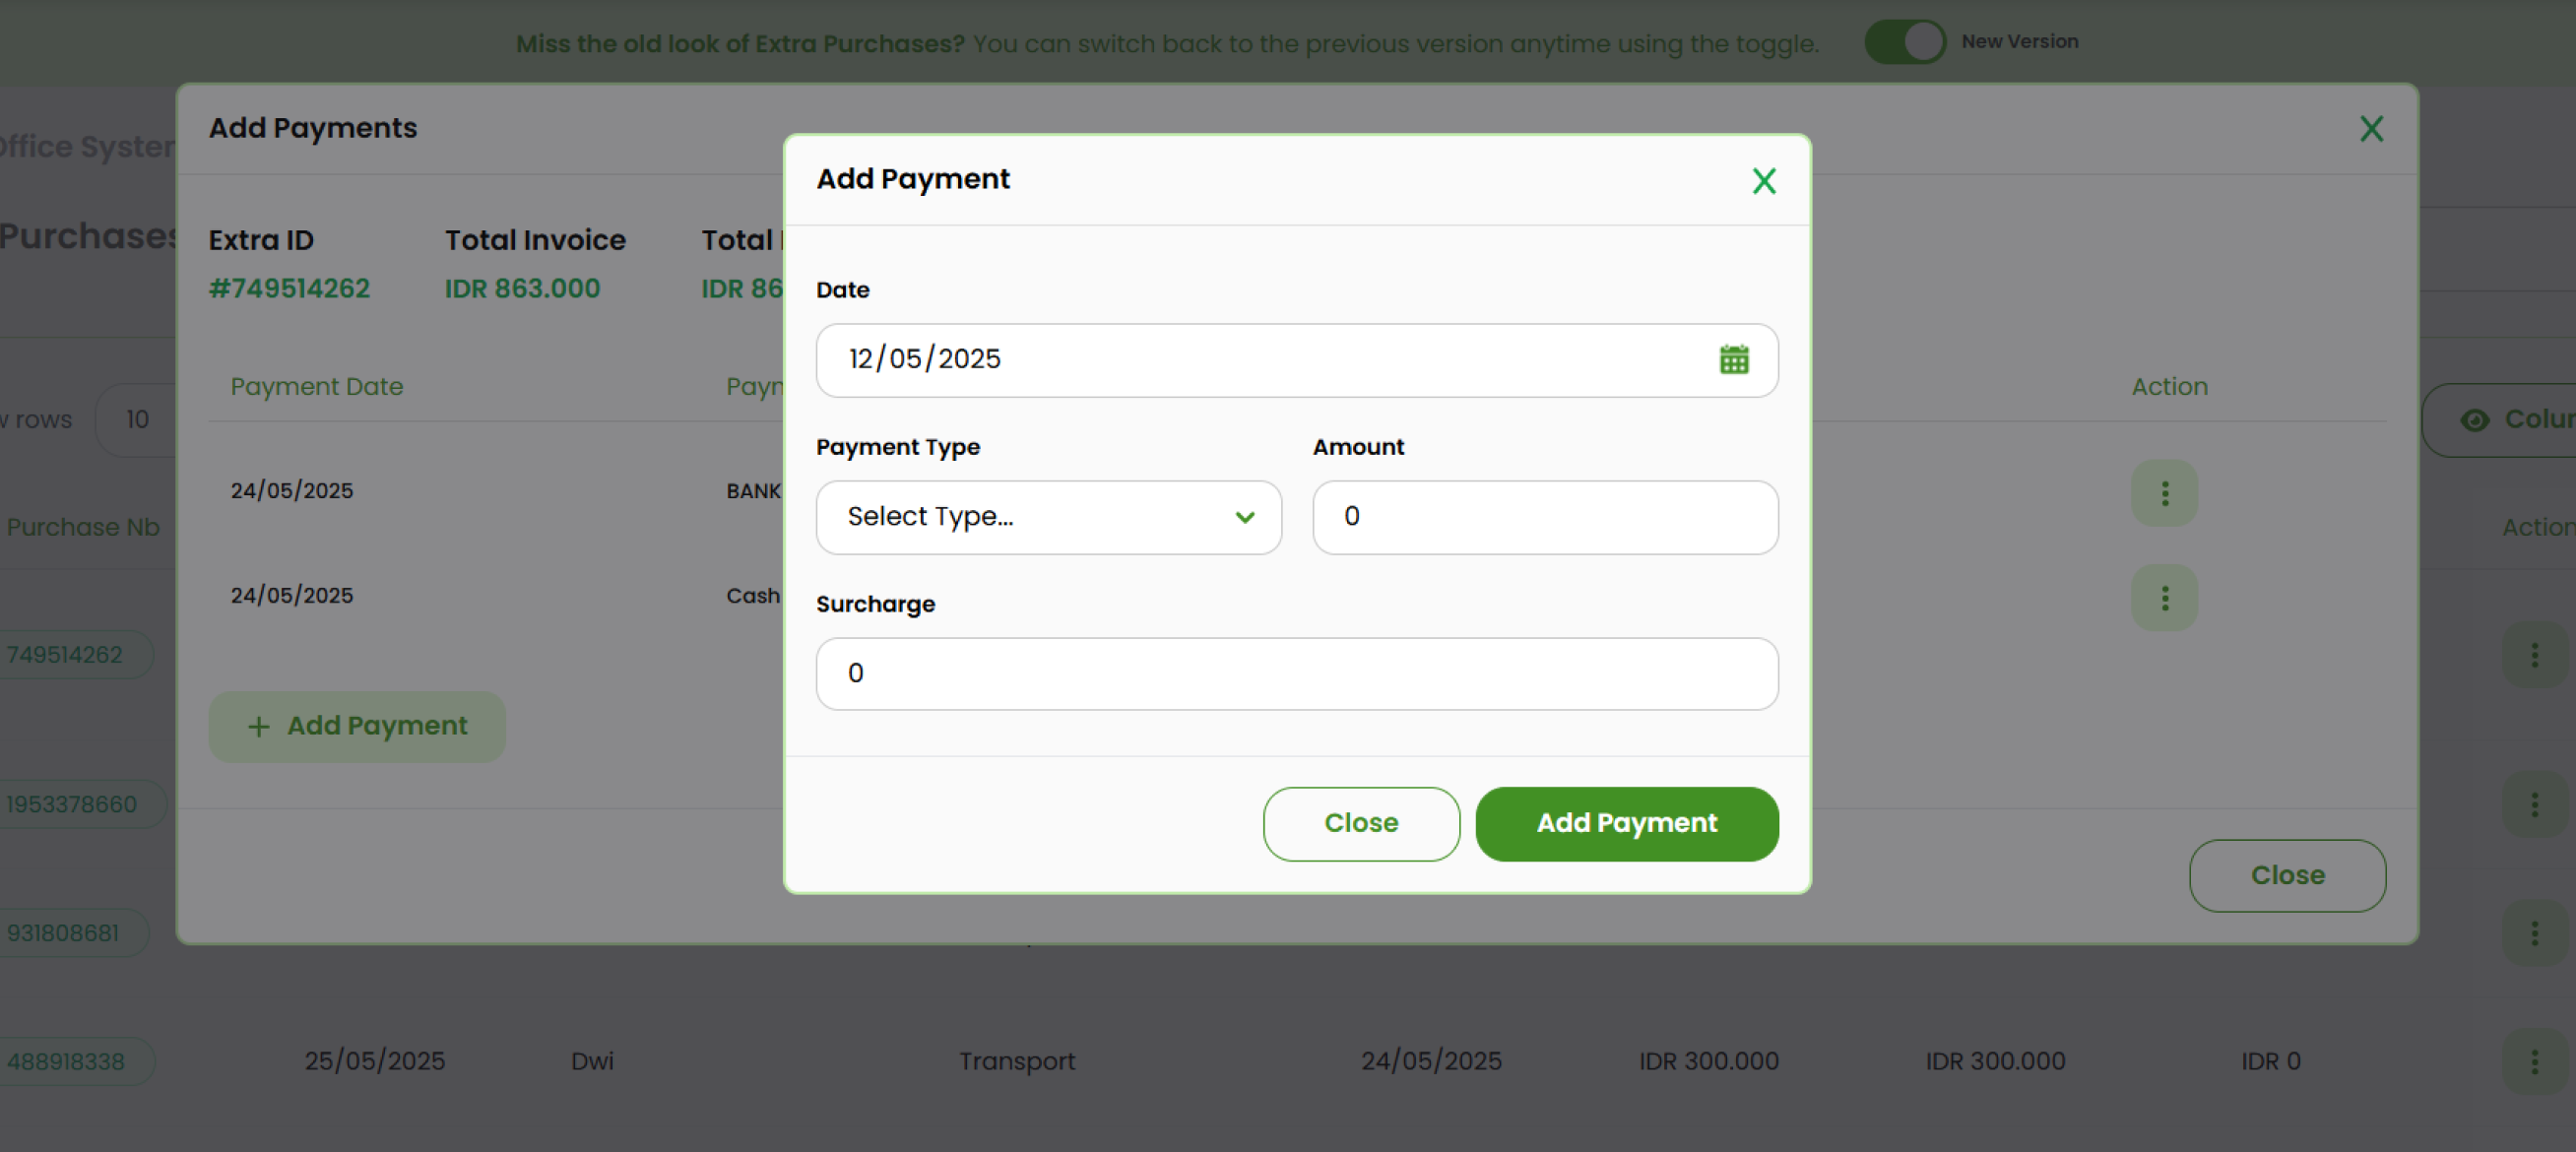
- Date : Enter the payment date.
- Type : Select the payment method.
- Amount : Enter the payment amount.
- Surcharge : Enter any applicable surcharge.
- Click Add payment button save the payment.
Edit Payment
- At the add payment pop up, select the payment item you want to modify.
- Click the three-dots button and choose Edit.
- A new pop up form will appear, update the fields as needed.
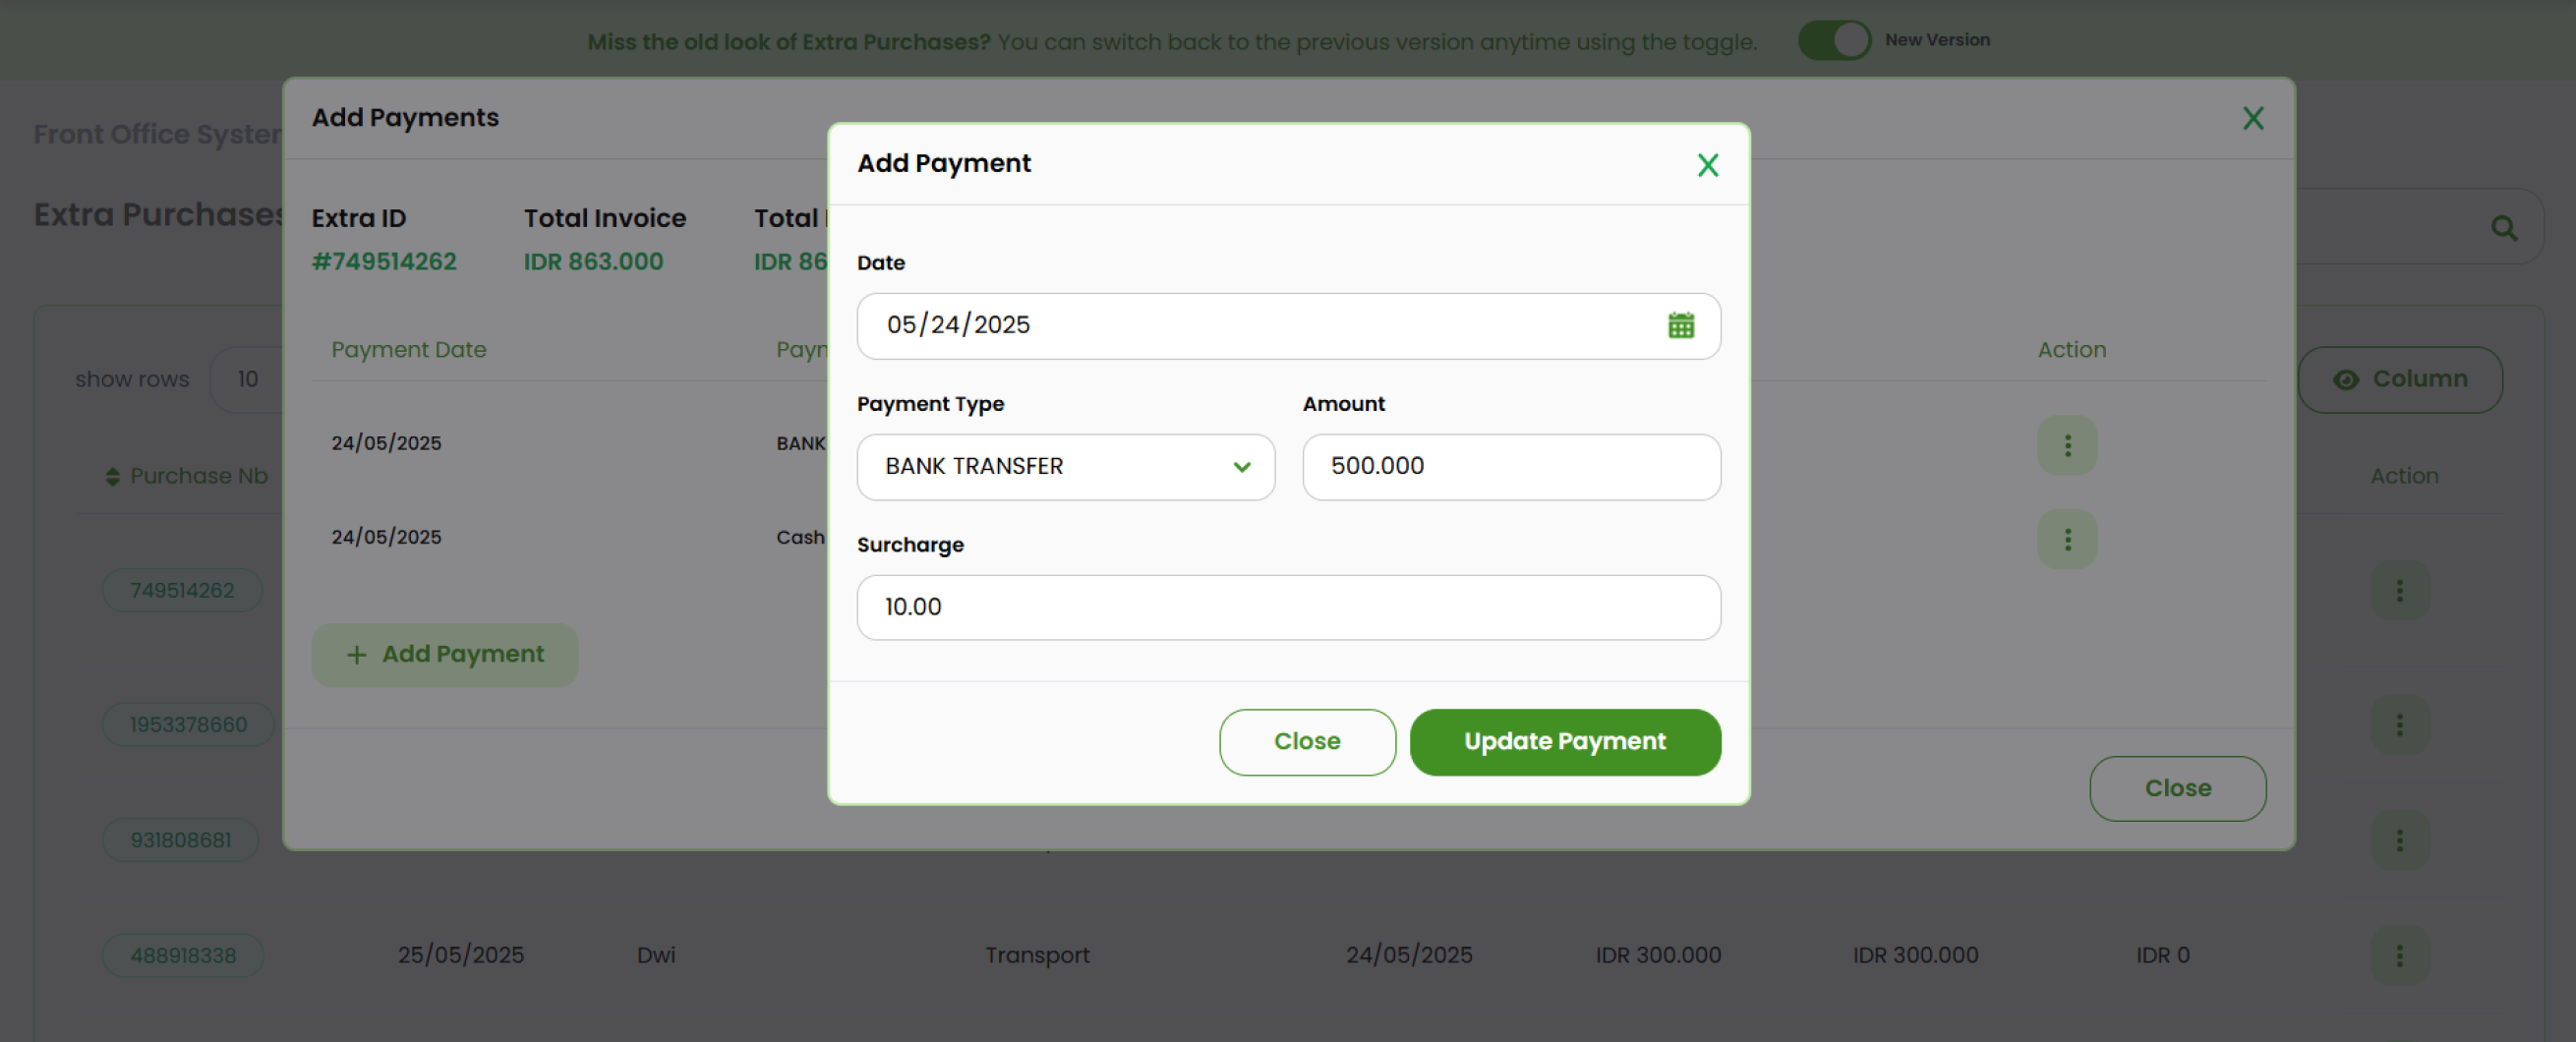
- Click Update Payment to save the changes.
Remove Payment
- At the add payment pop up, select the payment you want to delete.
- Click the three-dots button and choose Remove. The item will be deleted immediately from the list.
Edit Invoice
Navigate to the invoice list.
- Select the invoice you want to edit.
- Click the three-dots button in the Action column. Then, select Edit.
- Update the fields in the pop-up form.
- Click Update Invoice to save your changes.