Introduction
The Accounts page is a configuration page used to manage internal purchase accounts and payment accounts. These accounts help ensure that all financial transactions are properly categorized.
The page is divided into two sections: Purchase and Payment. You can switch between these sections using the tab bar located at the top-right panel.

Purchase Account
Before managing purchase accounts, ensure you are in the Purchase section.
How to Add New Account
Add Master Account
- Click the + Account button.
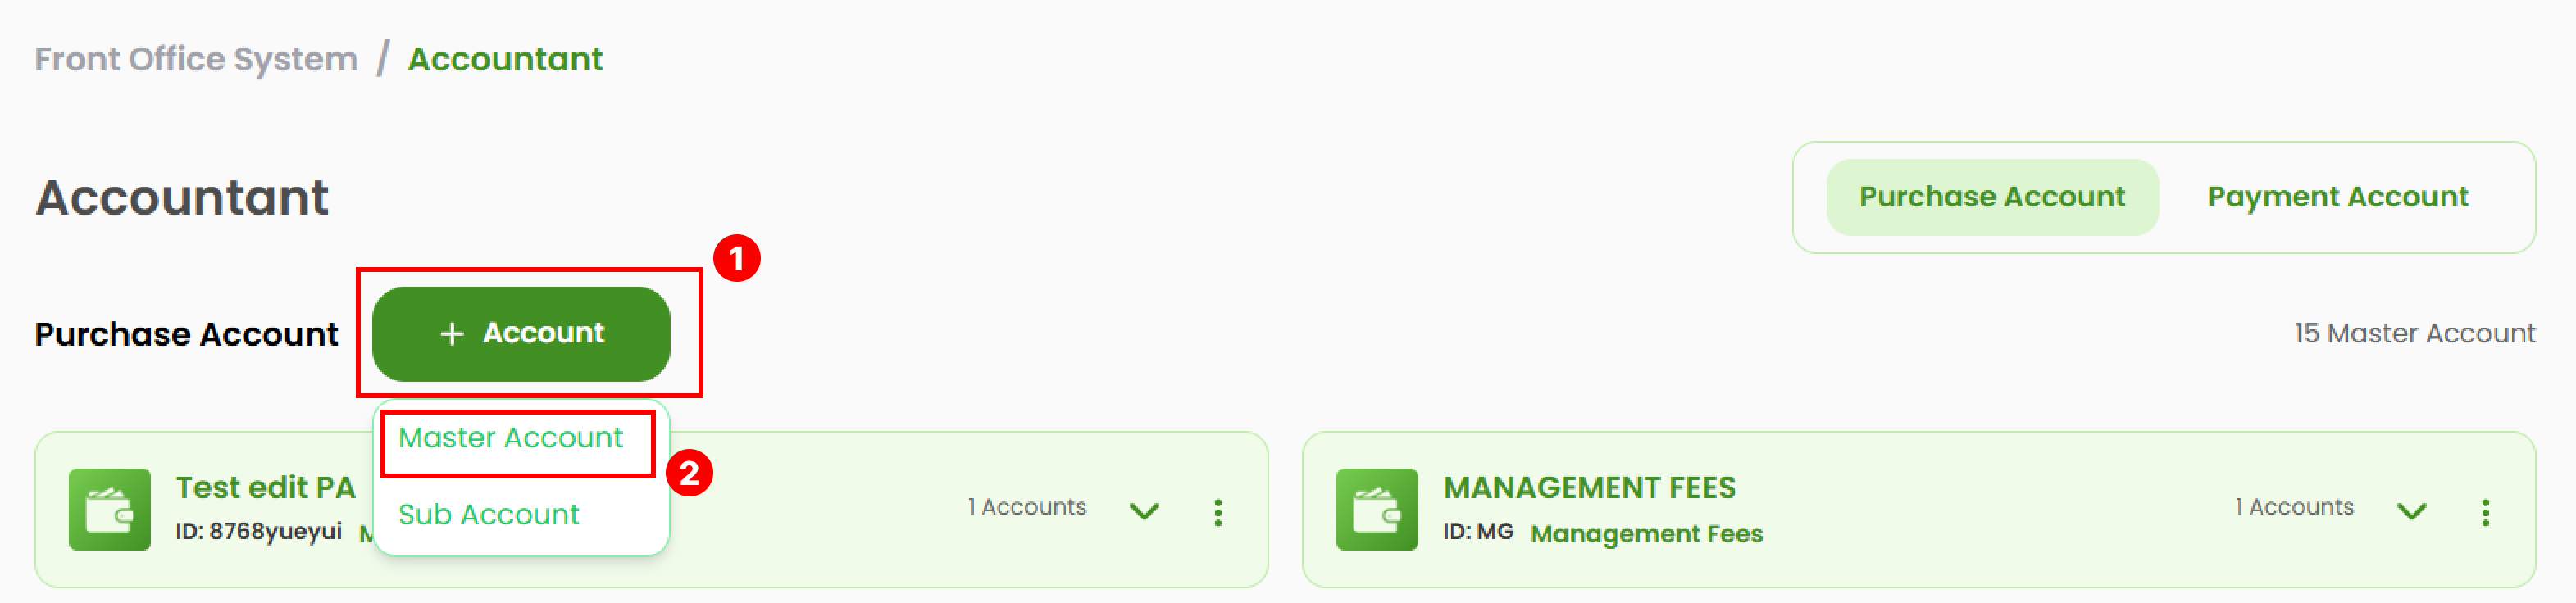
- Select the Master Account.
- A pop-up form will appear. Complete all required fields.
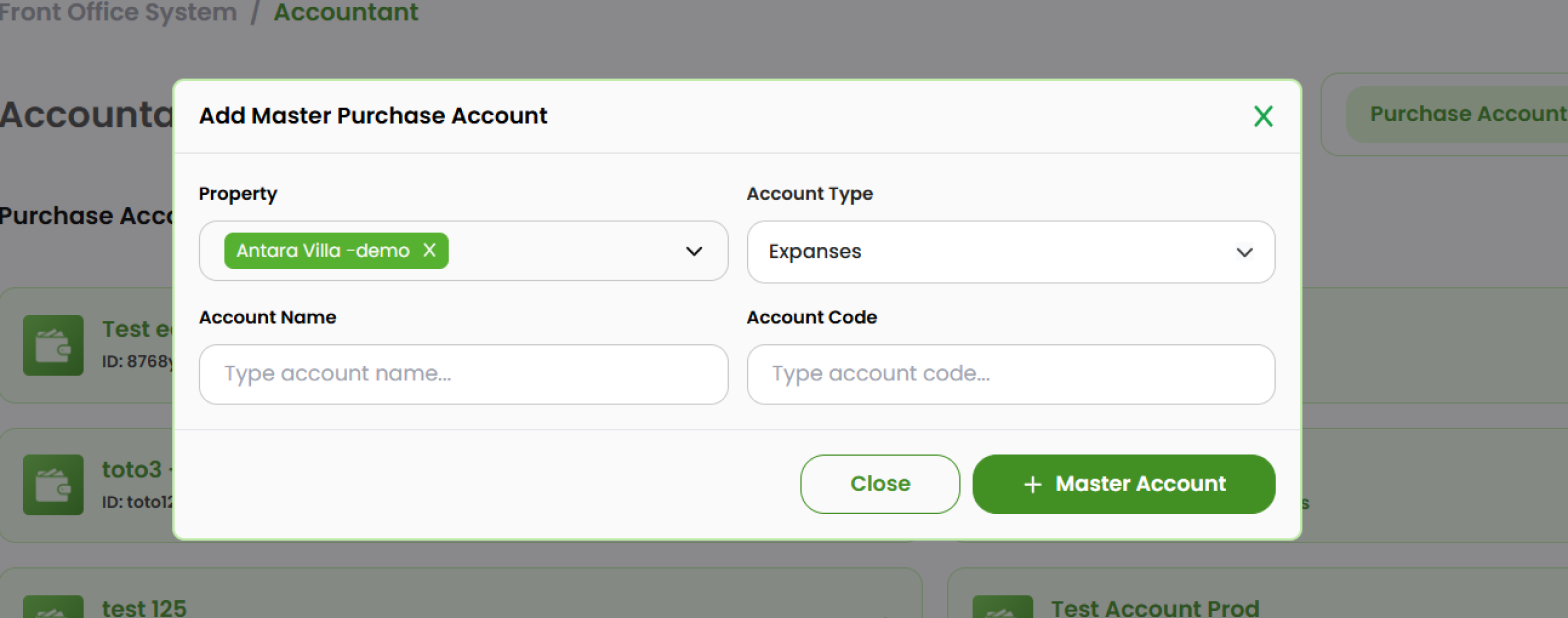
- Property : Select the property where the account will be stored.
- Account Type : Choose between Expanses or Management Free.
- Account Name and Code : Enter the name and code of the account.
- Click + Master Account to save and add the new account to the list.
Add Sub Account
- Click the + Account button.
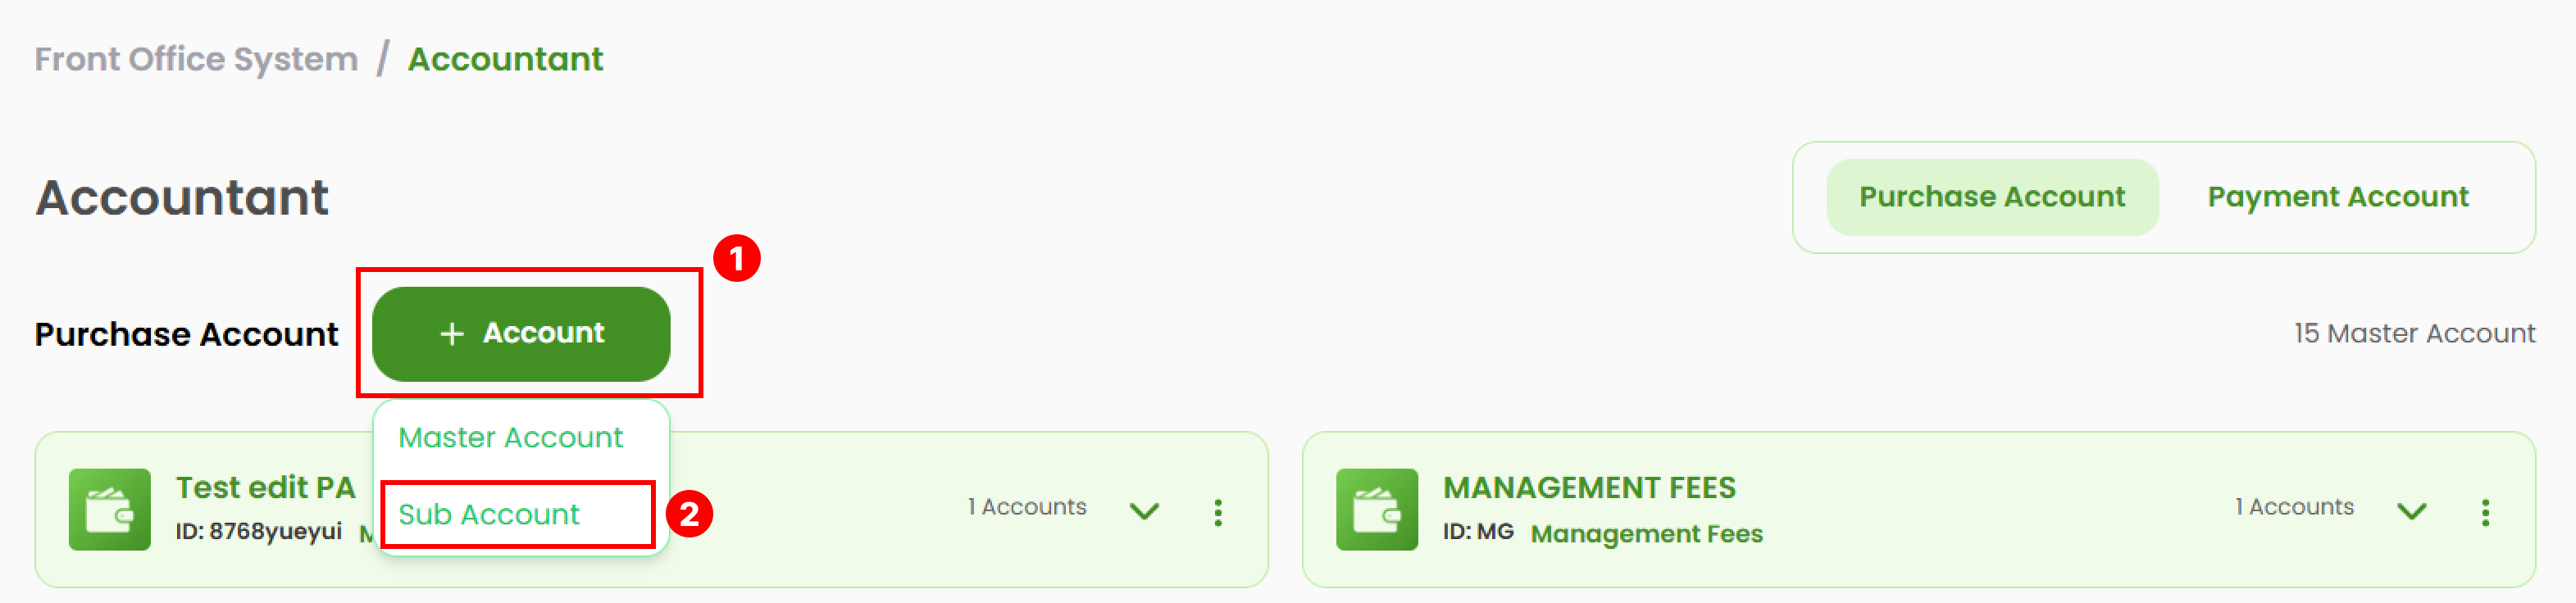
- Select the Sub Account.
- A pop-up form will appear. Complete all required fields.
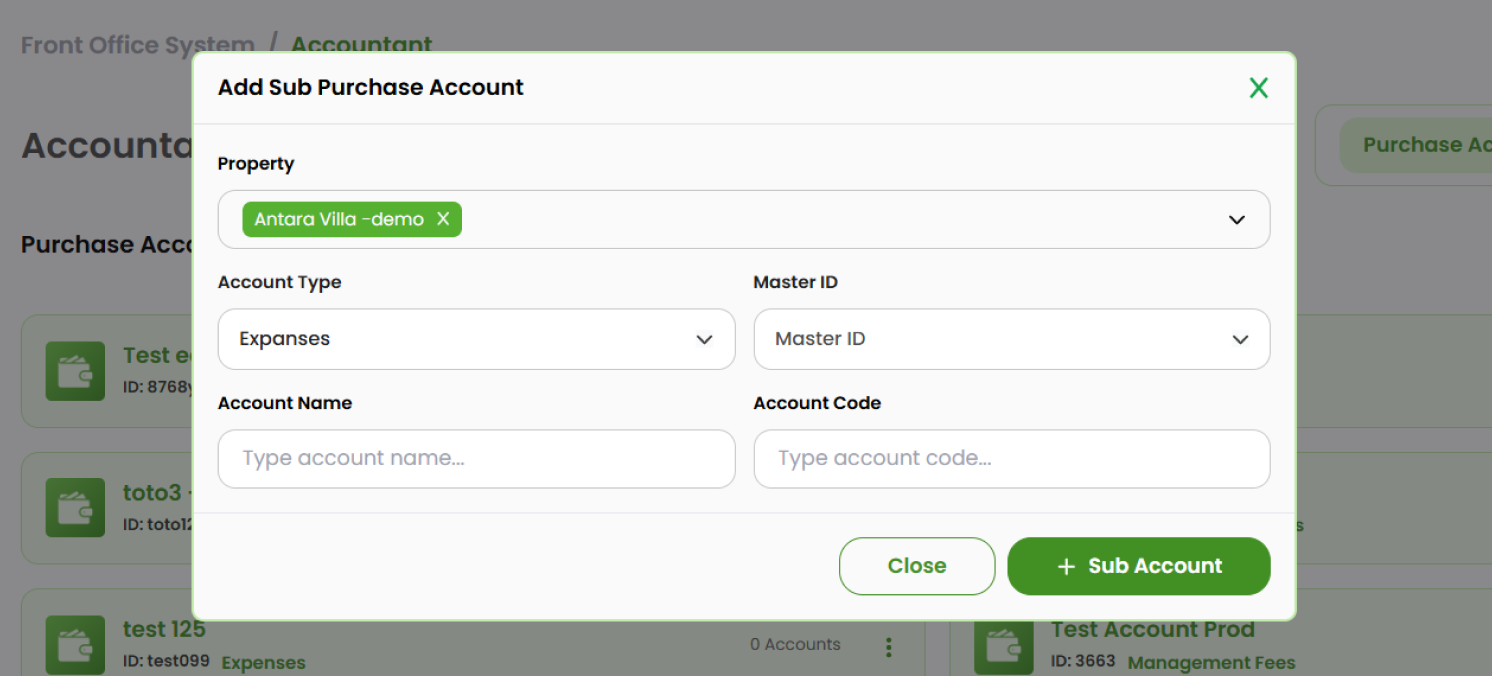
- Property : Select the property where the account will be stored.
- Account Type : Select the account type between Expanses or Management Free.
- Master ID : Select the corresponding Master Account from the list.
- Account Name and Code : Type the account's name and code.
- Click + Master Account to save and add the item to the list.
How to Edit Account
Edit Master Account
- Choose the item you want to change. Click the three-dots icon (⋮) at the right side.
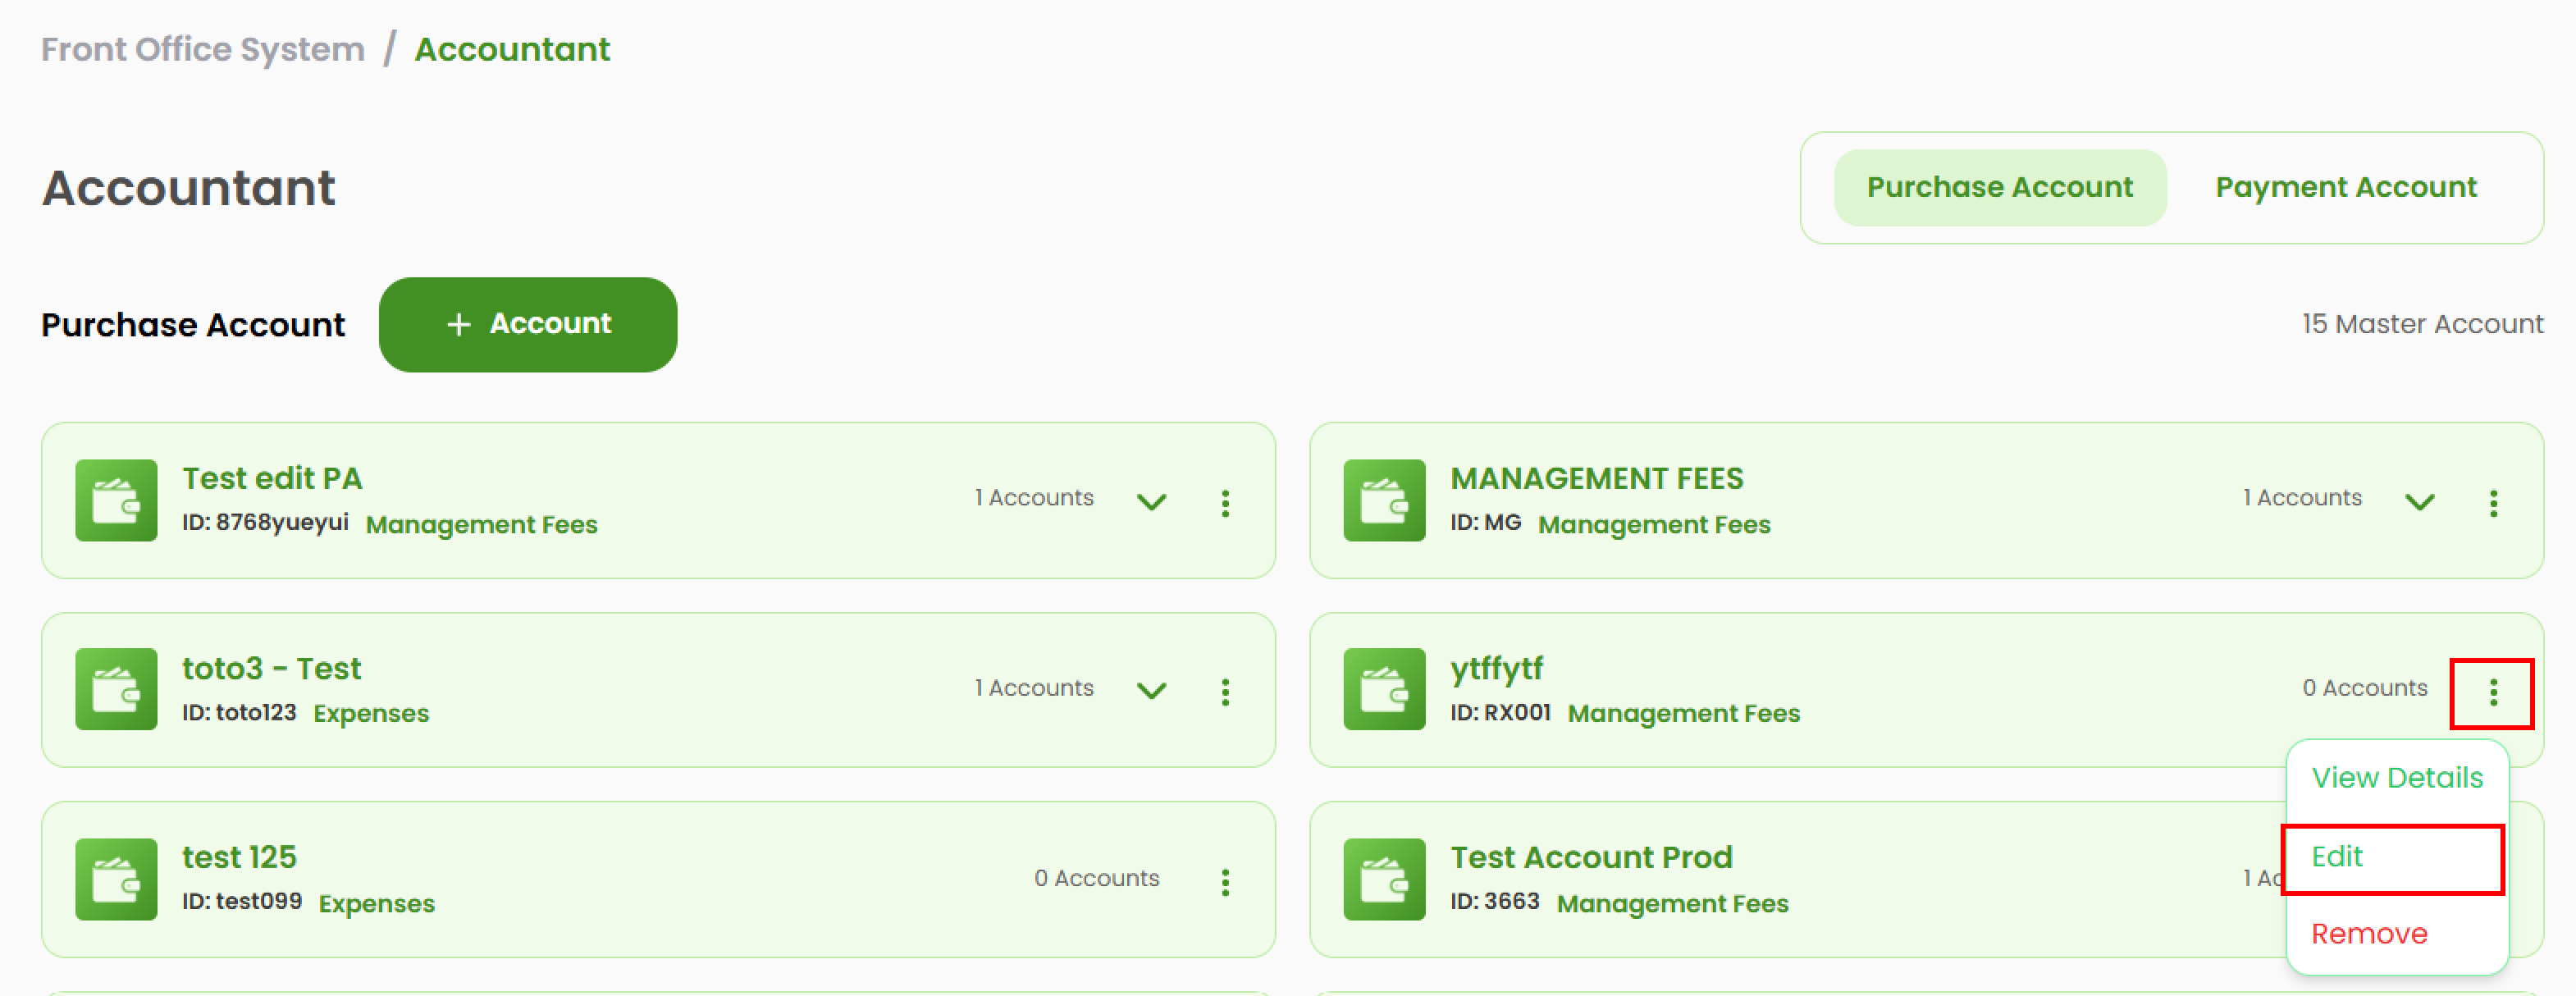
- Select Edit.
- A pop-up form will appear. Modify the necessary fields.
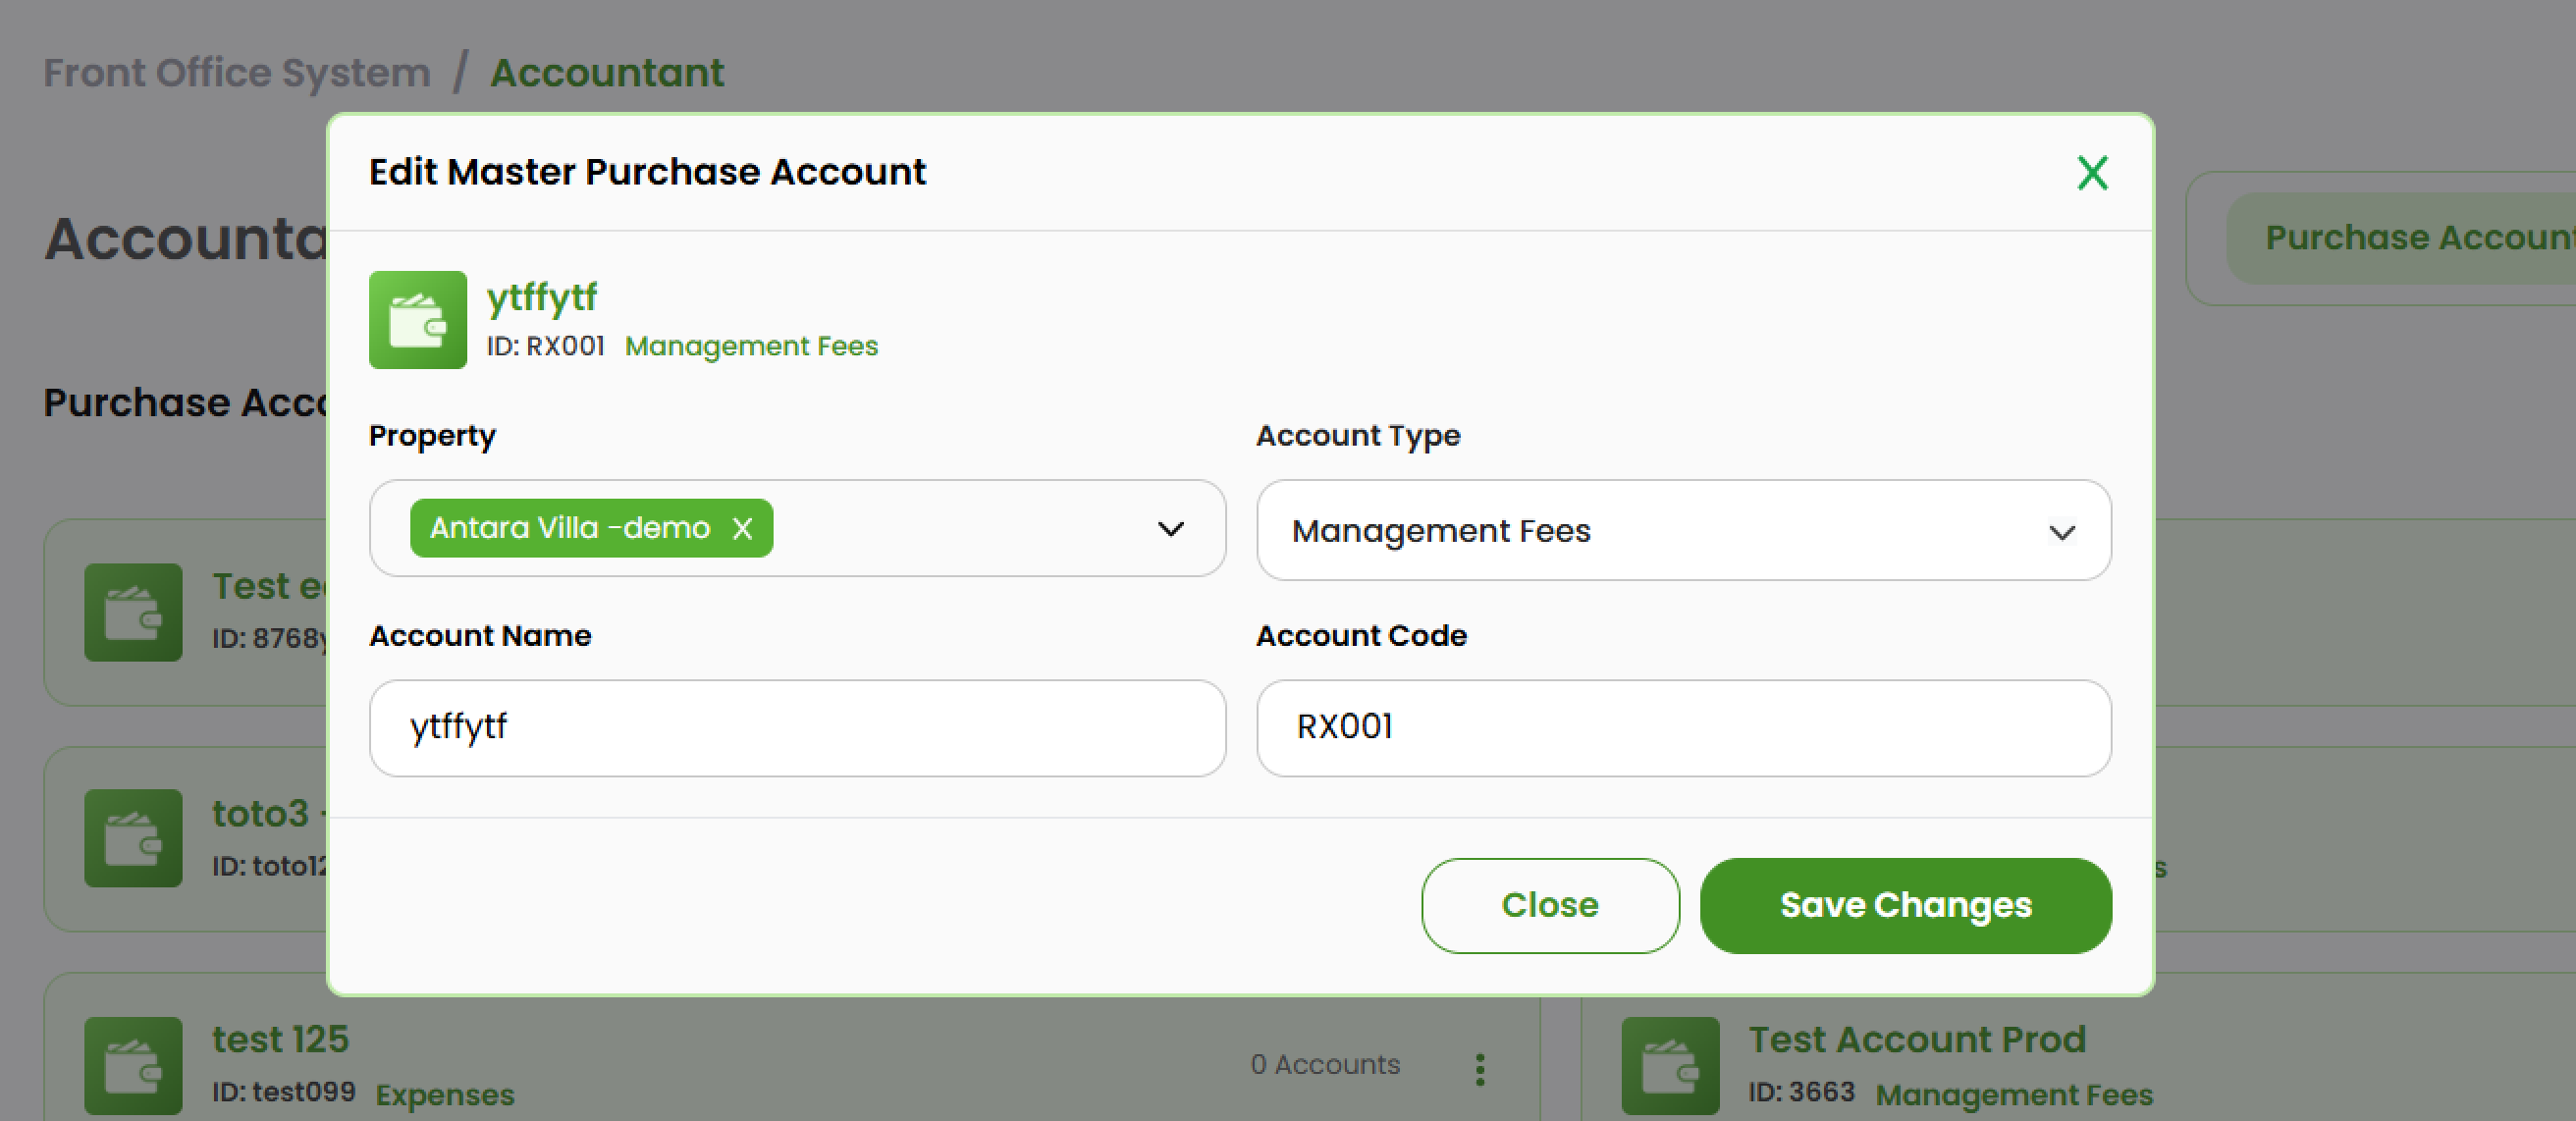
- Click Save Changes to save and apply the changes.
Edit Sub Account
- Click the arrow beside the master account to expand its list of sub accounts.
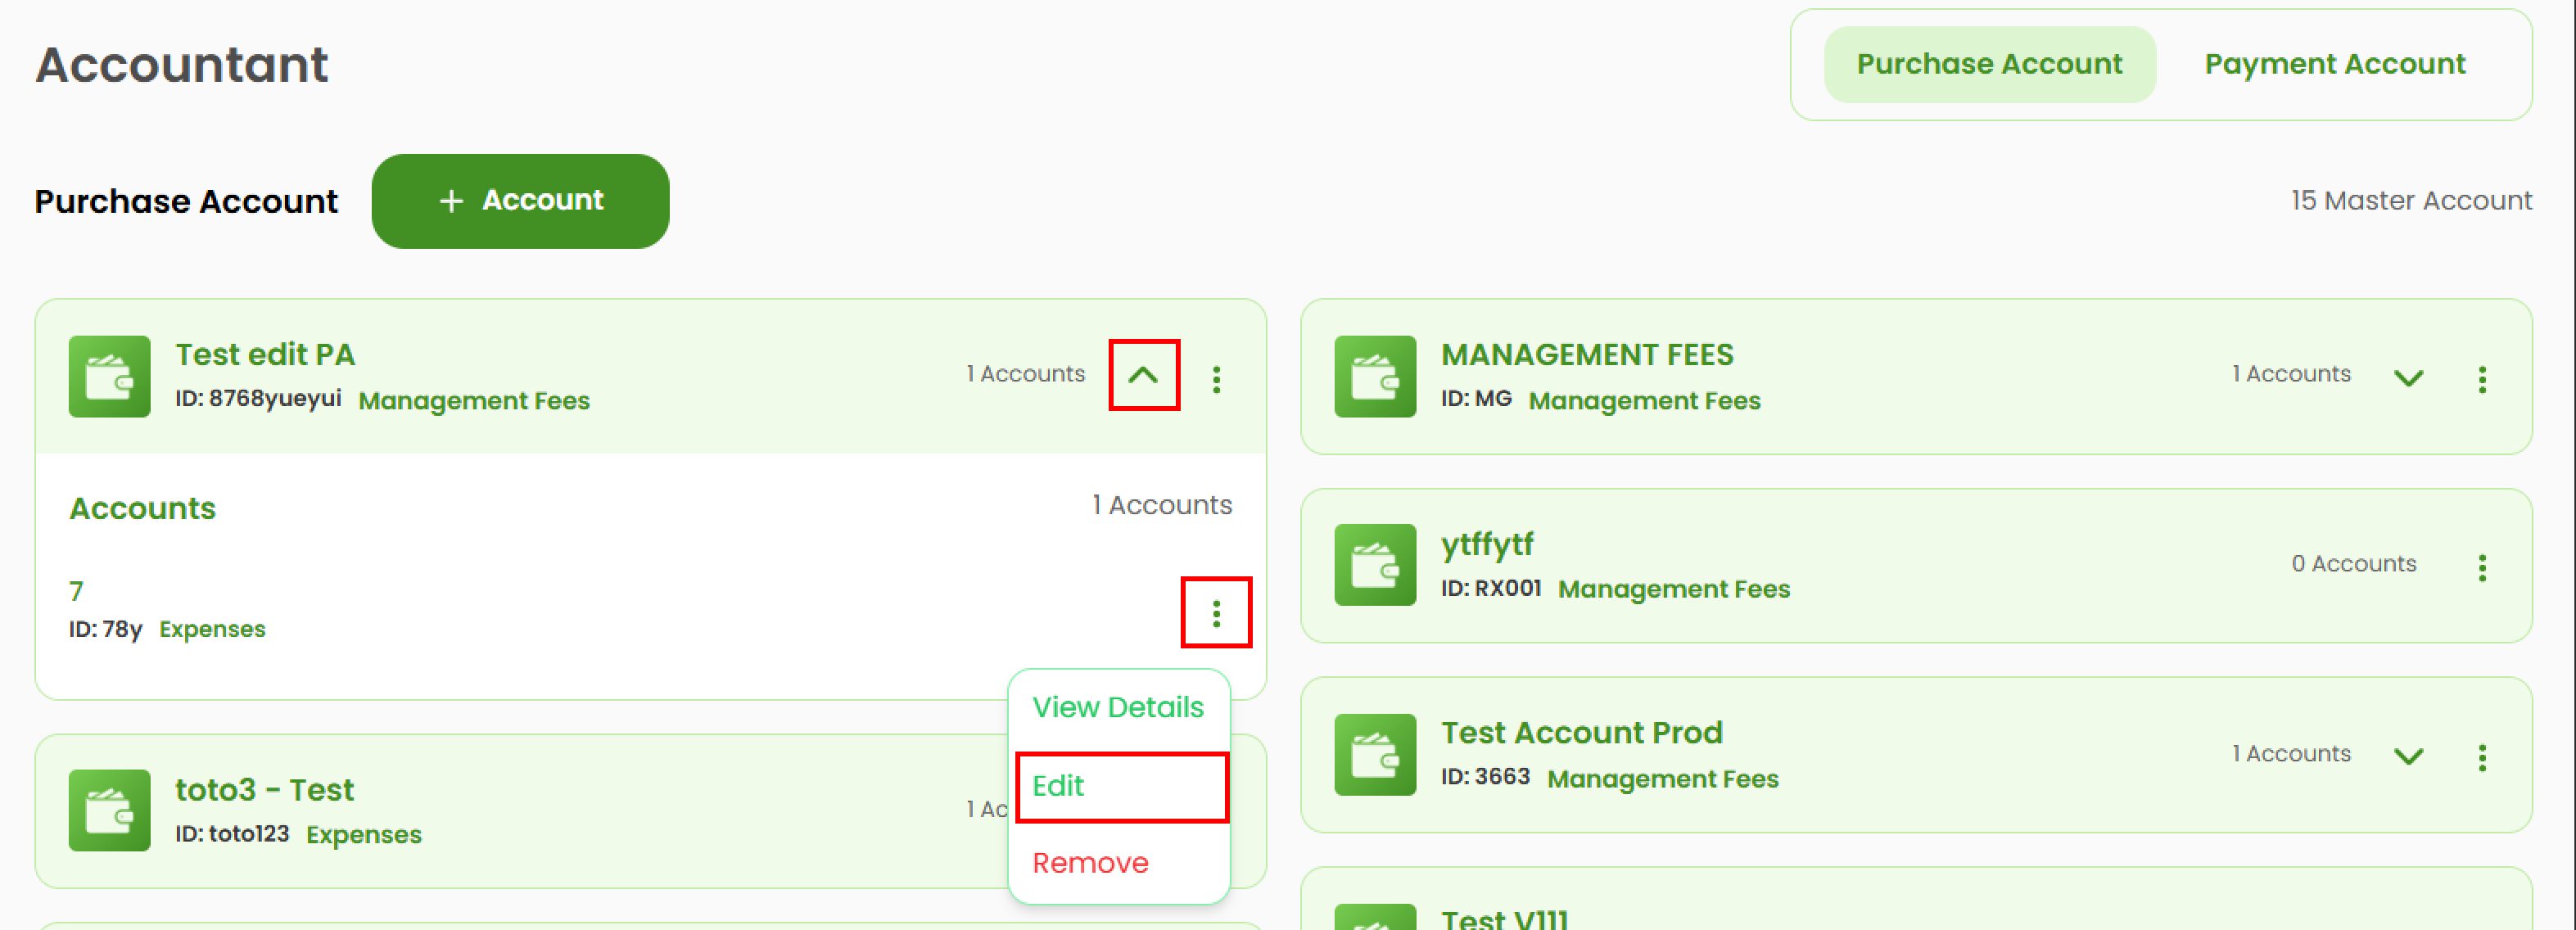
- Choose the sub account you want to update, then click the three-dots icon (⋮), at the right side.
- Select Edit.
- A pop-up form will appear. Modify the necessary fields.
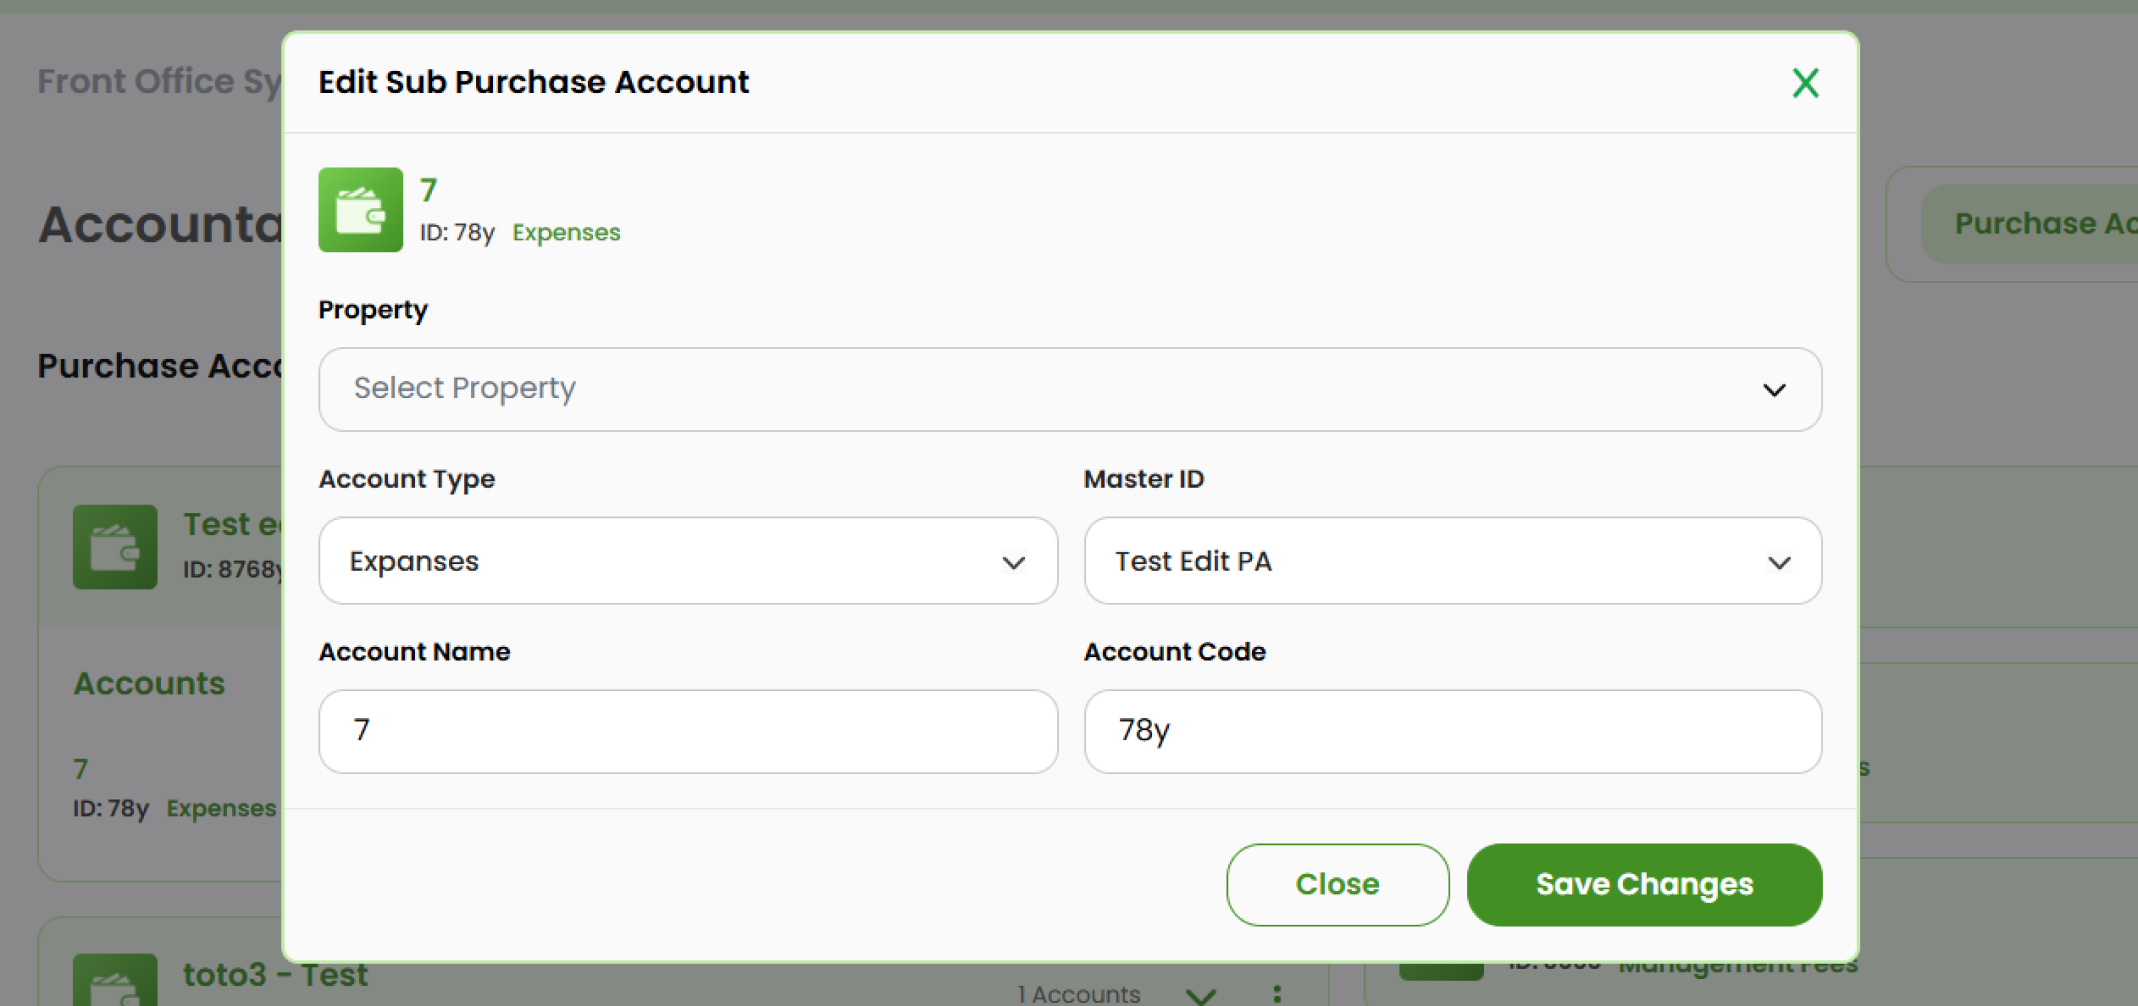
- Click Save Changes to save and apply the changes.
How to View Account's Detail
View Master Account's Detail
- Select the account and click the three-dots icon (⋮) on the right.
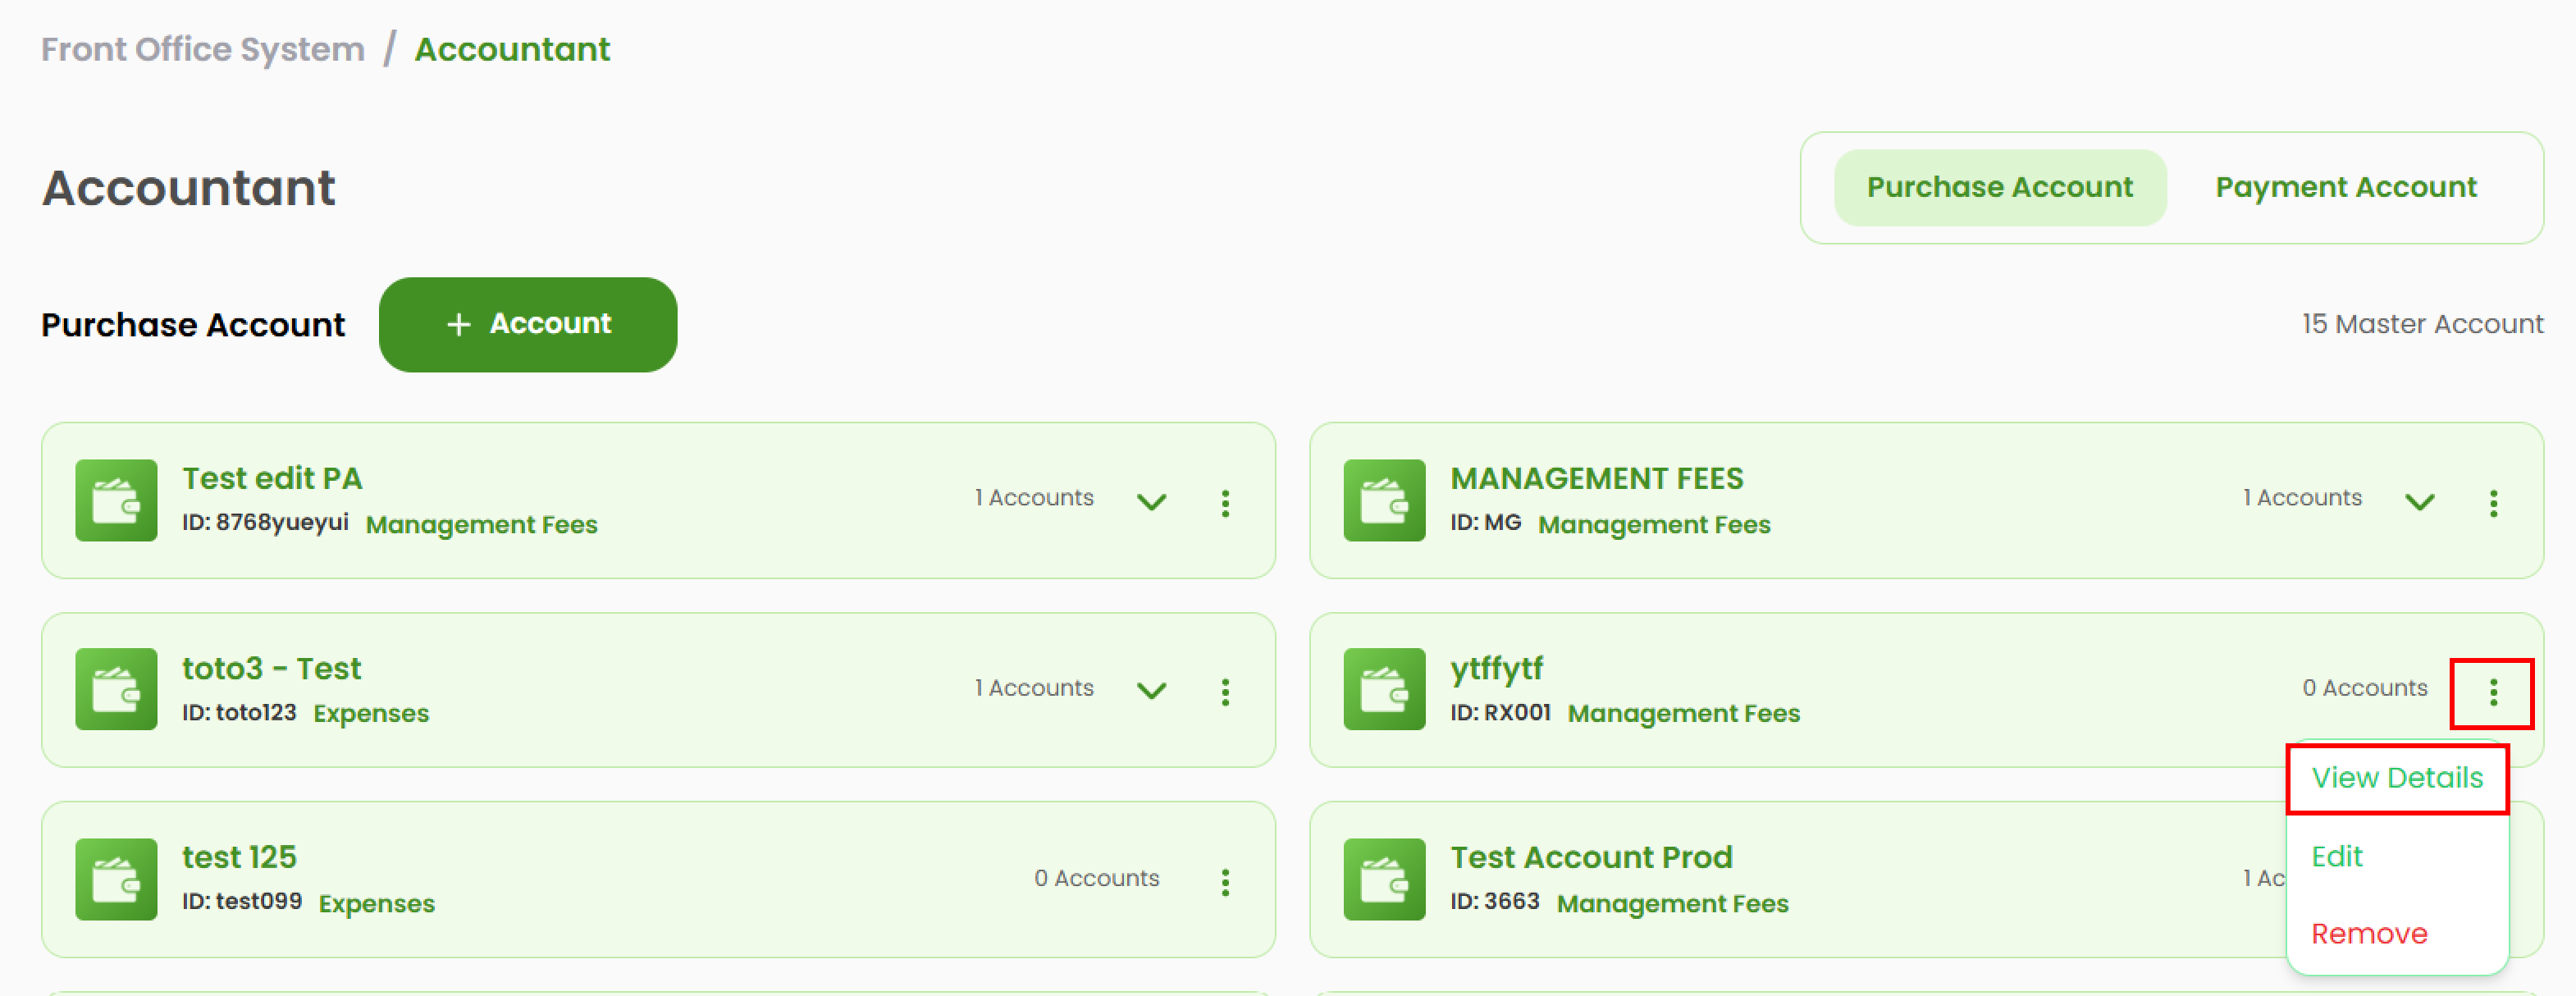
- Select View Detail.
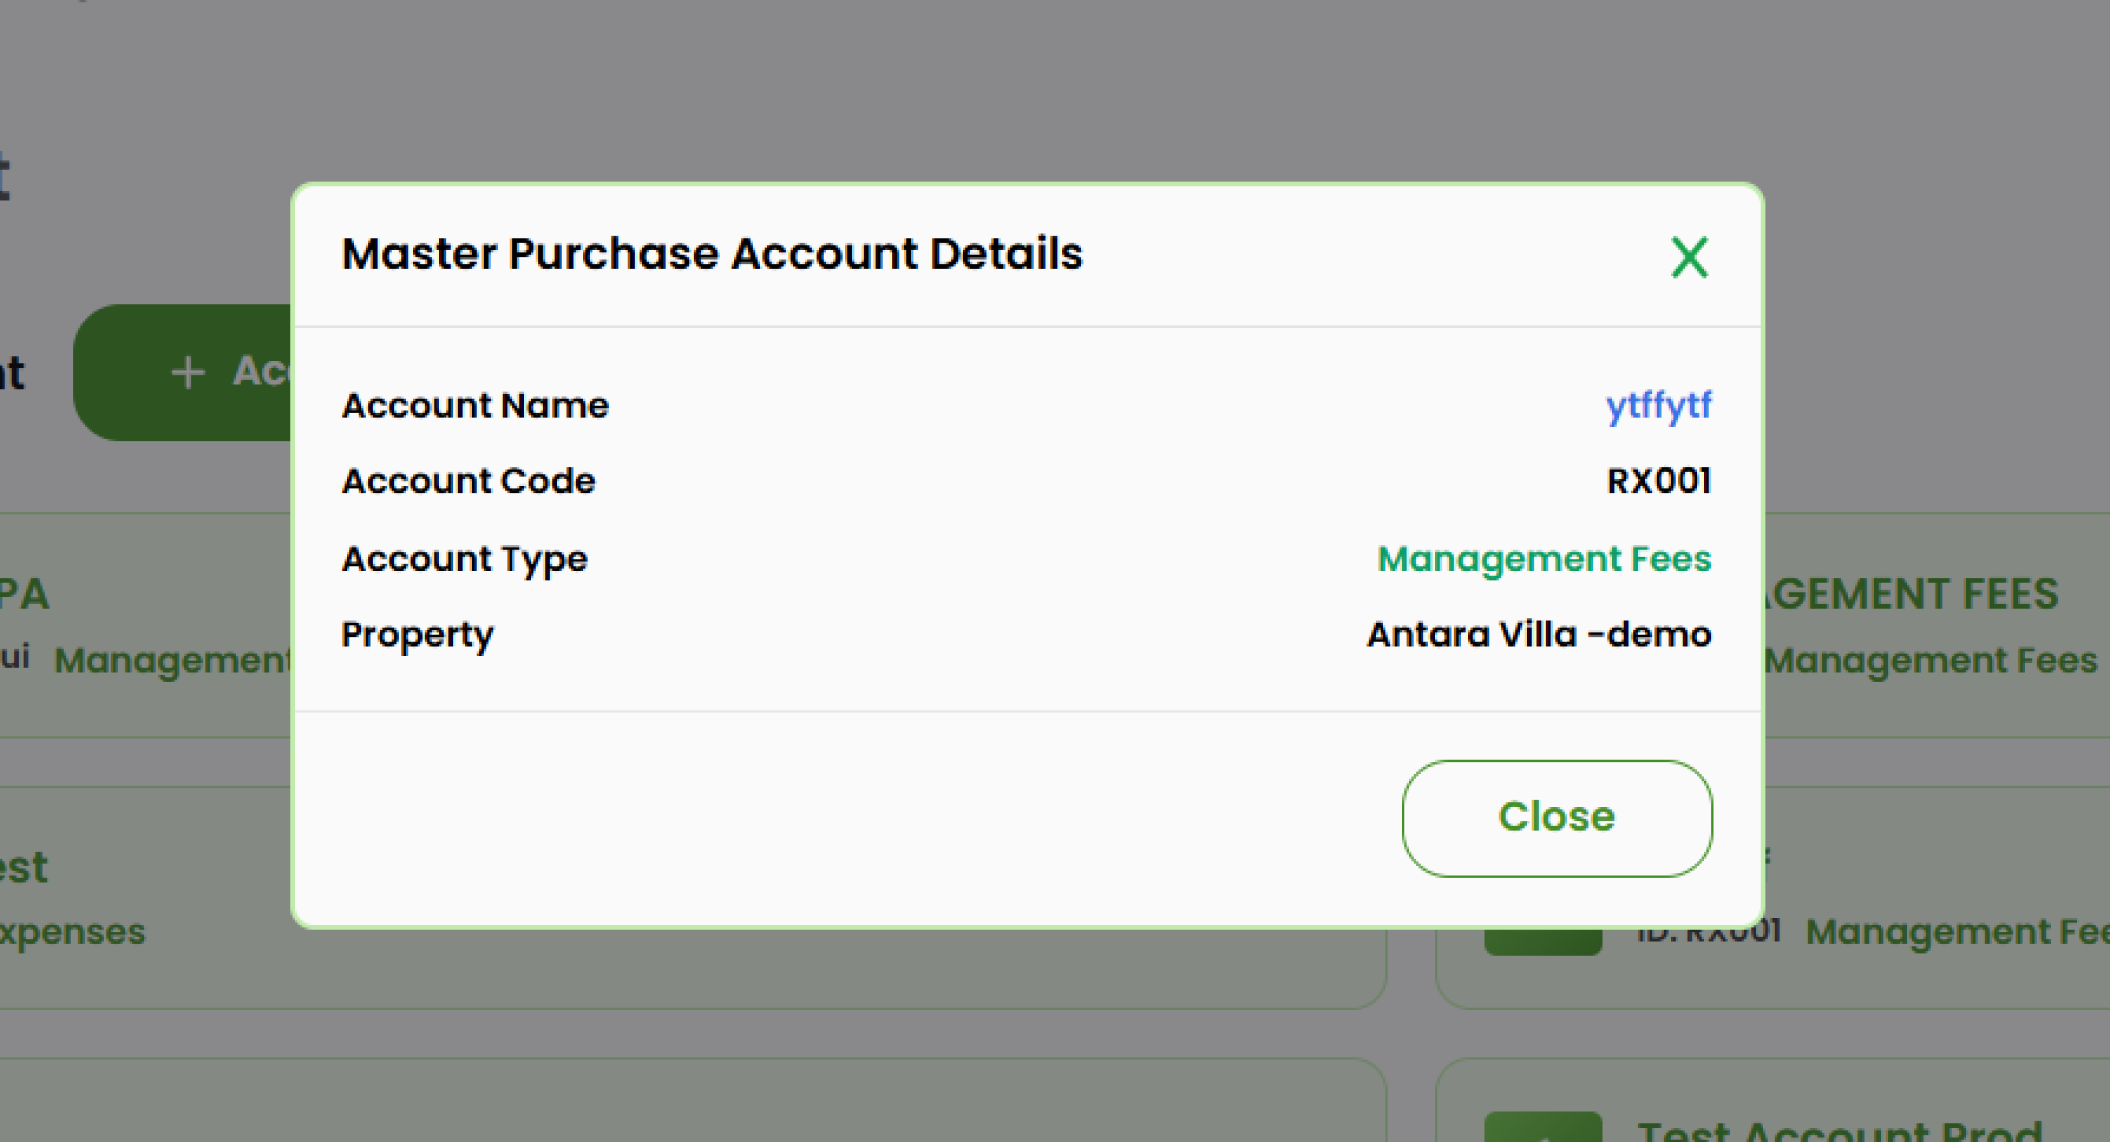
- A pop-up will display the full details of the selected master account.
View Sub Account's Detail
- Click the arrow to expand the master account and display its sub accounts.
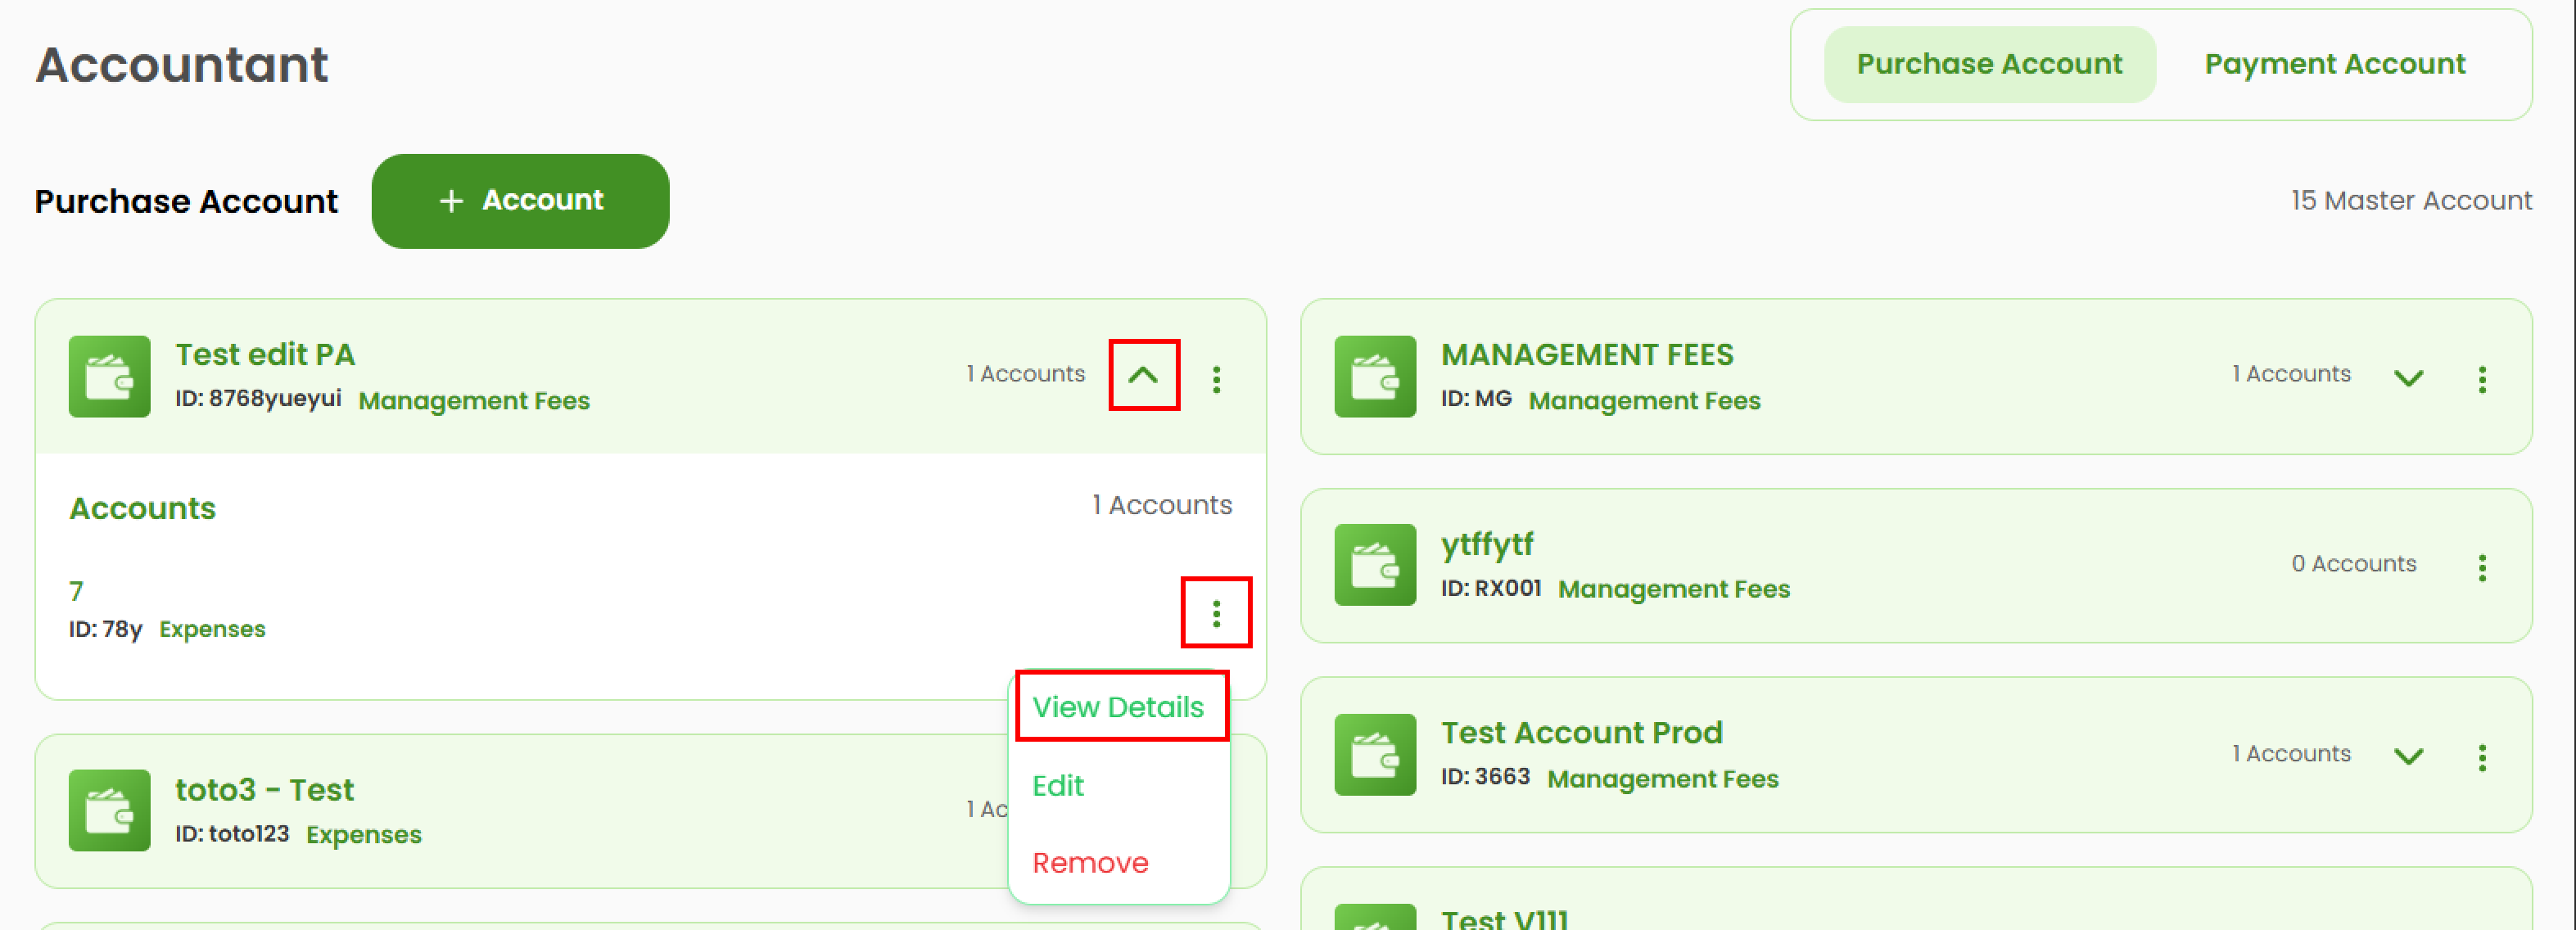
- Select the desired sub account, then click the three-dots icon (⋮).
- Select View Detail.
- A pop-up will display the full details of the selected sub account.

How to Delete Account
Delete Master Account
- Select the account you want to remove, then click the three-dots icon (⋮).

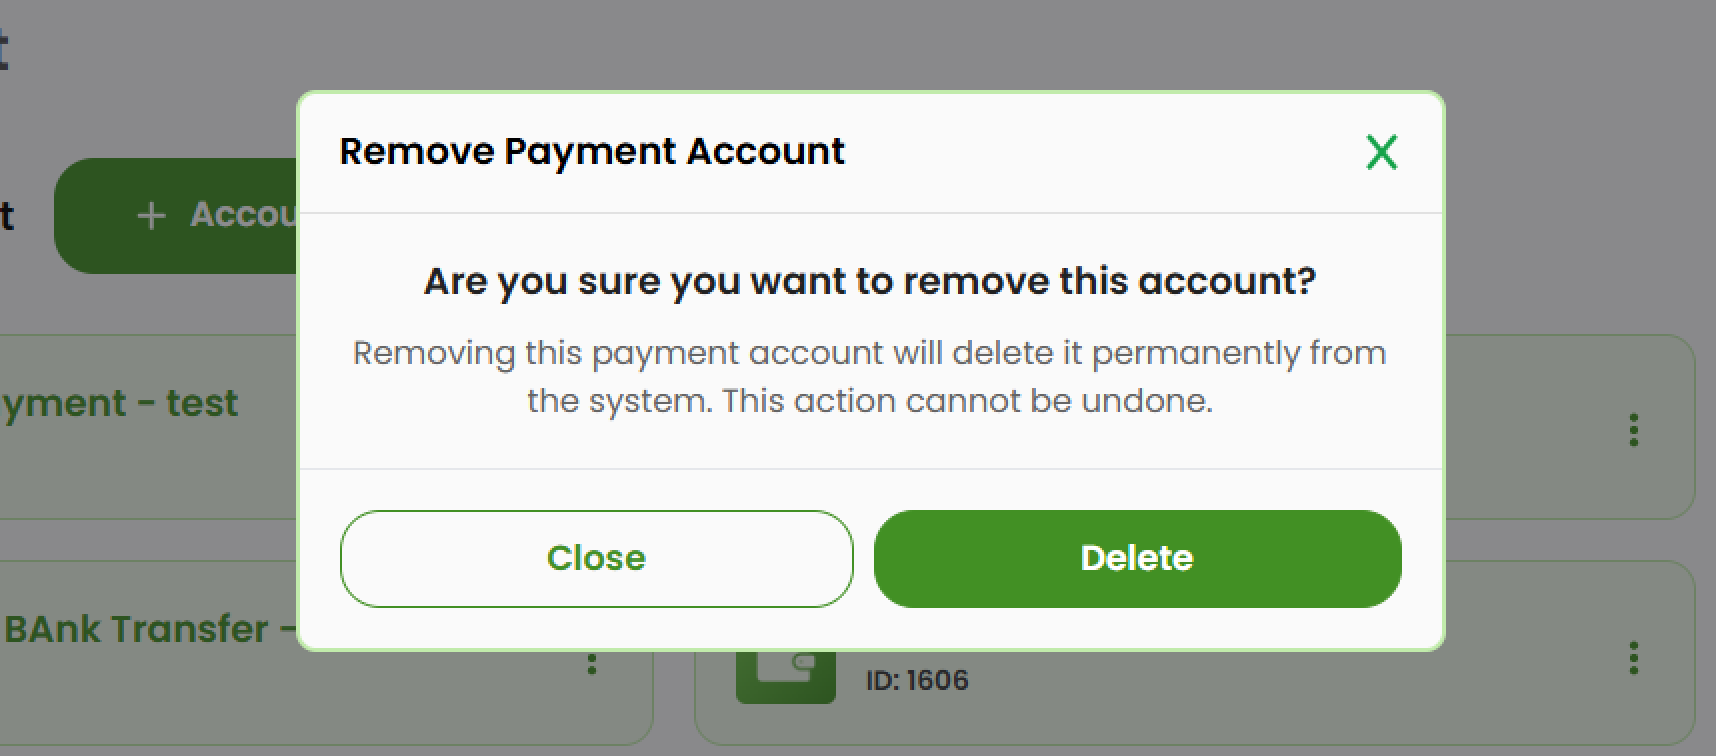
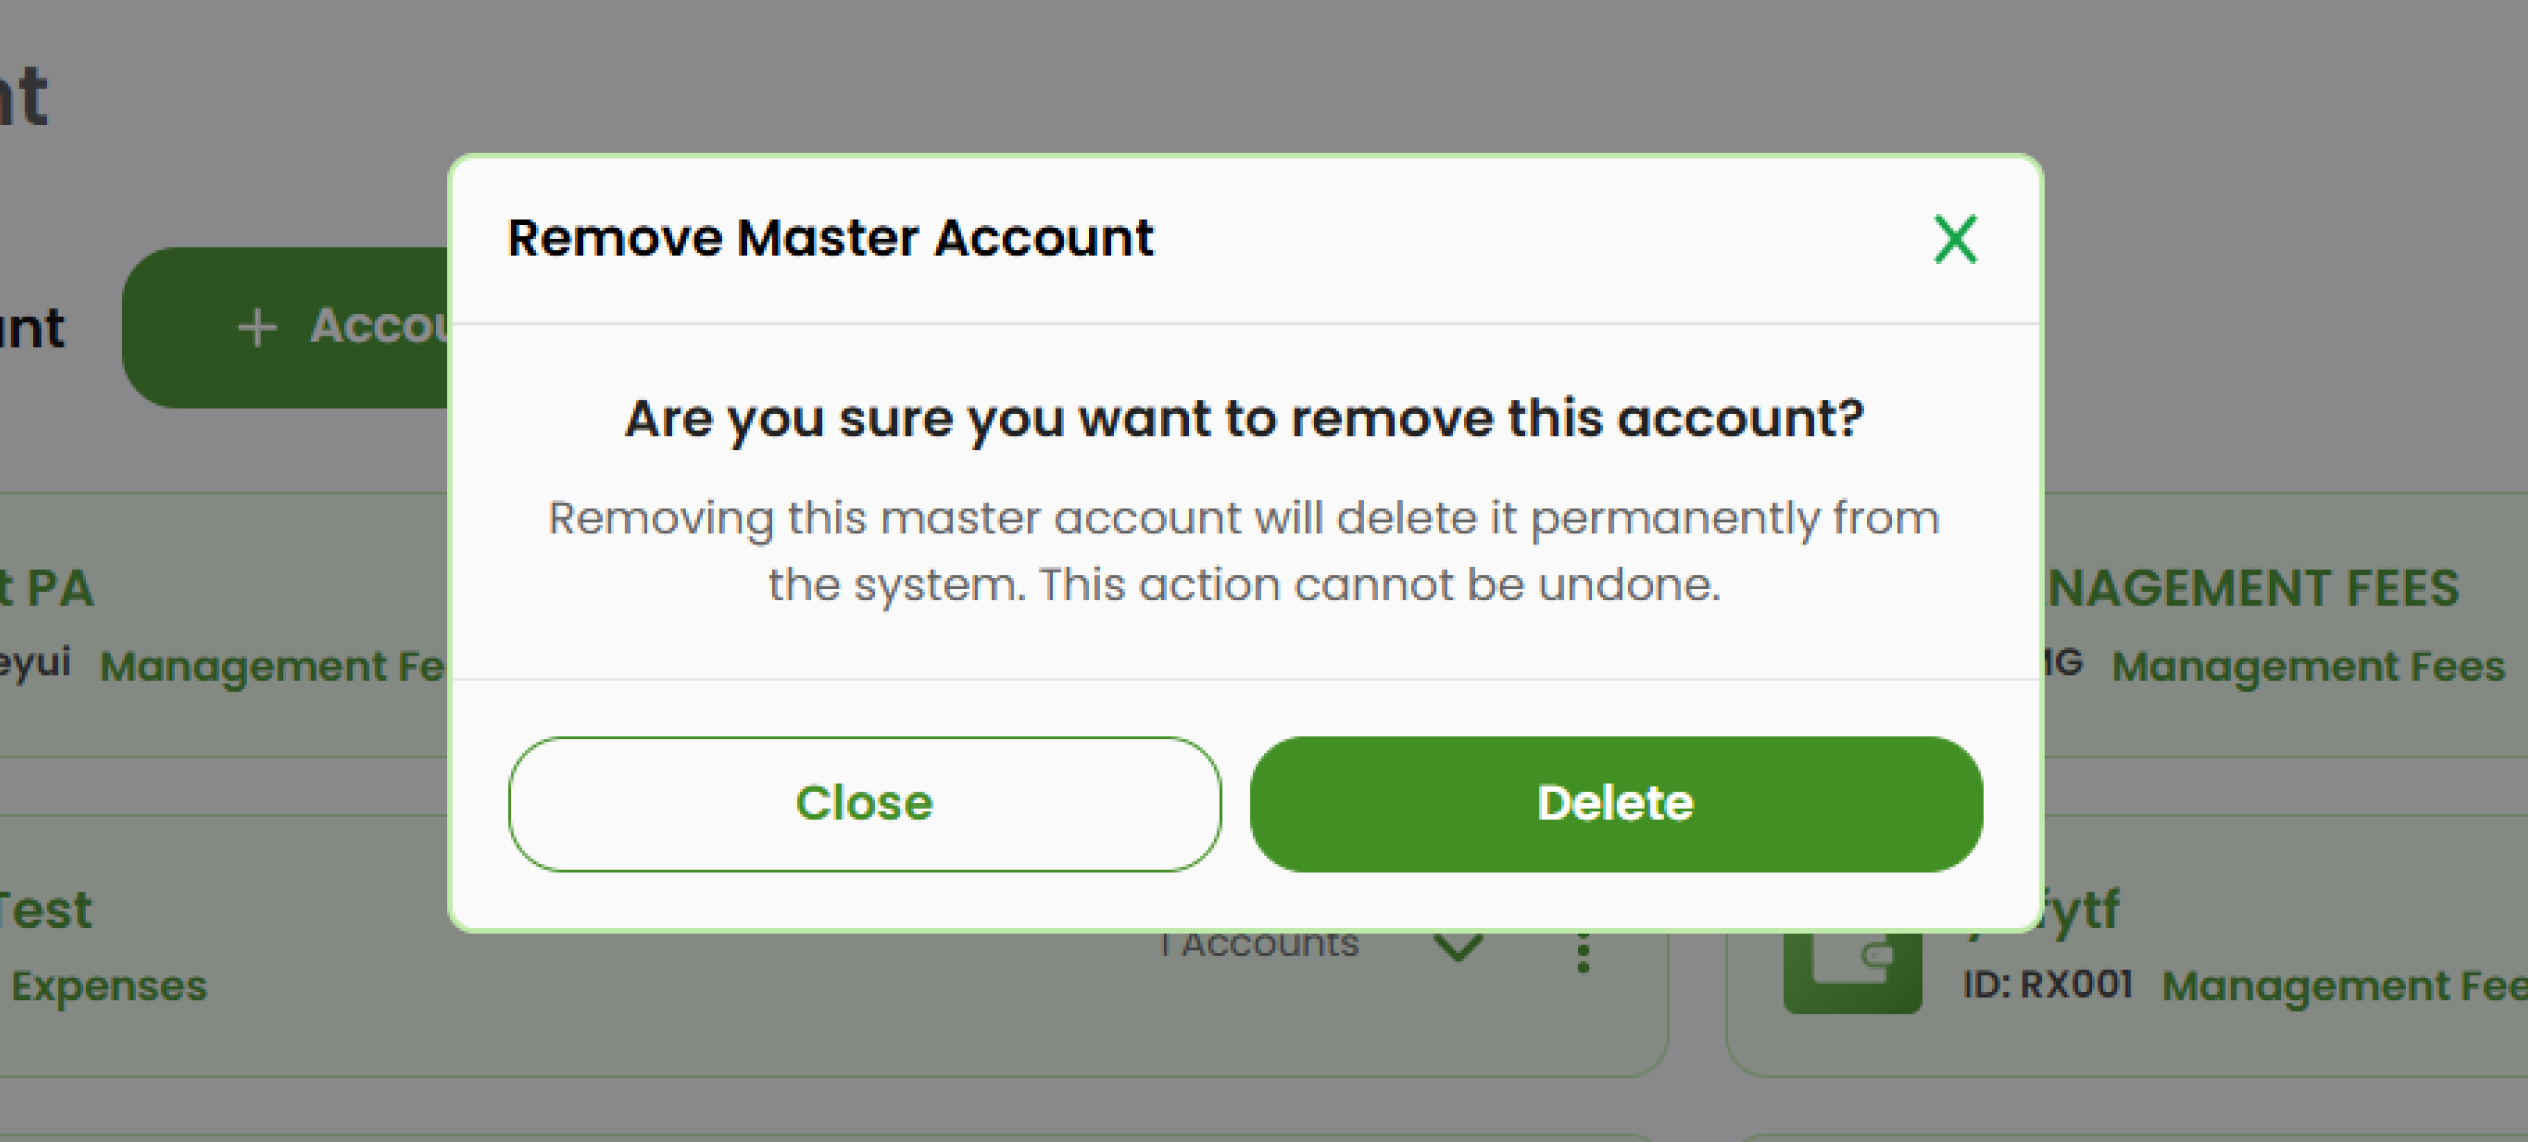
- Select Remove.
- A confirmation pop-up will appear. Click Delete to proceed or Close to cancel.
Delete Sub Account
- Click the arrow to expand the master account. It will shows you a list of the sub account.
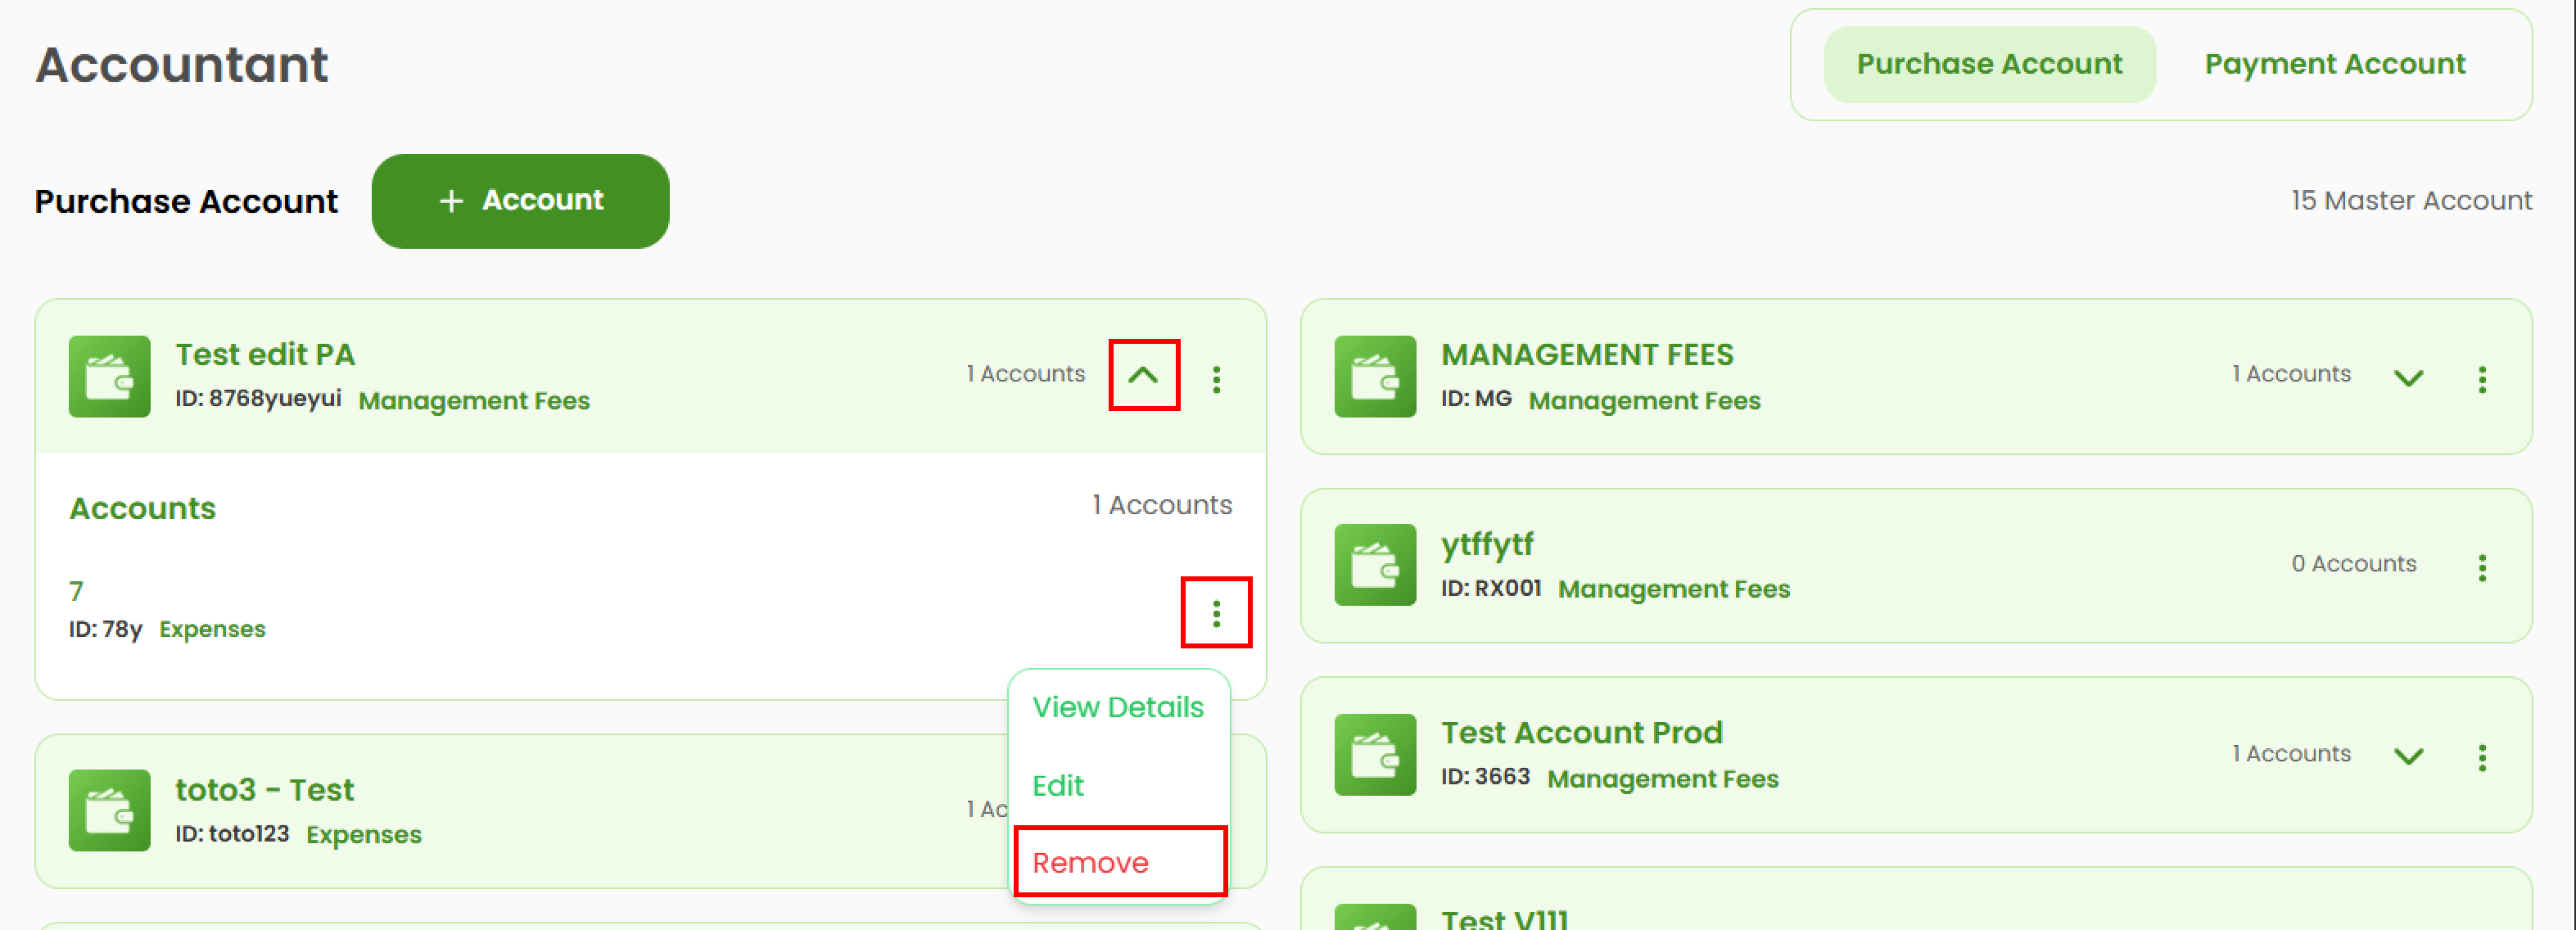
- Select the sub account, then click the three-dots icon (⋮).
- Select Remove.
- A confirmation pop-up will appear. Click Delete to proceed or Close to cancel.

Payment Account
Before managing payment accounts, ensure you are in the Payment section.
How to Add New Account
- Click the + Account button.

- A pop-up form will appear. Enter the Account Name.
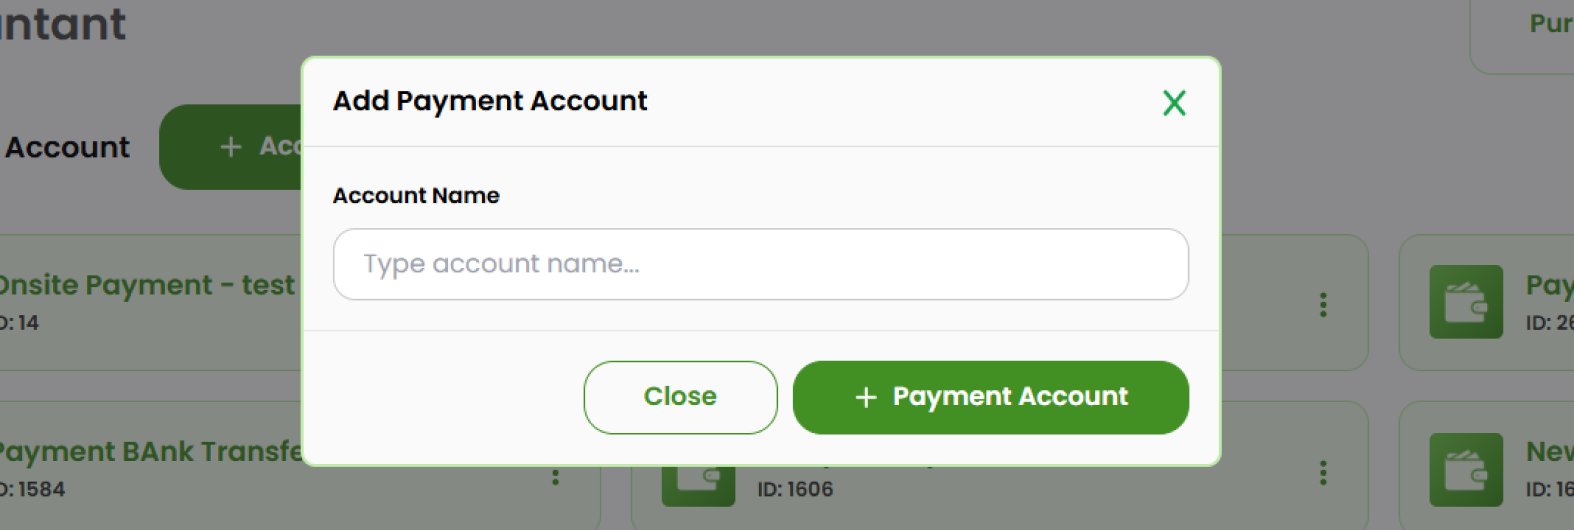
- Click + Payment Account to save and add the item to the list.
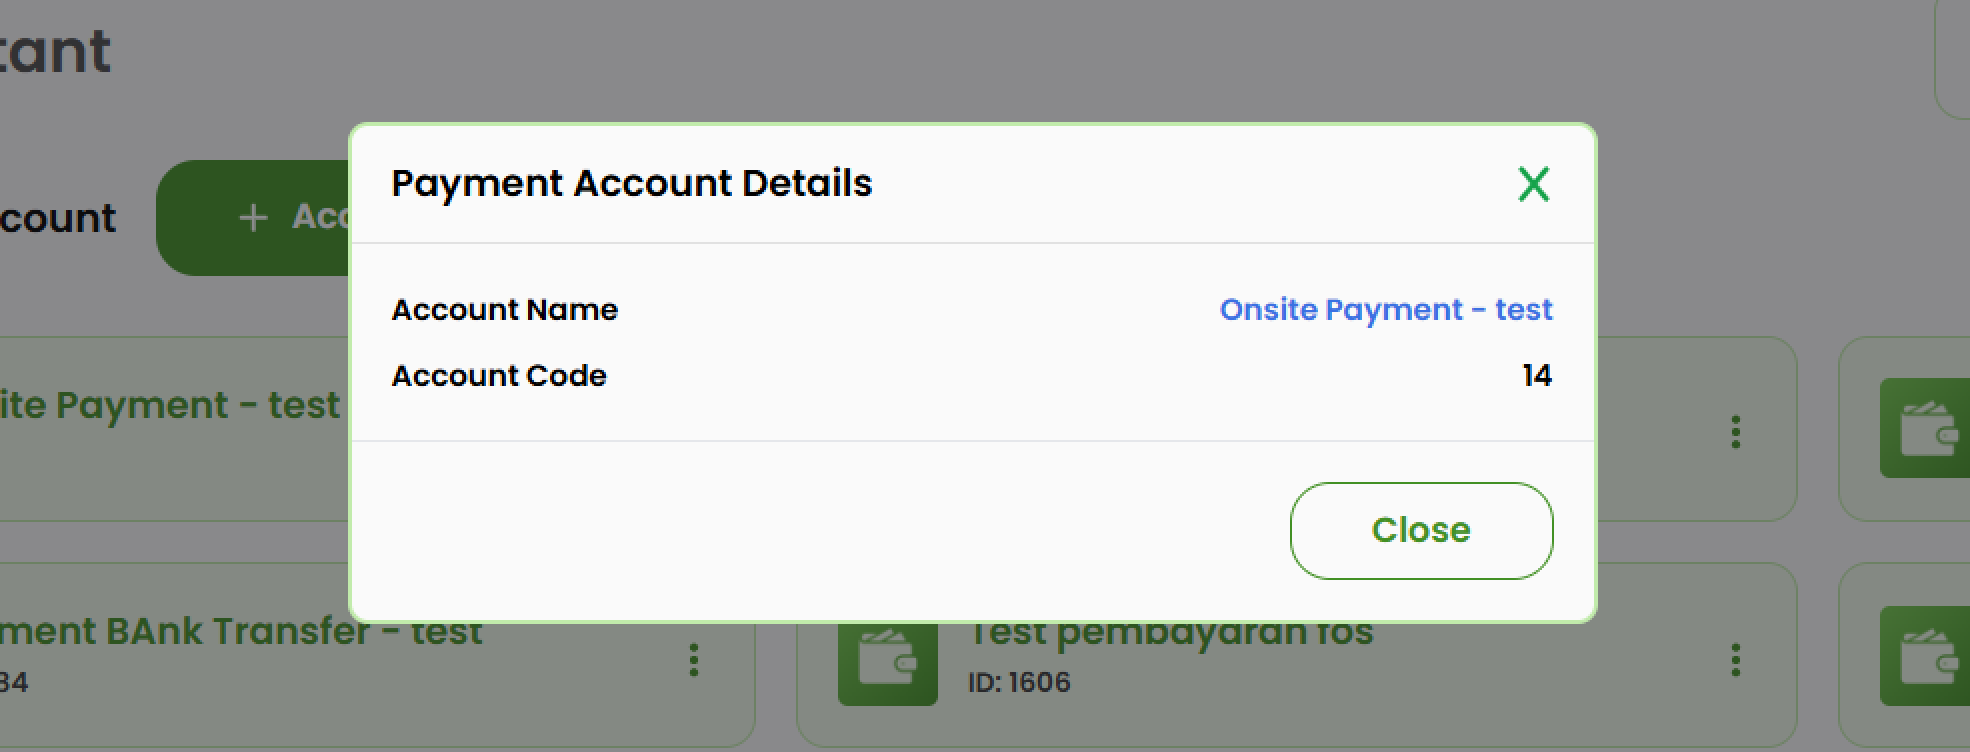
View Account's Details
- CSelect the account you want to review, then click the three-dots icon (⋮).
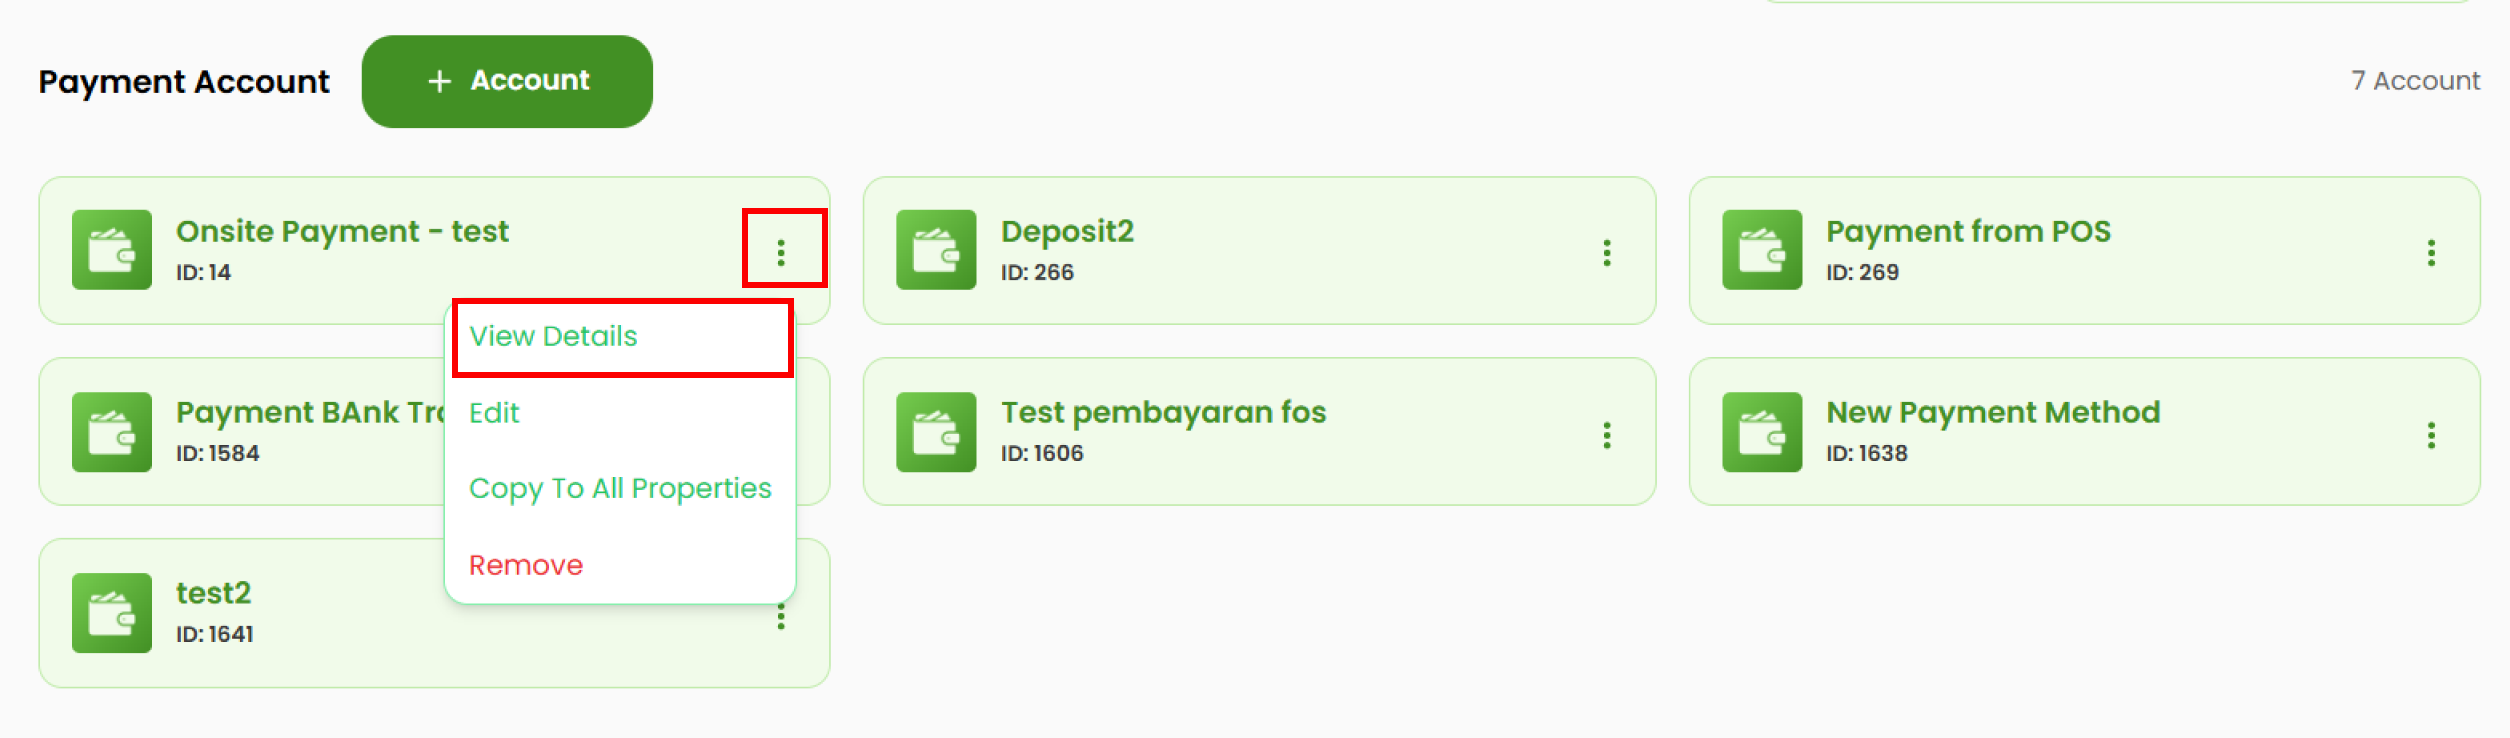
- Select View Detail.
- A pop-up will appear displaying the full details of the payment account.
Edit Account
- Choose the item you want to change. Click the three dots button (⋮) at the right side.

- Select Edit.
- A pop-up form will appear. Update the Account Name as needed.
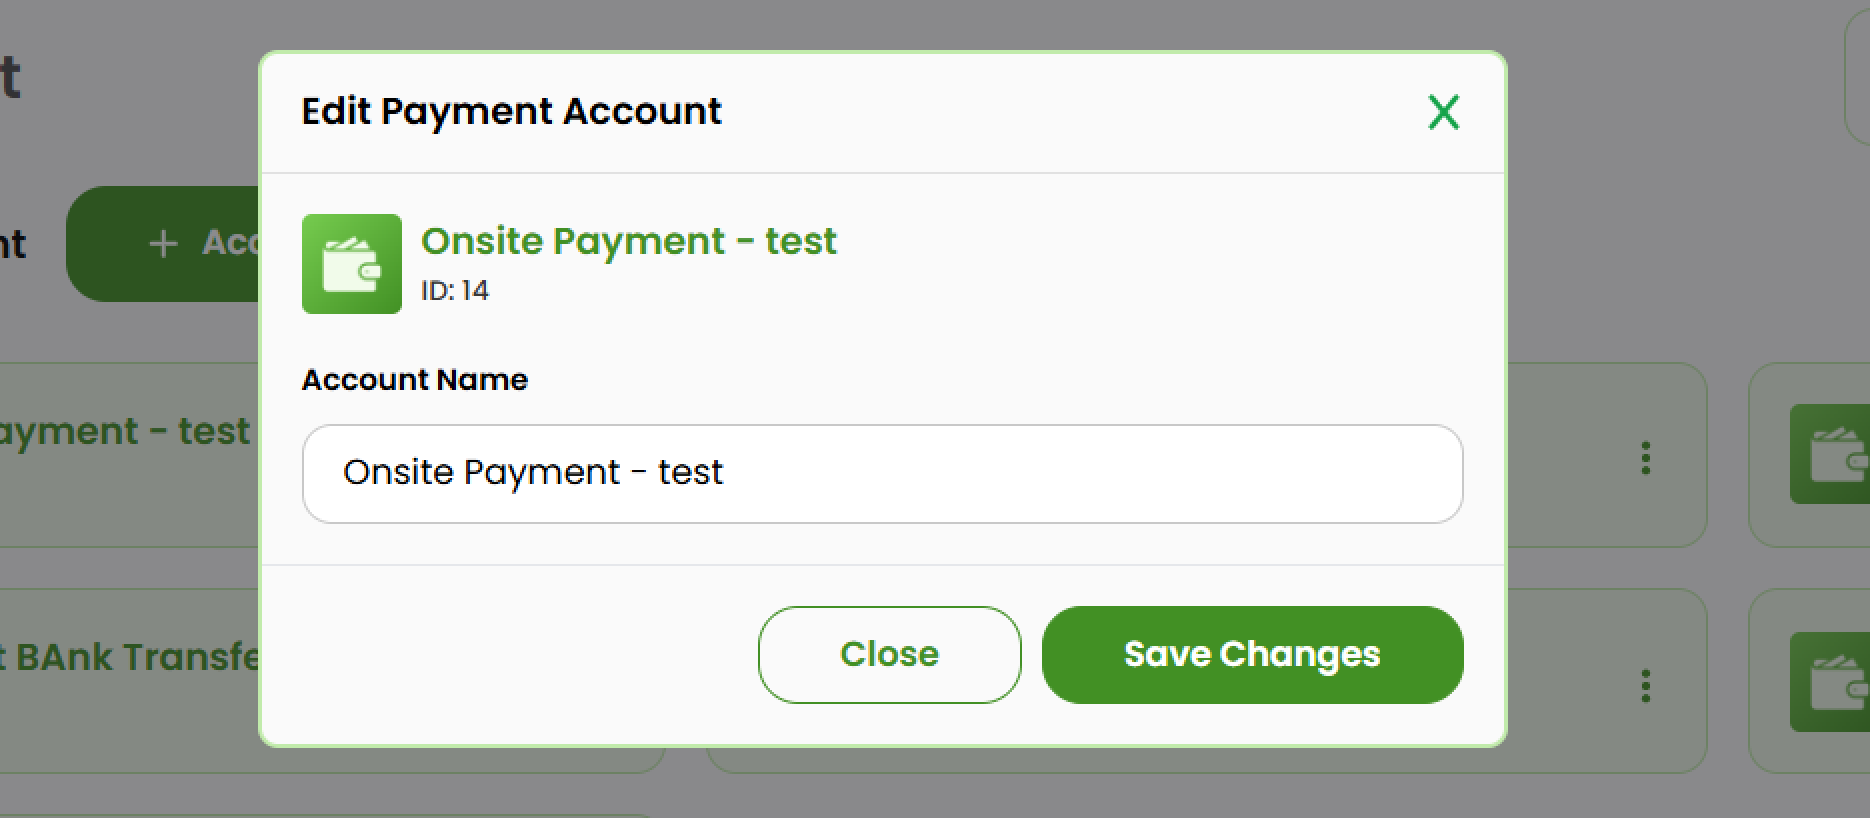
- Click Save Changes to apply the updates.
Copy Account
You can use Copy to All to replicate account settings across your properties.
- Click the three dots button (⋮) at the right side of the item you want to copy.
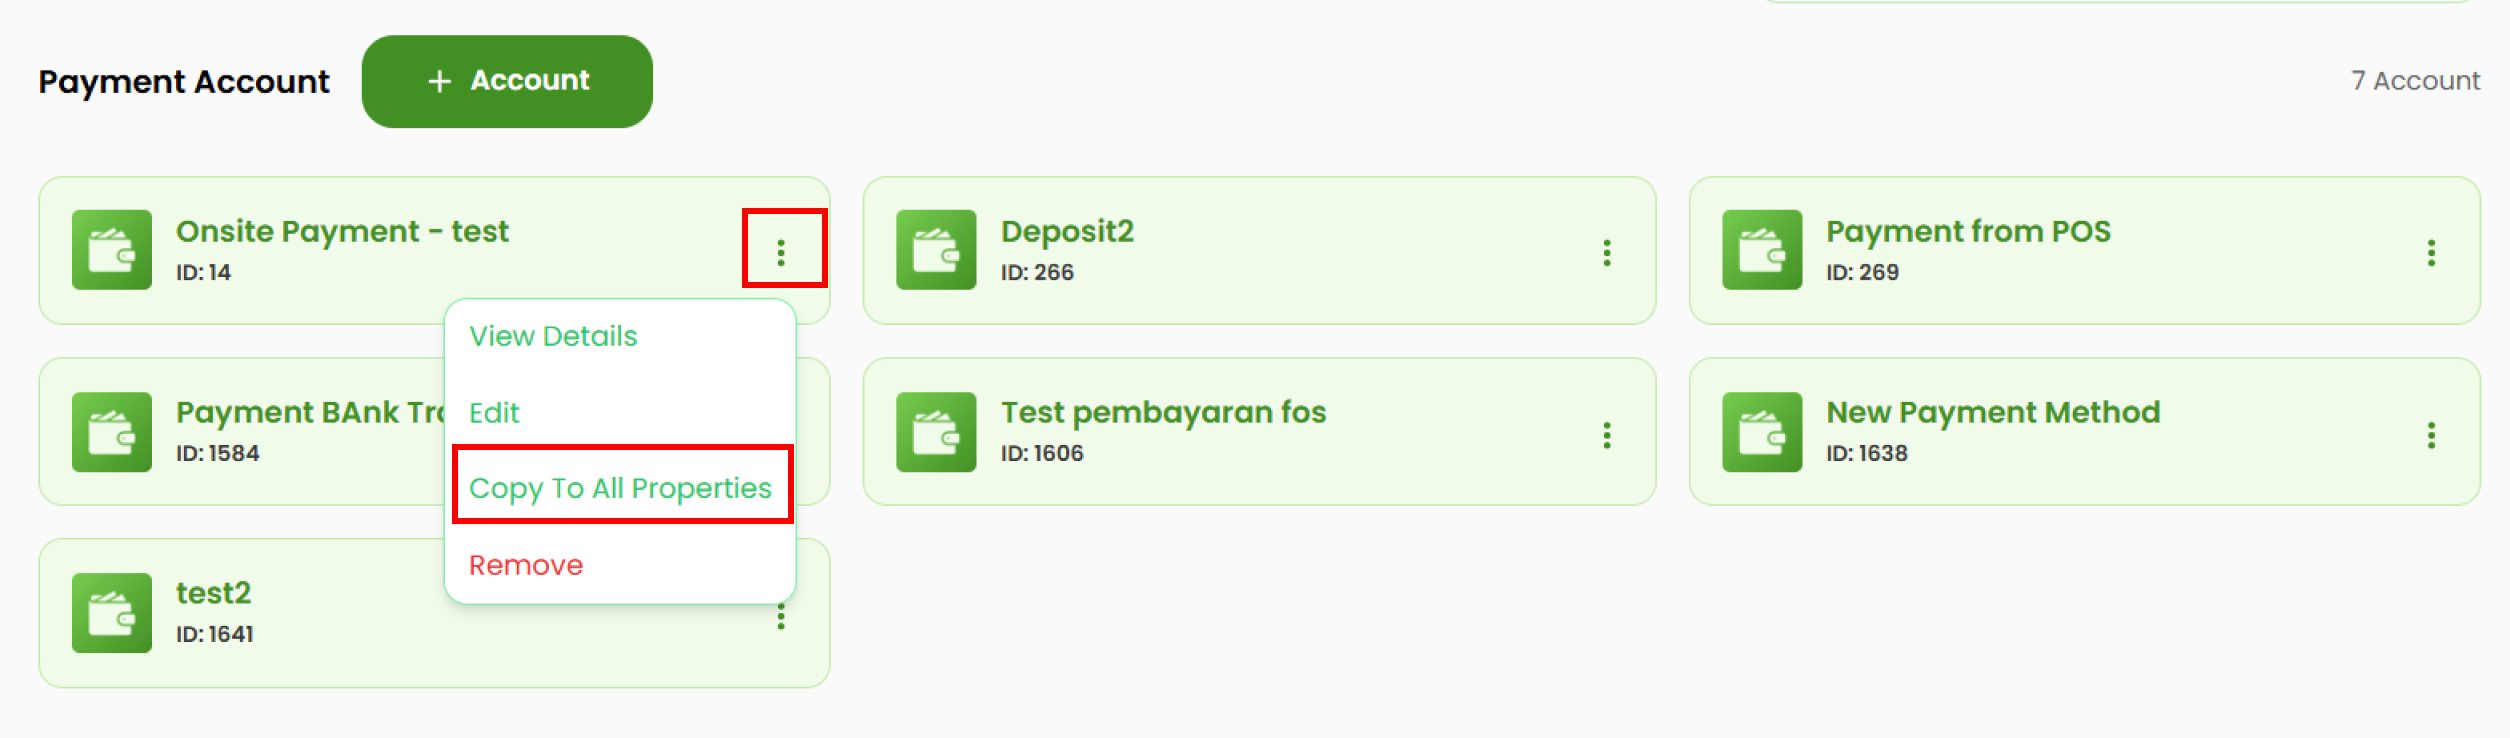
- Select Copy to All Properties.
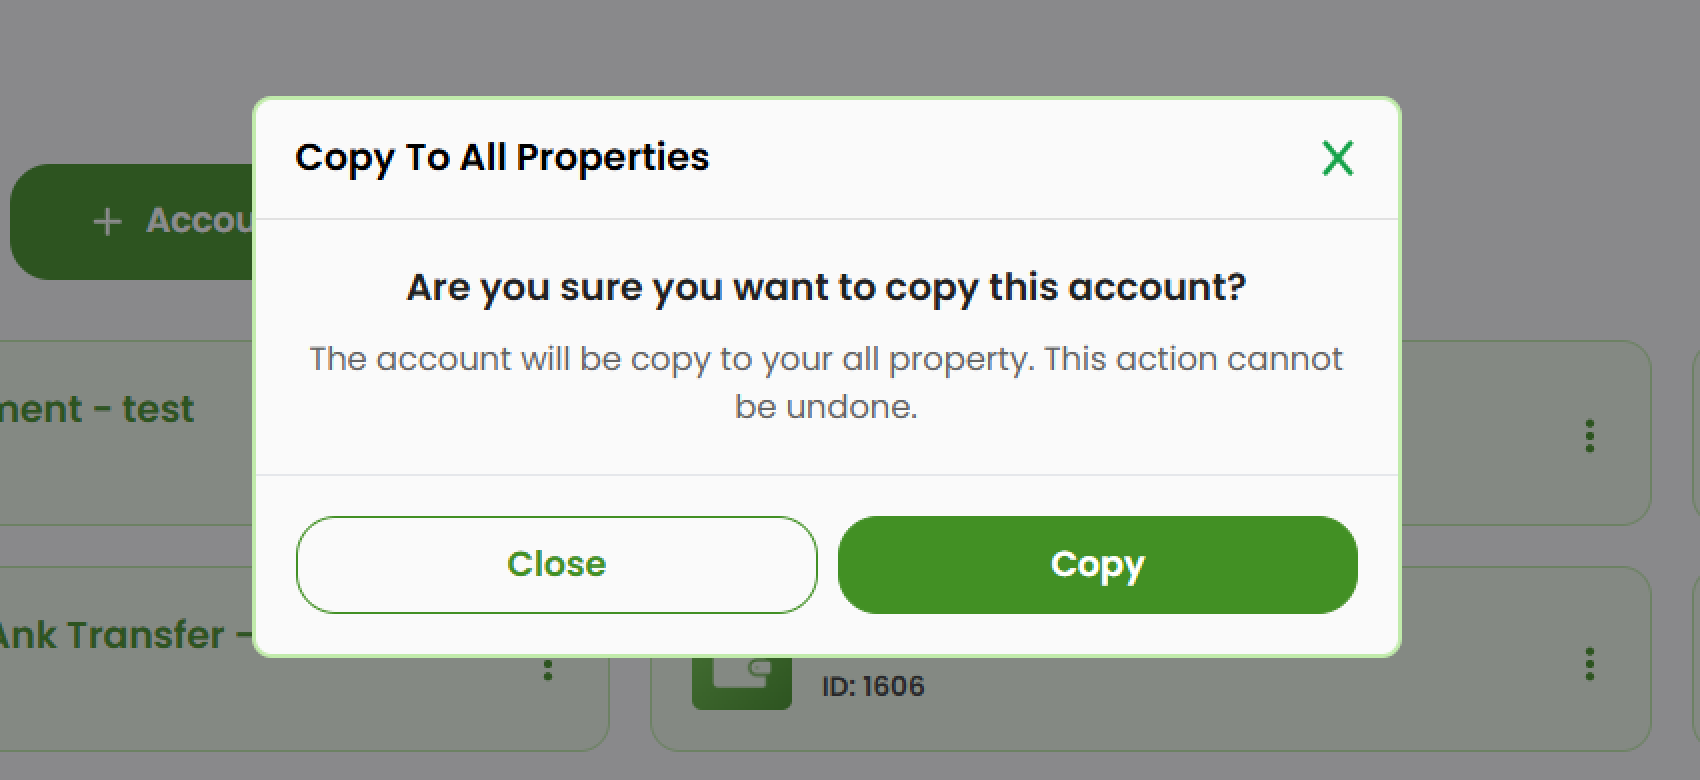
- A confirmation pop-up will appear. Click Copy to continue the process or Close to cancel.
Delete Account
- Select the account you want to delete, then click the three-dots icon (⋮).
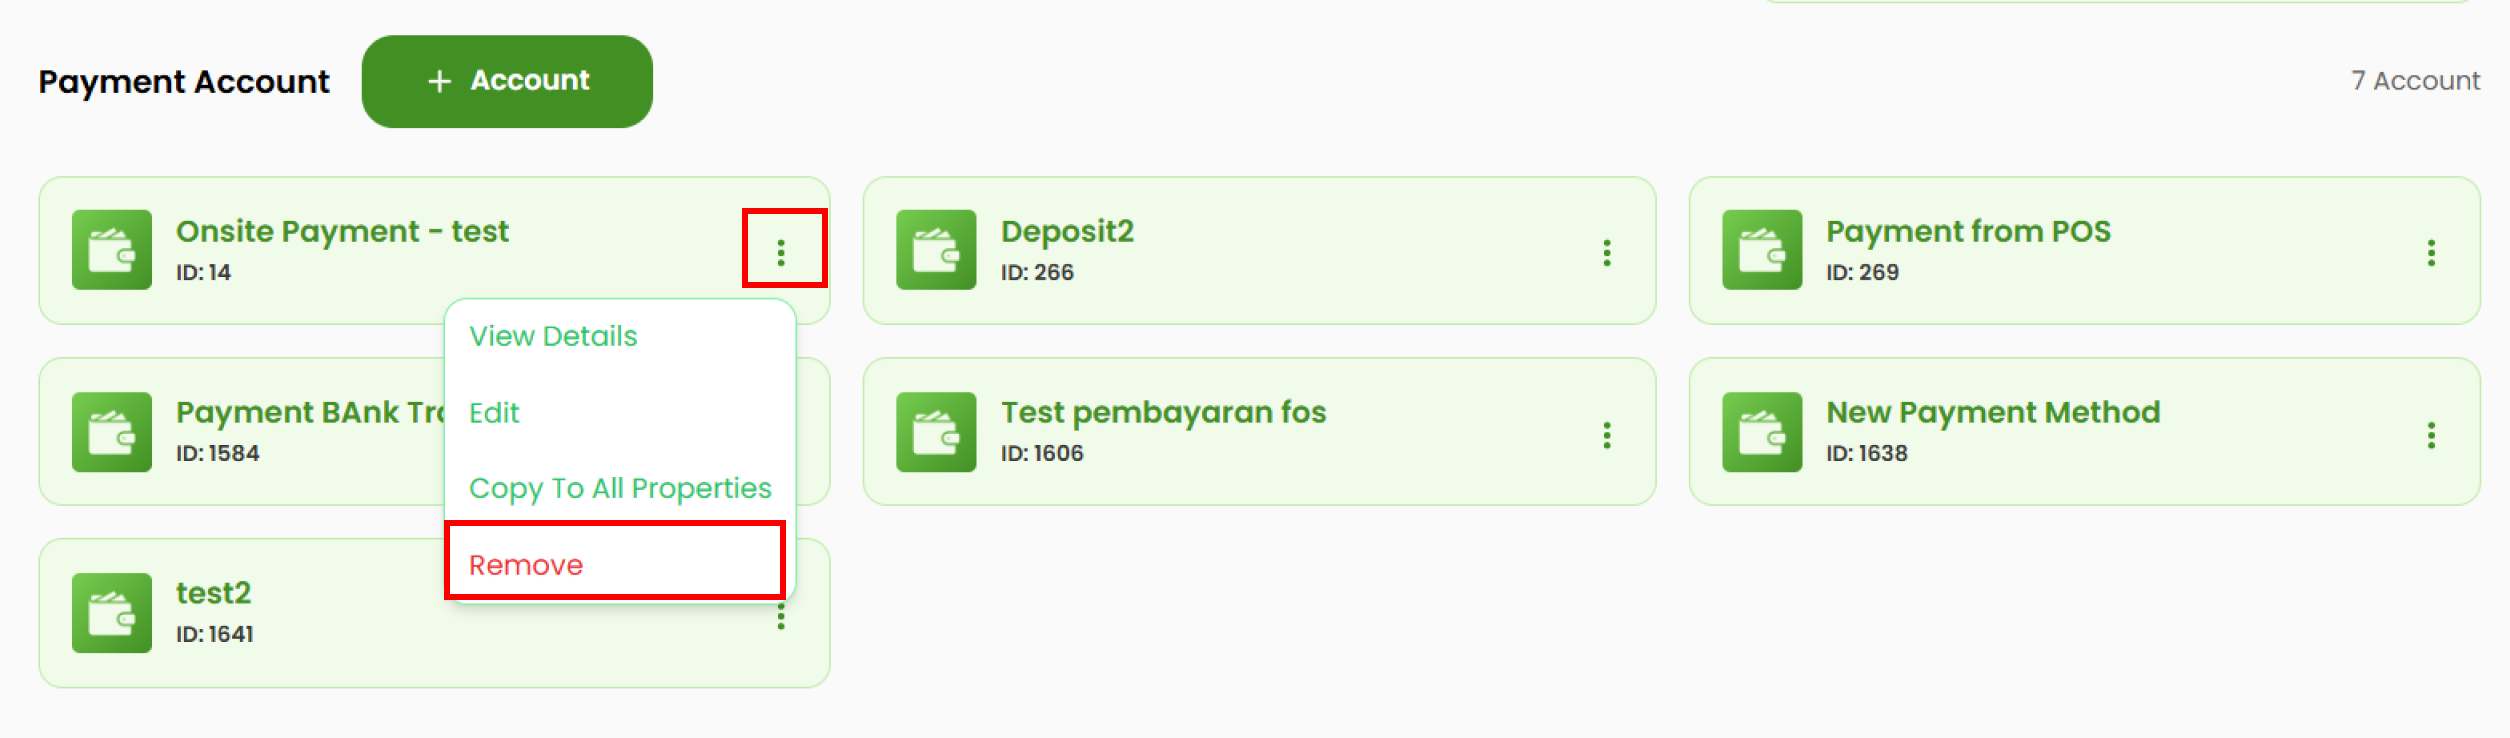
- Select Remove.
- A confirmation pop-up will appear. Click Delete to proceed or Close to cancel.