Introduction
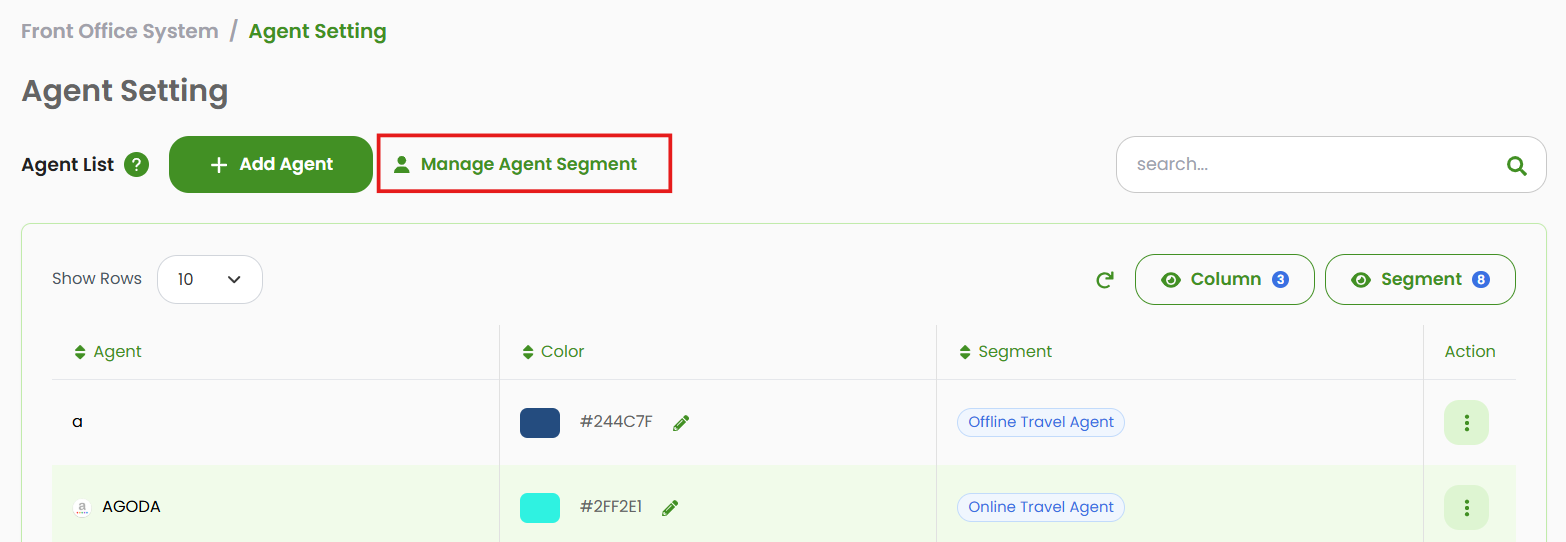
The Agent Setting page allows property managers to manage both default online agents and offline agencies. Each agent can be customized with a unique color code to help easily identify booking sources in reports and the booking chart.
View and Navigate
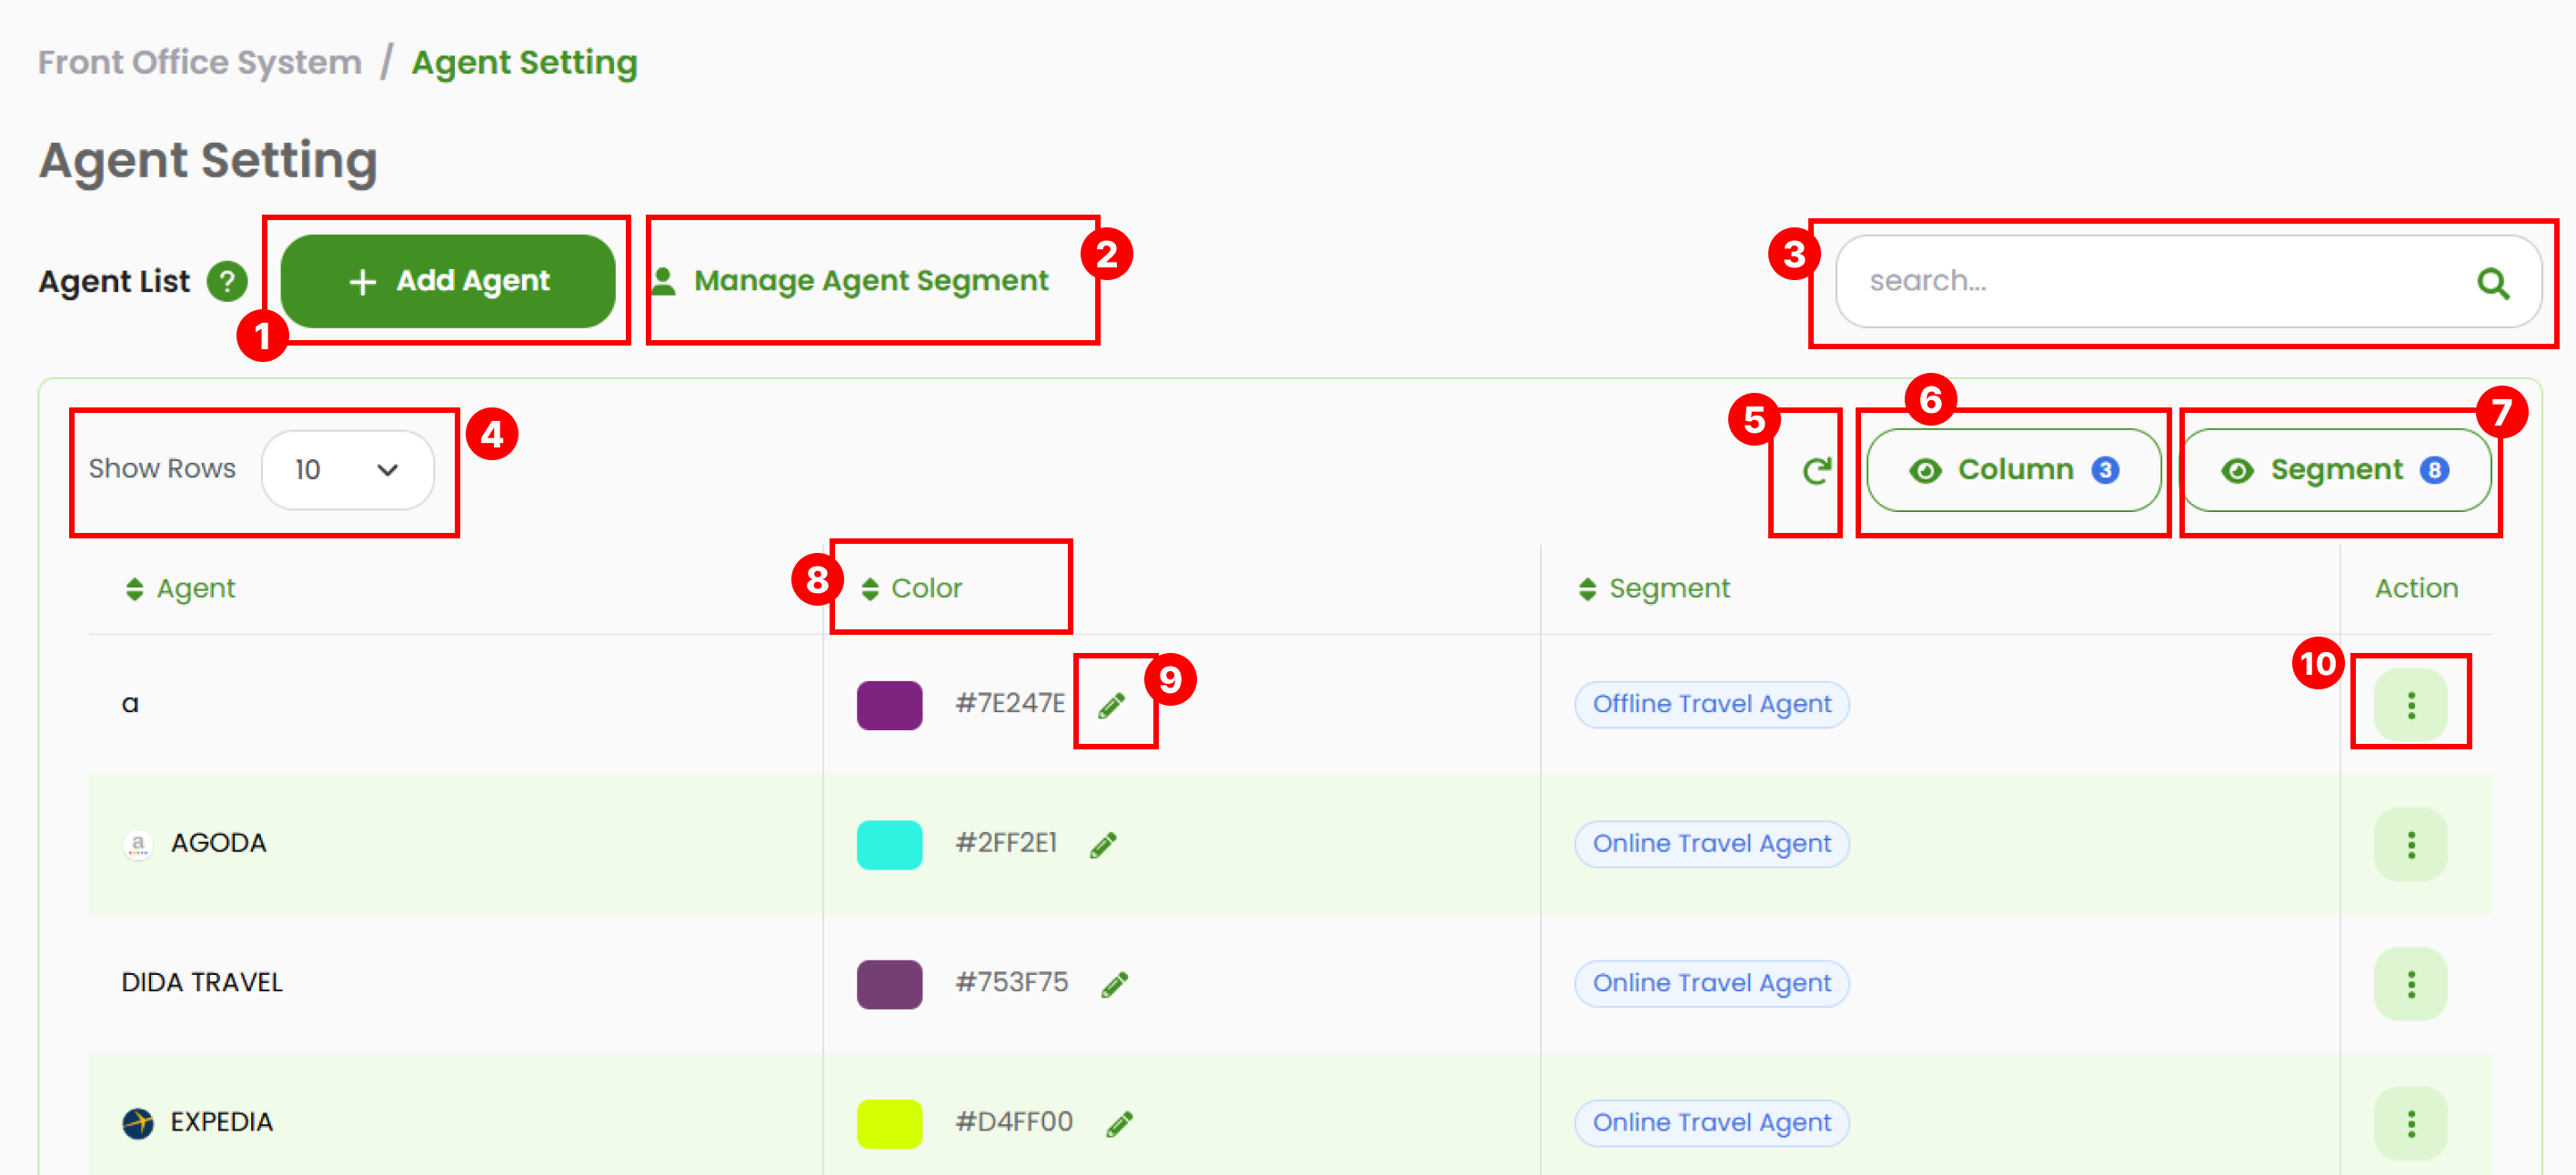
- Add New Agent to create a new agent color configuration item.
- Use the Manage Segment button to manage the list of segments assigned to your agents.
- Search for specific agents by typing a keyword (agent name or HEX color code). The table will display matching results.
- Adjust the number of displayed rows to 10, 25, 50, 75, 100, or All.
- The Refresh button clears any applied sorting and restores the table to its default order.
- Use Column Visibility to select which columns to display (Agent, Color, Segment).
- Use the Segment Filter to display only agents belonging to specific segments. You can select one or multiple segments to show.
- Sort the data in the table by clicking any column header.
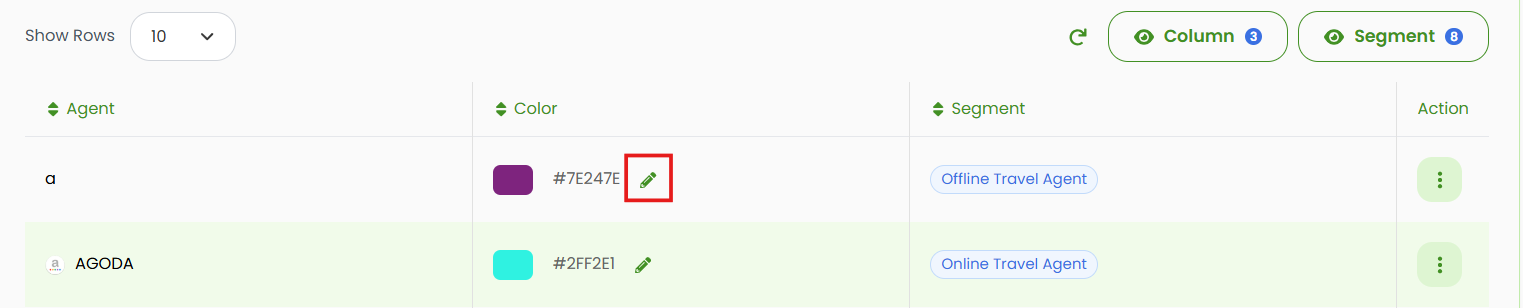
- To update an agent’s color, click the Edit button. Refer to How to Change Agent Color for details.
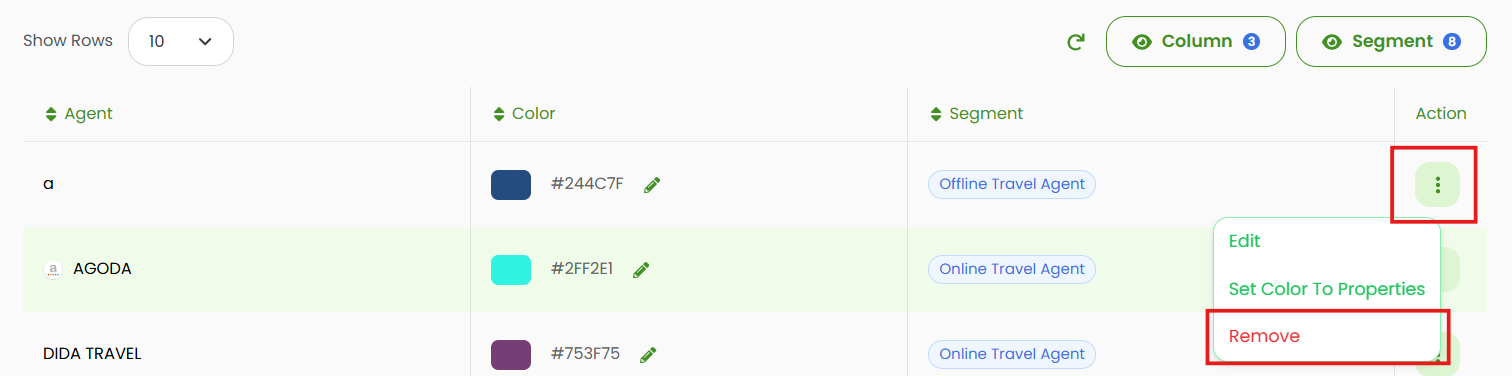
- The Action column provides options to update or delete the selected agent.
Manage Agent
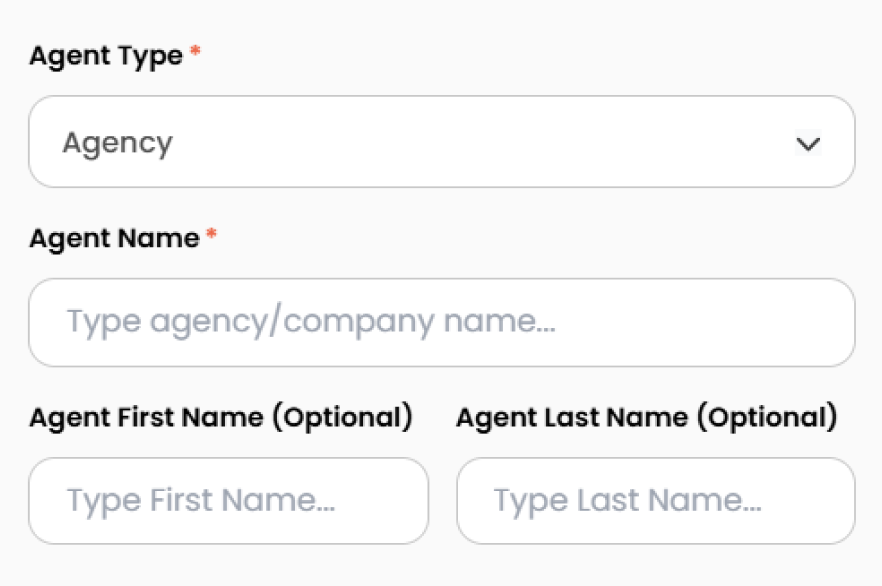
Add New Agent
- Click the Add Agent button to open the pop-up form.

- Complete all required fields:
- Agent Type : Select type between
AgencyorCompany. - Agent Name : Enter the agency or company name.
- Agent First / Last Name : Enter the contact person's name (optional).
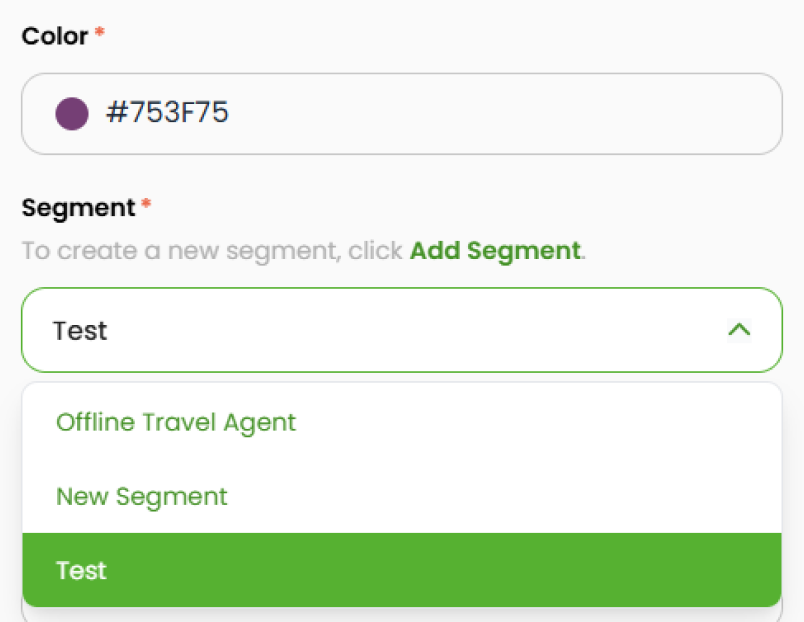
- Color : Select a color code to identify this agent.
- Segment : Choose the segment for this agent. If you need to create a new one, refer to Add New Segment to see the guidance.
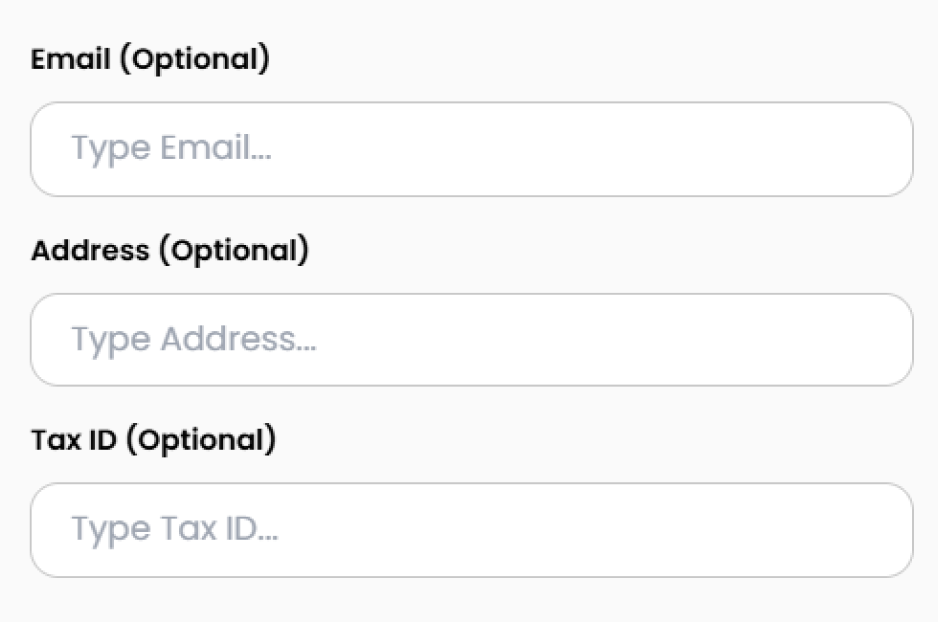
- Email : Enter the agent’s email (optional).
- Address : Enter the physical agent’s address (optional).
- Tax ID : Enter the tax identification number (optional).
- Agent Type : Select type between
- Click the Add Agent to save and add the new item to the list.

[!NOTE]
Troubleshooting Add a New Agency or Company
Form does not appear after clicking “Add Agency”
- Refresh the page and try clicking the button again.
- Ensure your browser allows pop-ups and JavaScript is enabled.
- Check if you have the correct permissions to add a new agency.
Unable to save the agency (button unresponsive or no changes appear)
- Confirm that all required fields (Type, Name, Email, First Name, Last Name, Address) are filled in correctly.
- Check for invalid email format in the Email field.
- Ensure no duplicate agency name is being added.
New agency does not show up after submission
- Wait a few seconds to allow the page to update, or refresh the page to see if it appears.
- Verify if there are any filters applied that might hide the new entry.
- If the issue persists, clear your browser cache and retry.
Color configuration option not visible
- Hover over or click the newly added agency on the right side panel to reveal configuration options.
- Ensure UI settings are not minimized or collapsed.
Error message appears when submitting the form
- Review the form for any missing or incorrectly formatted input.
- Check if your internet connection is stable and retry submission.
- If applicable, contact your system administrator for further assistance.
Change Agent Color
- In the Agents List, click the Edit button (pencil icon) next to the item you want to update.
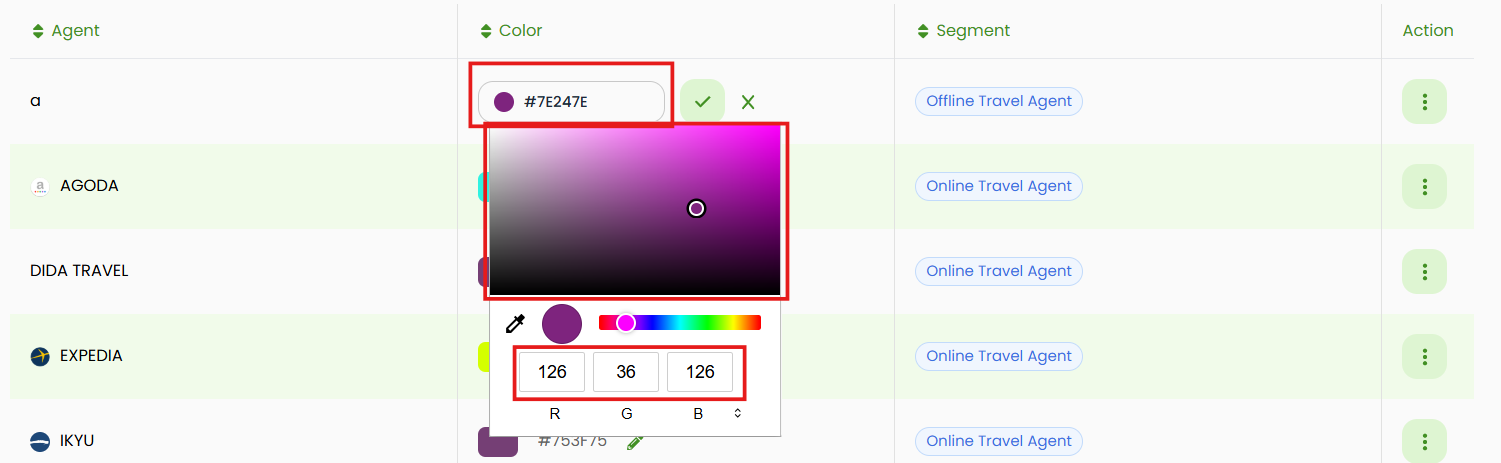
- Click the Color field to open a color picker. You can change the color by
- Enter a specific RGB code, or
- Drag the selector to choose the color.
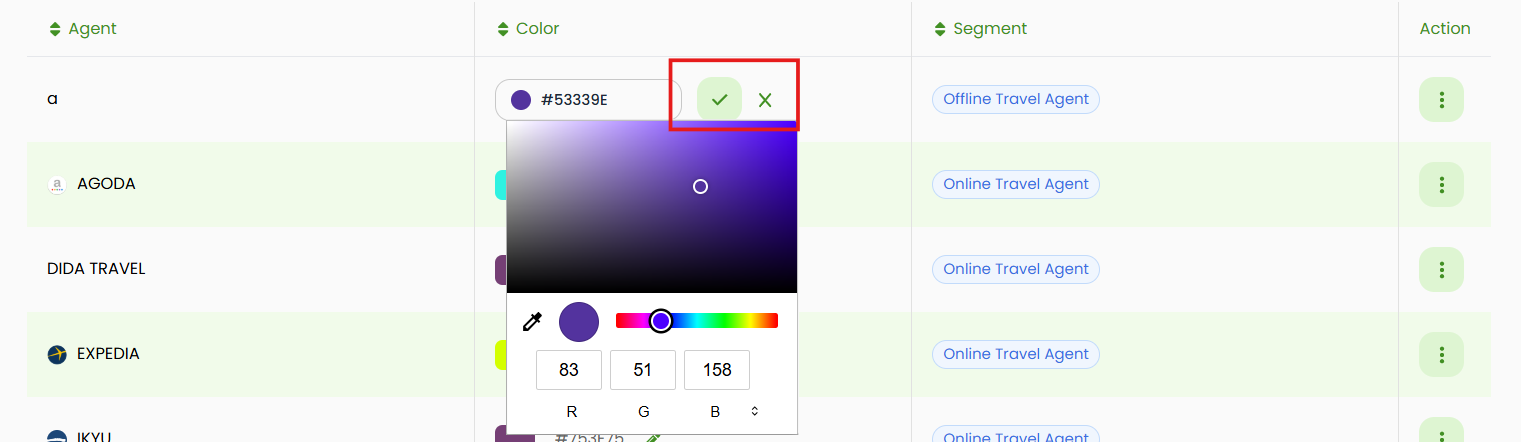
- Click the Check (✓) button to save the new color, or click the Cancel (x) button to discard the change.
[!NOTE]
Troubleshooting Change Agent Color
Color picker does not appear when clicking the color field
- Ensure your browser supports JavaScript and it is enabled.
- Try refreshing the page and clicking the color field again.
- Confirm that you have permission to edit agency settings.
Unable to save the new color (Change Color button unresponsive)
- Make sure a valid color is selected from the picker.
- Wait a moment after clicking and ensure the UI updates.
- Check your internet connection before submitting changes.
Color does not update on calendar or reports after saving
- Try refreshing the page or navigating to the calendar/report again.
- Clear your browser cache to ensure the latest settings are loaded.
Set Color to Property
The Set Color to Properties feature allows you to assign a specific color to one or multiple properties associated with an agent. This helps ensure consistent visual identification across booking charts, reports, and multi-property environments.
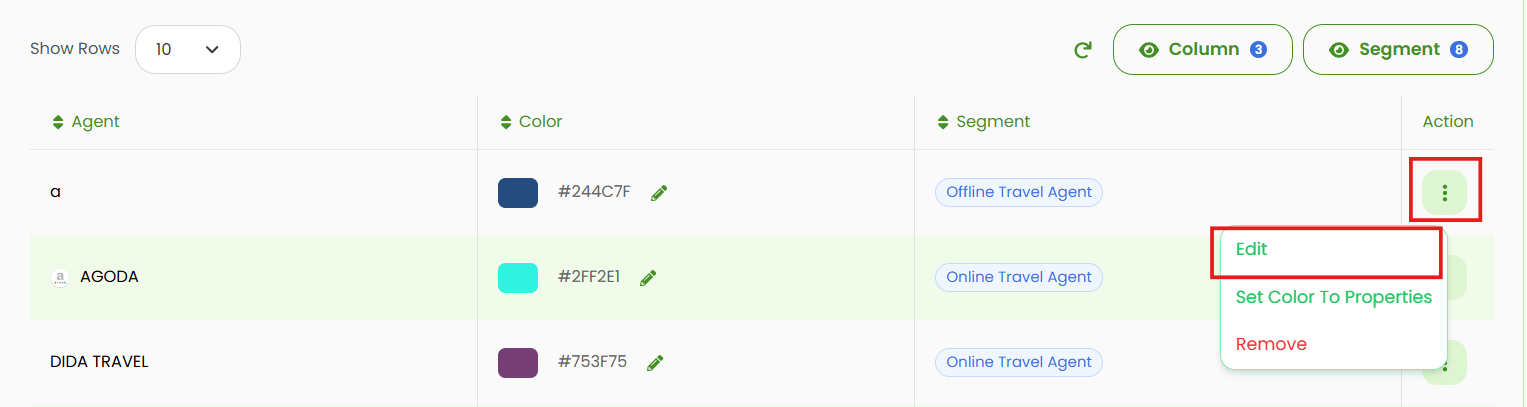
- In the Agents List, click the three dots (⋮) button in the Action column. Then, select Set Color To Properties from the dropdown menu.
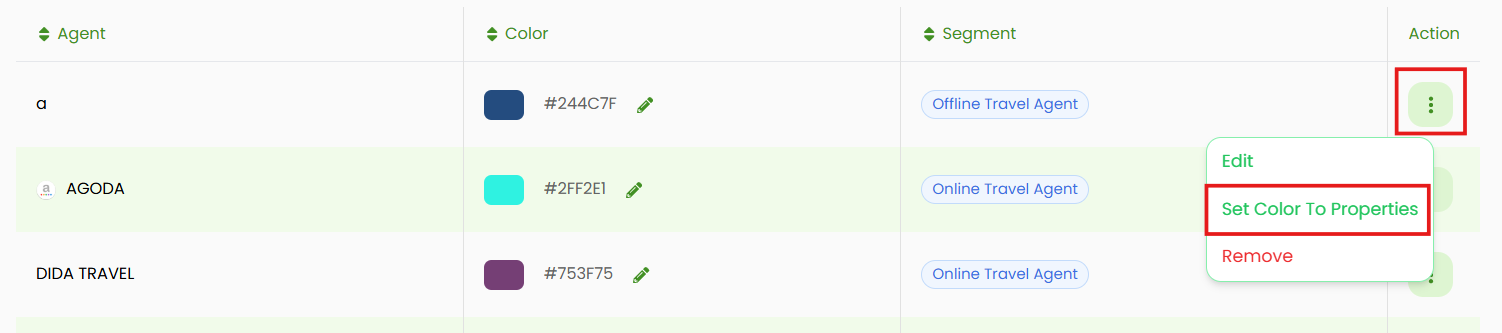
- A pop-up window will appear displaying:
- The selected color code.
- A list of available properties linked to your account.
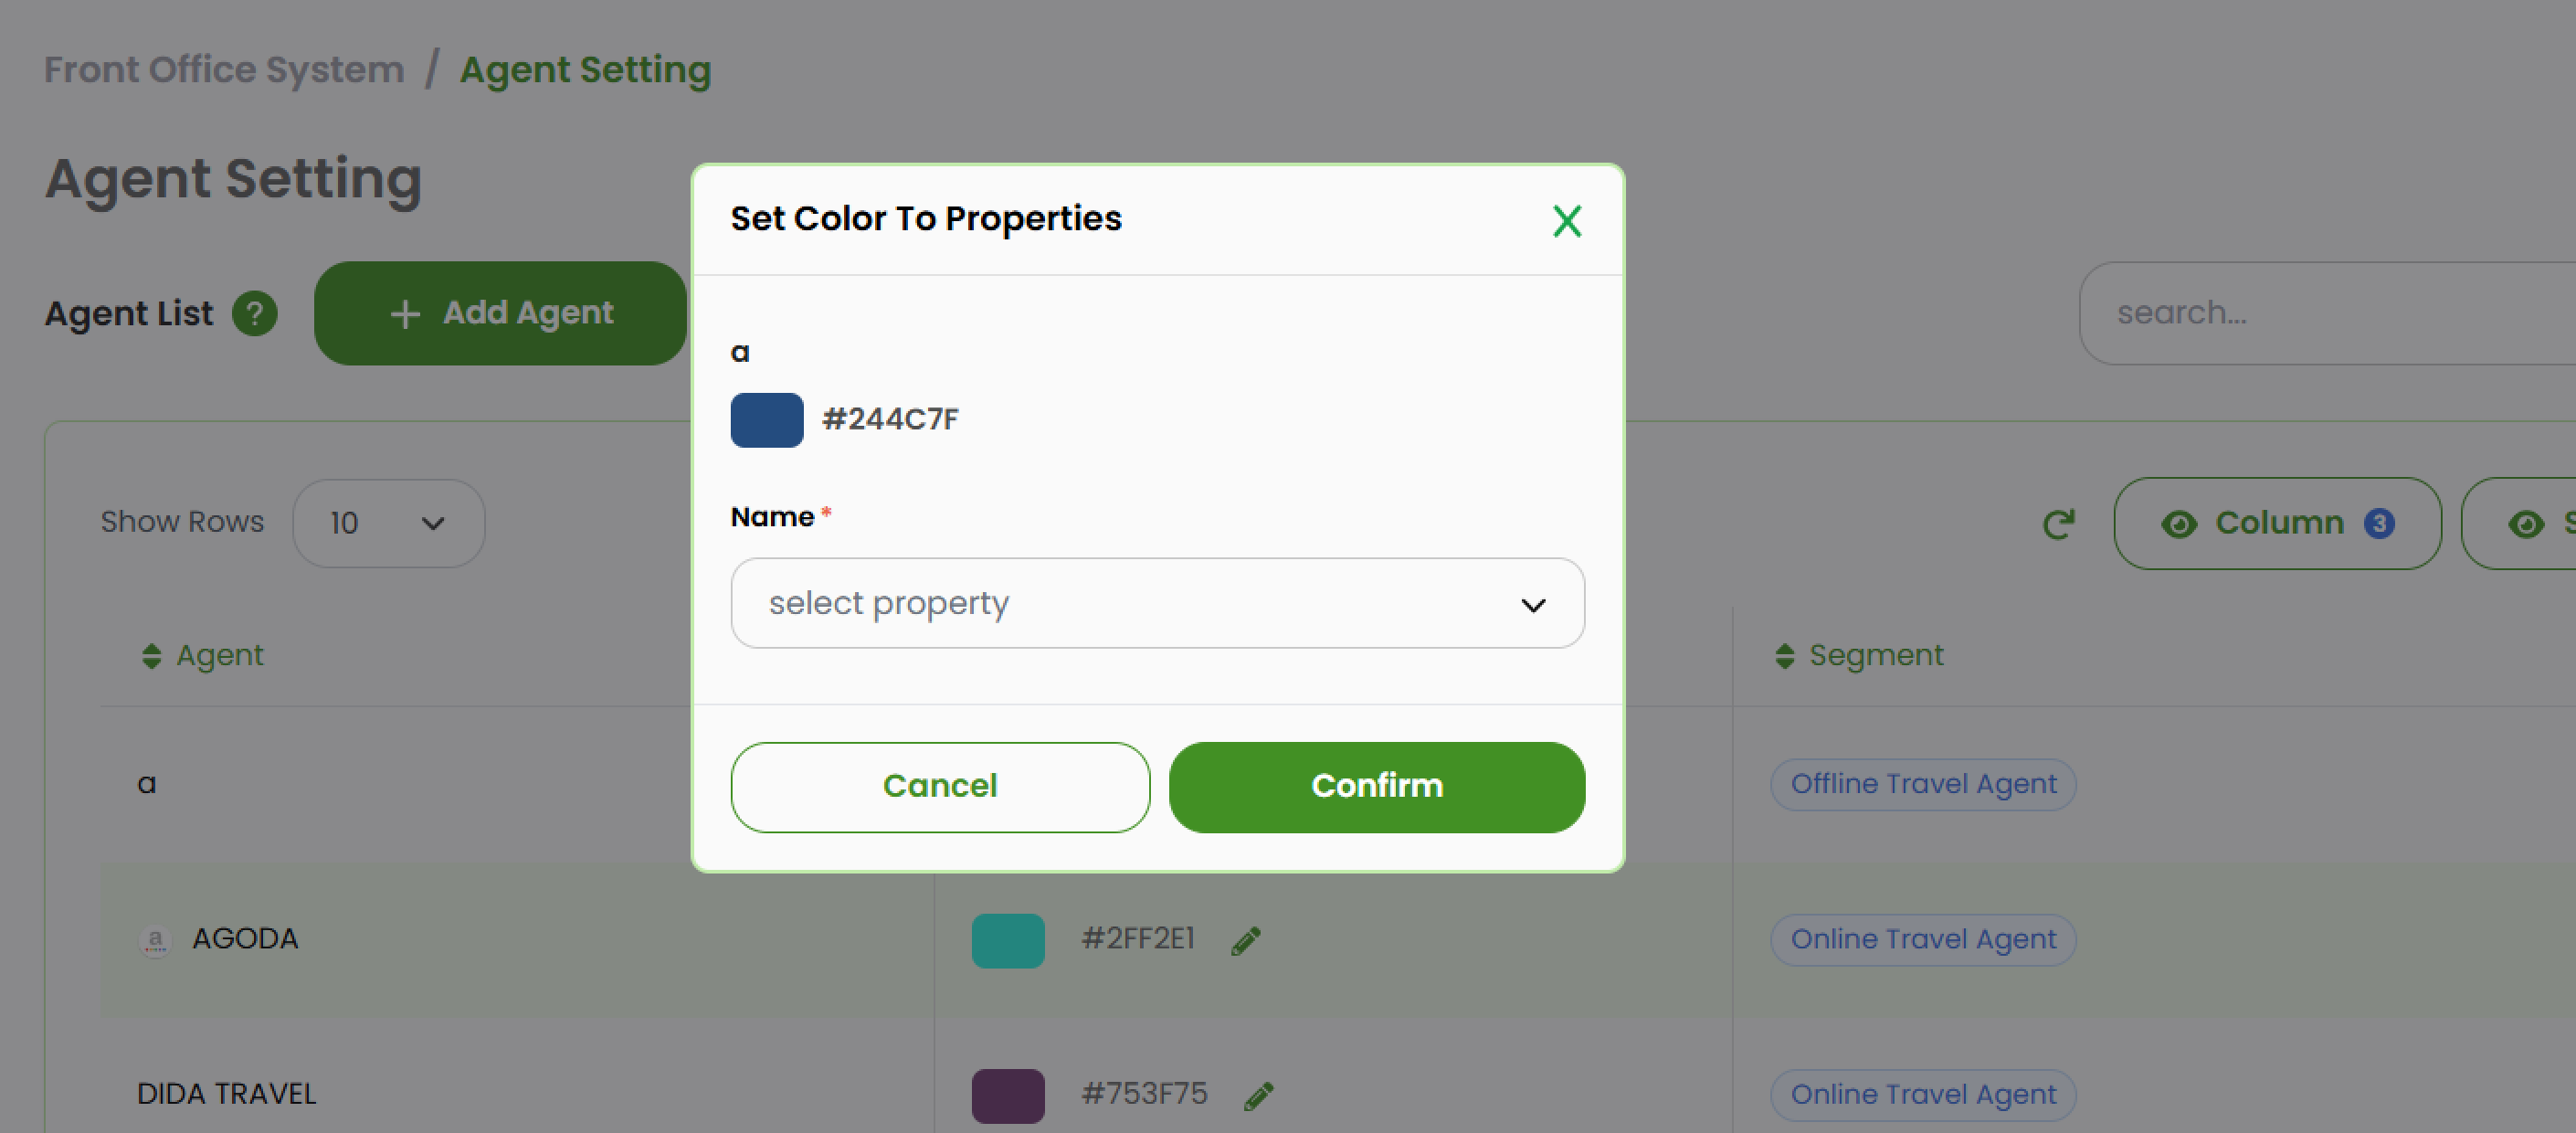
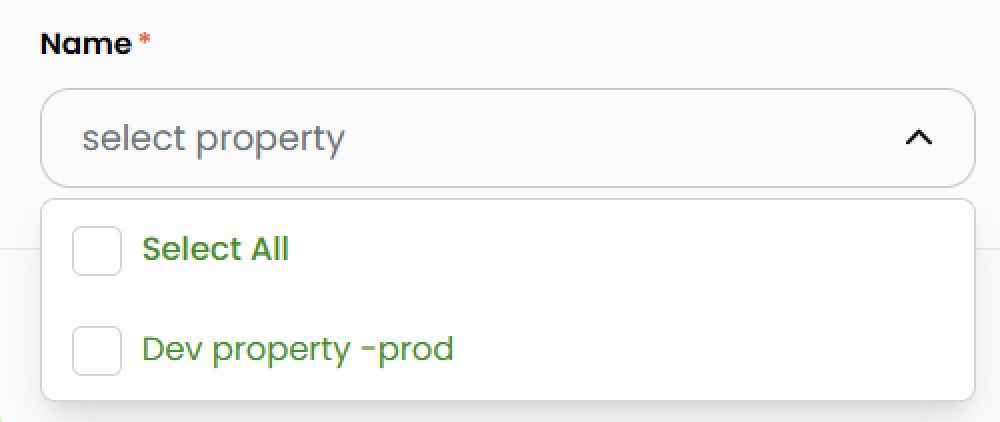
- In the Name field, select one or multiple properties to which the color should be applied.
- Click Confirm to save the configuration. Click Cancel to discard the changes.
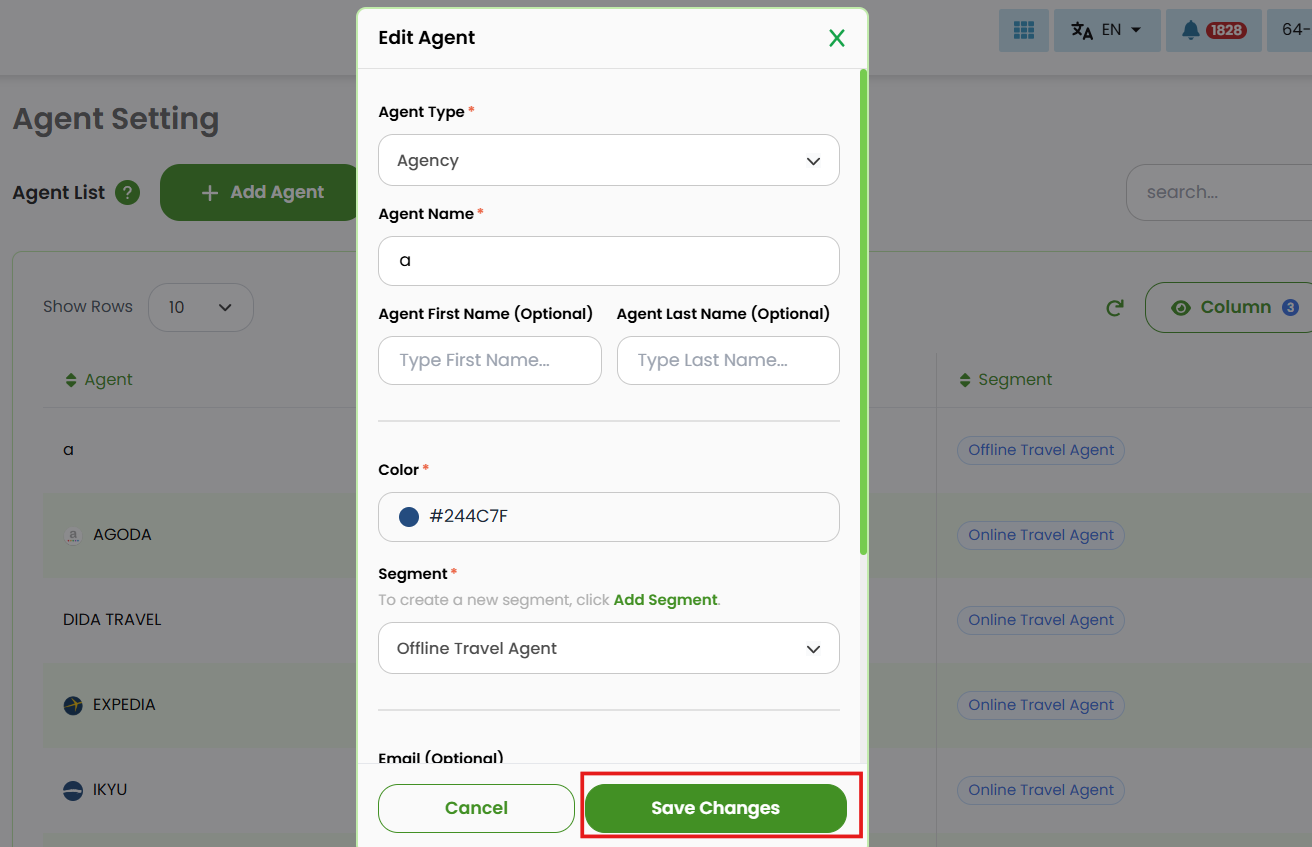
Edit Agent
- In the Agents List, click the three dots (⋮) button in the Action column. Then, select Edit from the dropdown menu.
- A pop-up window will appear showing the agent’s current details. Update any fields as needed, such as Agent Name, Segment, Email, etc.
- Click the Save Changes button to save and apply the changes.
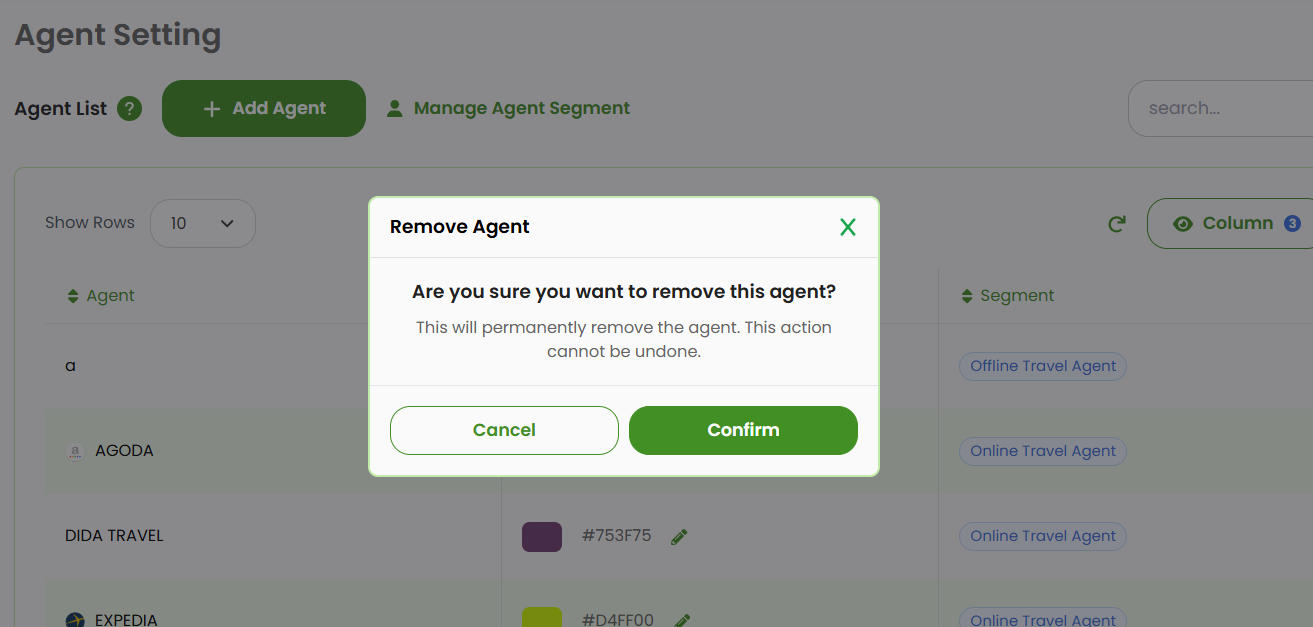
Remove Agent
- In the Agents List, click the three dots (⋮) button in the Action column. Then, select Remove from the dropdown menu.
- If the confirmation pop up appear, click Confirm to continue the process, or Cancel to discard the process.
Manage Segment
Segments allow you to categorize agents based on type or source, making it easier to organize and manage them effectively.
Add New Segment
You can create a new segment in two ways:
While Adding a New Agent
- In the Add Agent form (see Add New Agent), click Add Segment.

- A pop-up window will appear. Type the Segment Name on the available field.
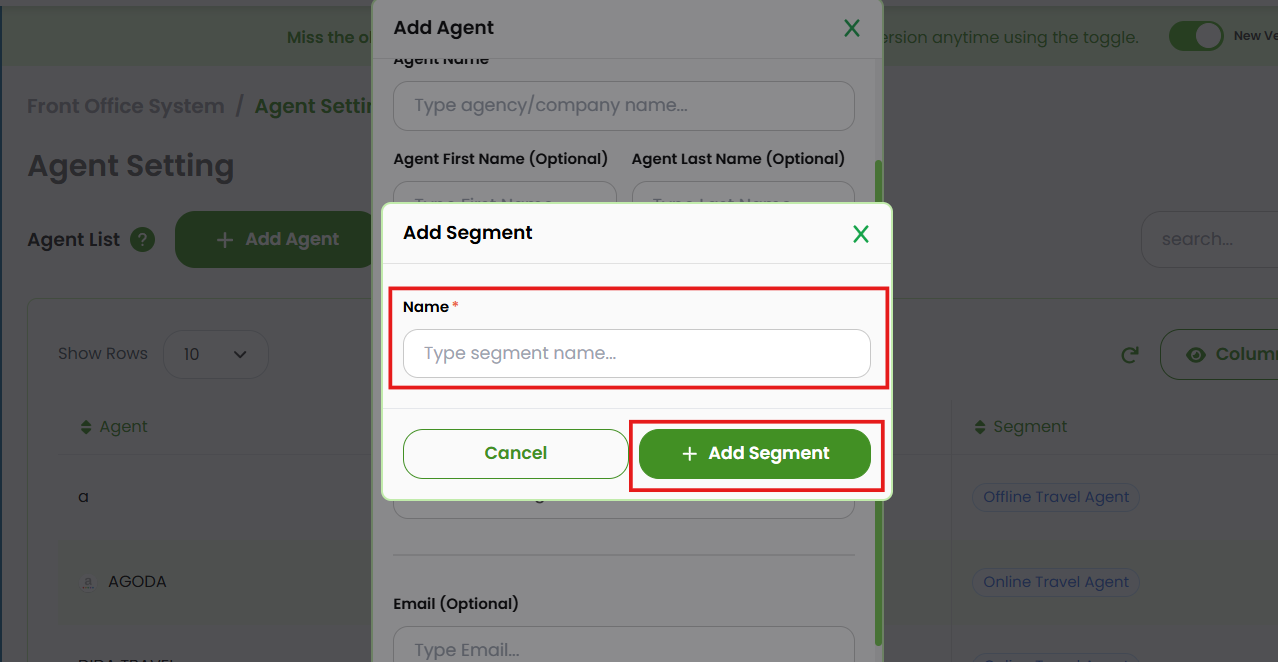
- Click Add Segment button to save changes.
Through Segment Management
- Click Manage Agent Segment button to open a Segment List.
- Click Add Segment button.
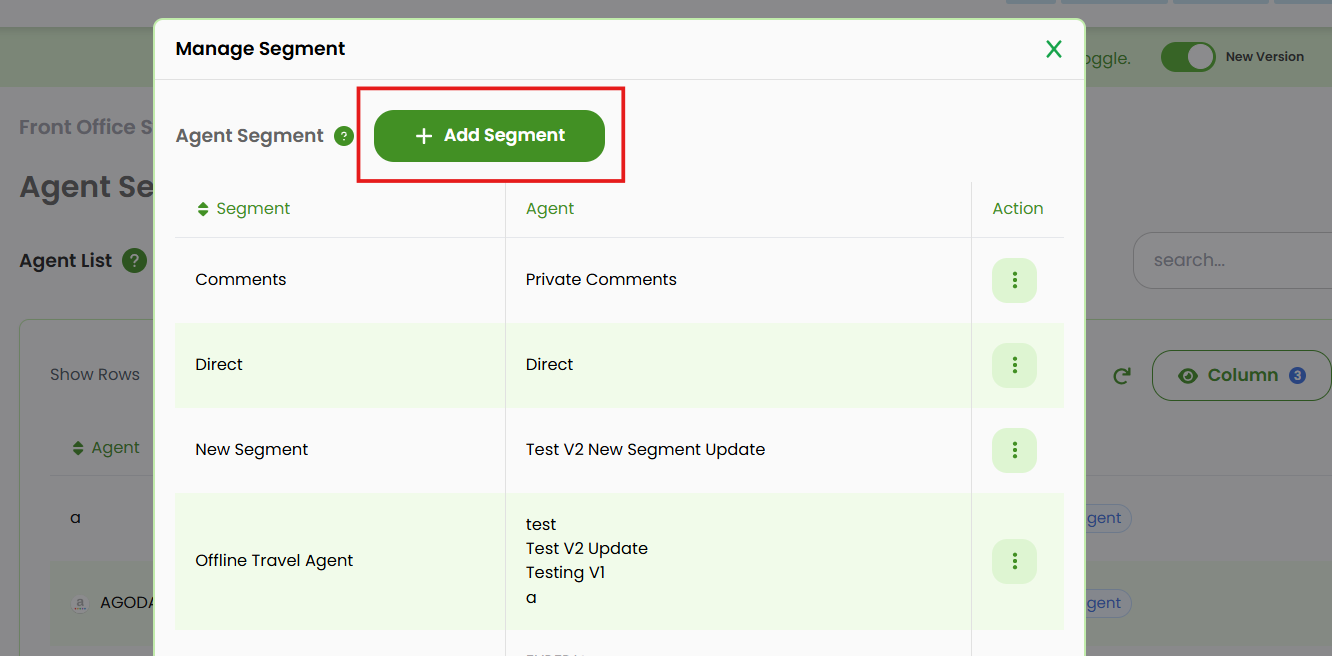
- It will shows you a new pop up. Type the segment name.
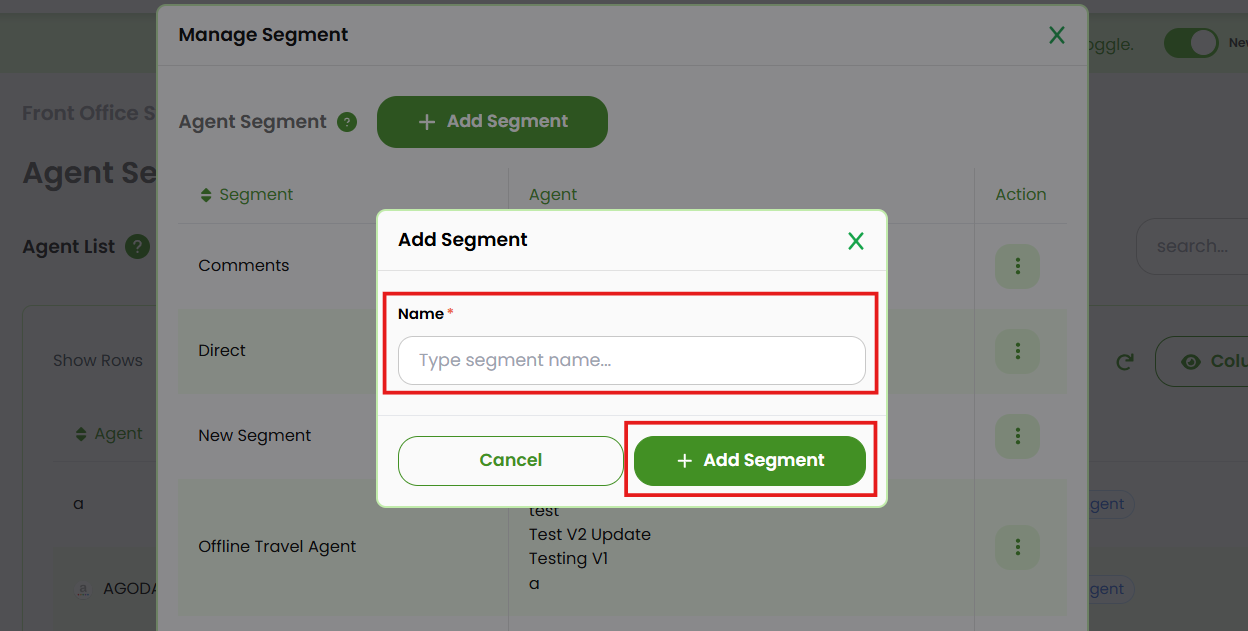
- Click Add Segment button to add new or click Cancel to discard them.
Edit Segment
In the segment management window, locate the segment you want to modify.
- Open the Action (⋮) menu and select Edit.
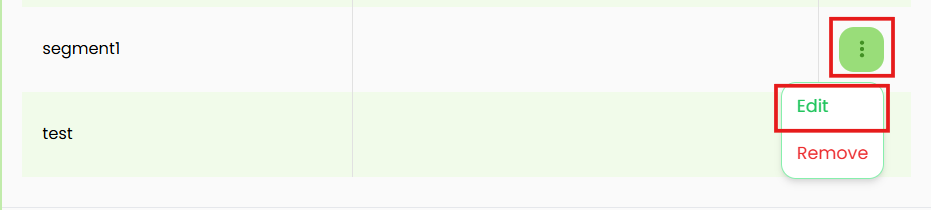
- Update the segment name as required.

- Click Save Changes to apply the changes.
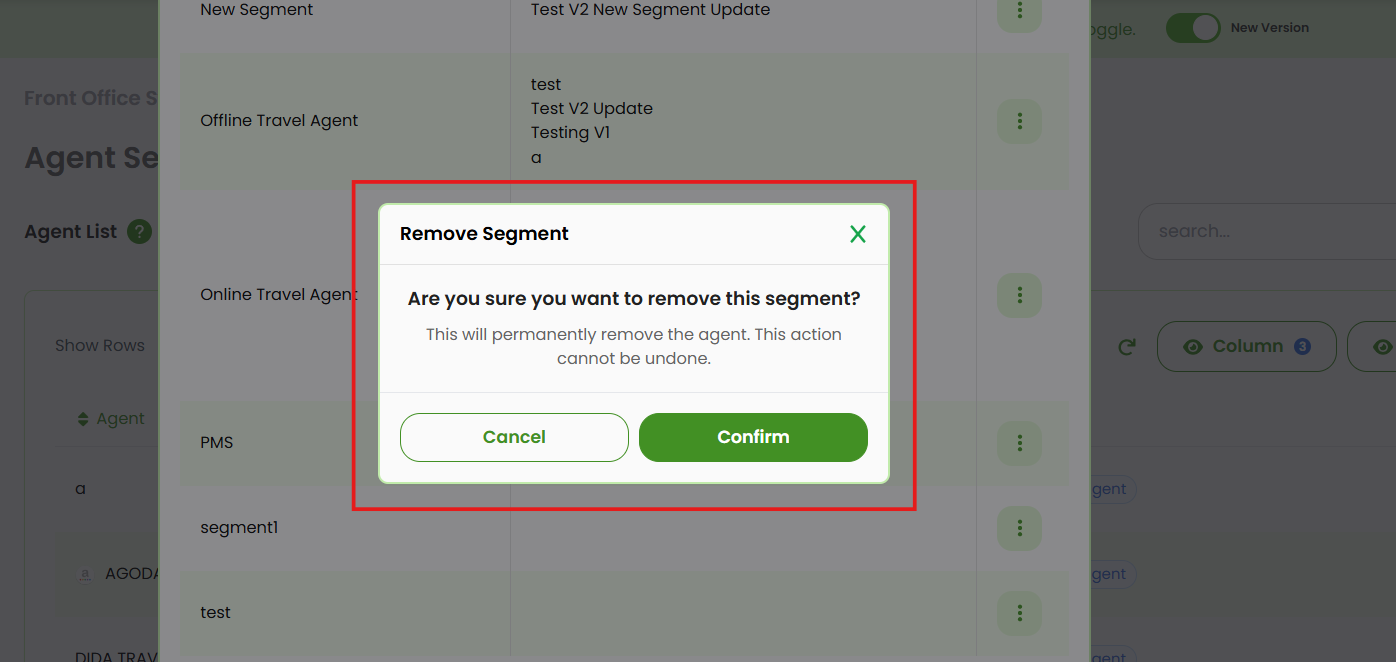
Remove Segment
In the segment management window, locate the segment to be removed.
- Open the Action (⋮) menu and select Remove
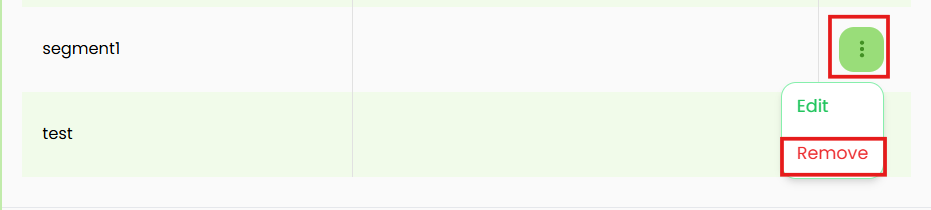
- Click Confirm to proceed the deletion.