Introduction
The Settings page in Bookingku allows you to configure various aspects of your booking interface to match your operational needs and brand identity. From visual customization like color schemes and favicon uploads to functional controls such as Google Captcha, WhatsApp display, and rate comparisons, this page centralizes key configuration options. You can also manage integrations with external tools like Google Analytics, adjust default booking behaviors, display custom messages, and fine-tune guest information requirements. Each section is designed to offer flexibility and control, ensuring an optimized experience for both property managers and guests.
Color Settings
The Color Settings section allows you to customize the color scheme of your Bookingku interface. You can adjust the background and font colors for various components to match your brand identity or preferences.
How to Customize Colors in Settings
- Navigate to the Settings menu.
- Under Colors Settings, configure the following options by entering a hex code or using the color picker:
- Top Header Background Color: Background color of the main header bar.
- Top Header Font Color: Text color used in the top header.
- Form Background Color: Background color for all input forms.
- Form Font Color: Text color inside form fields.
- Block Background Color: Background for main content blocks.
- Block Font Color (on mobile only): Font color for blocks when viewed on mobile.
- Result Font Color: Color of the text in result displays.
- Footer Background Color: Background color of the footer section.
- Footer Font Color: Text color used in the footer.
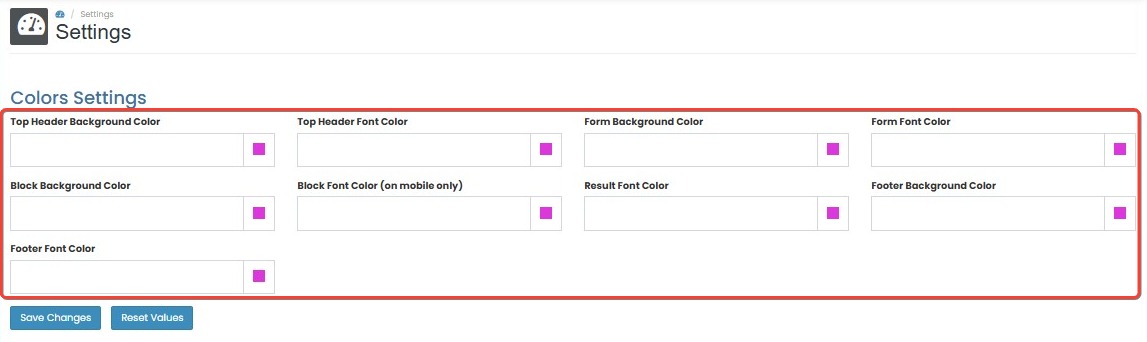
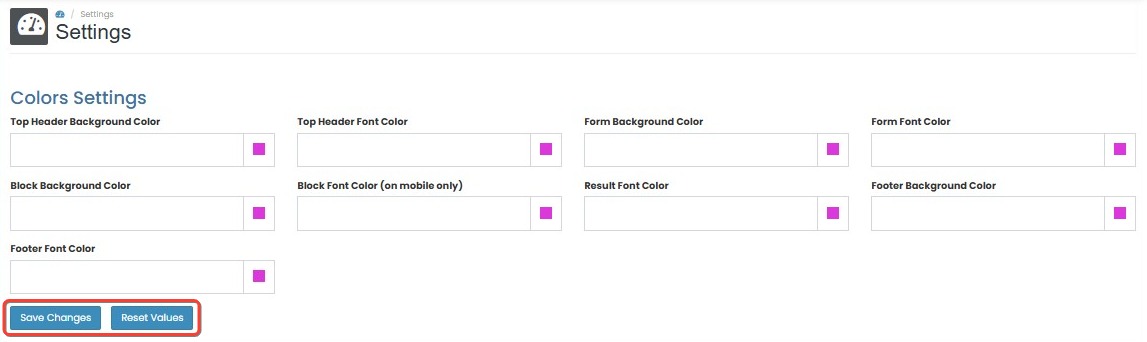
- Click Save Changes to apply the new color settings.
- To reset all values to their defaults, click Reset Values.
[!NOTE]
Troubleshooting Color Settings
Changes are not reflected after saving
- Refresh the page to ensure the updated colors are loaded.
- Clear your browser cache if the previous styles are still displayed.
- Make sure you clicked Save Changes after adjusting the colors.
Color picker does not appear or is not responsive
- Try using a different browser or device.
- Disable any browser extensions that may interfere with input fields.
Accidentally applied wrong colors and want to revert
- Use the Reset Values button to restore default color settings.
- Confirm the reset and re-apply any necessary customizations.
Unreadable text after changing font color
- Ensure sufficient contrast between font color and background color.
- Revert the problematic color by manually entering a readable hex code or using the reset option.
Custom Message
The Custom Message section allows you to display a personalized message to your guests during the booking process. You can control the appearance, display method, and content of the message.
How to Set Up Custom Message
- Navigate to the Settings menu, then scroll to the Custom Message section.
- Choose whether to enable or disable the custom message using the radio buttons:
- Disable Custom Message: No message will be shown to guests.
- Enable Custom Message: A message will appear during booking based on your configuration.

- If enabled, configure the following appearance settings:
- Custom Background Color: Choose the background color for the message box.
- Custom Font Color: Set the text color for the message content.
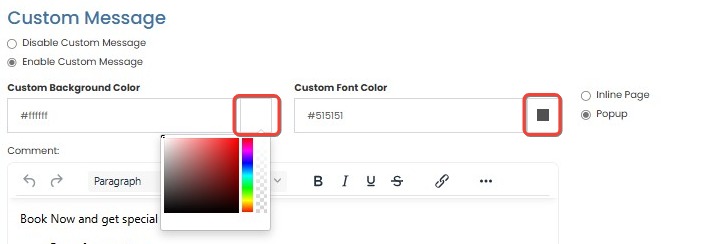
- Select the display type using the radio button:
- Inline Page: The message will appear within the booking page layout.
- Popup: The message will be shown as a popup window.

- Enter your message in the Comment field. This can include any custom note or instruction for guests (e.g., special terms, reminders, or thank-you notes).
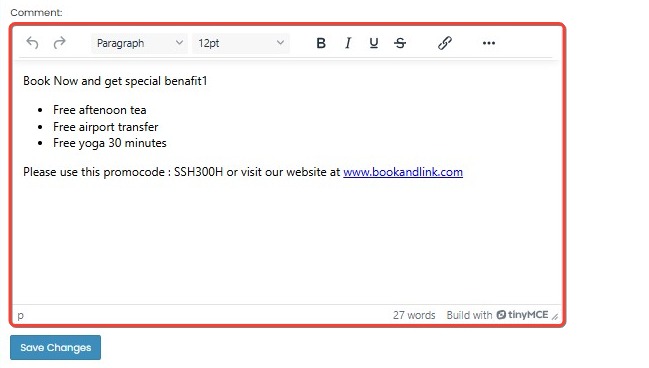
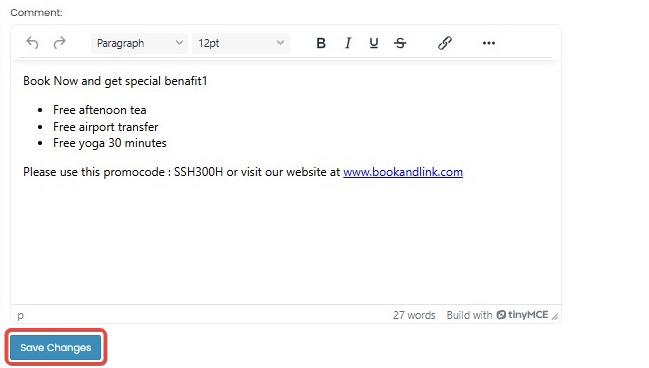
- Click Save Changes to apply the configuration.
[!NOTE]
Troubleshooting Custom Message
Custom message does not appear during booking
- Make sure the Enable Custom Message option is selected.
- Confirm that the message content has been entered in the Comment field.
- Check if the selected display type (Inline Page or Popup) is compatible with your current booking layout.
Popup message not showing as expected
- Verify that your browser allows popups for the site.
- Disable any browser extensions that may block popup functionality.
- Try switching to the Inline Page display mode to see if the issue persists.
Font color or background color makes text unreadable
- Ensure there is enough contrast between the font and background colors.
- Adjust the hex codes to more readable color combinations.
- Use the reset option or re-enter the values manually if the display looks off.
Changes not applied after clicking Save Changes
- Ensure all required fields (such as the message text) are filled before saving.
- Refresh the page and verify if the message appears.
- If the problem continues, try clearing your browser cache.
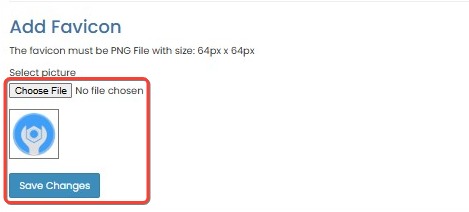
Add Favicon
The Add Favicon feature allows you to customize the browser tab icon for your Bookingku page, helping reinforce your brand identity.
How to Add or Change the Favicon
- Go to the Settings menu and scroll down to the Add Favicon section.
- Click the Choose File button to upload a favicon image from your device.
- Recommended format:
.png,.jpeg, or.jpg - Ideal size: 64×64 pixels for best display across browsers.
- Recommended format:
- After selecting the file, click Save Changes to apply the favicon to your Bookingku page.
[!NOTE]
Troubleshooting Add Favicon
Favicon does not appear on the browser tab
- Clear your browser cache and refresh the page to ensure the new favicon loads correctly.
- Make sure the uploaded image is in a supported format (
.png,.jpeg, or.jpg).- Verify that the file size and dimensions (ideally 64×64 pixels) meet the requirements.
Upload button not responding
- Check your internet connection and try reloading the page.
- Ensure the file you're uploading is not corrupted or too large.
- Try using a different browser to rule out compatibility issues.
Changes not saved after clicking Save Changes
- Confirm that a file has been selected before clicking Save Changes.
- Refresh the page and see if the favicon appears.
- If the issue persists, try uploading a different file or renaming the current file before uploading again.
Social Media / Analytic
The Social Media / Analytic section allows you to connect your Bookingku page with third-party tracking tools and customer engagement platforms, such as Google Analytics, Google Tag Manager, WhatsApp, and review widgets.
How to Configure Social Media & Analytics Integration
- Go to the Settings menu and locate the Social Media / Analytic section.
- Fill in the following fields as needed:
- WhatsApp ID: Input your WhatsApp number (e.g., 087xxxxxxx). You need to register at widgetwhats.com and obtain your
data-idfor integration. - Google Analytic ID: Enter your Google Analytics tracking ID (e.g., UA-XXXXXX-Y).
- Google Tag Manager ID: Enter your GTM container ID (e.g., GTM-XXXXXXX).
- Marketing Tag: Choose a marketing tag from the dropdown list, if applicable.
- Triptease ID: Enter your Triptease integration ID if available.
- Reviewku ID: Input your Reviewku widget ID for embedding guest reviews.
- WhatsApp ID: Input your WhatsApp number (e.g., 087xxxxxxx). You need to register at widgetwhats.com and obtain your
- Click Save Changes to apply and activate the integrations.

[!NOTE]
Troubleshooting Social Media / Analytic
WhatsApp widget does not appear on the website
- Make sure you have registered your number at widgetwhats.com and copied the correct
data-id.- Verify that the WhatsApp ID entered matches the format required by the widget service.
- Refresh the website after saving to check if the widget appears.
Google Analytics or Tag Manager is not tracking data
- Double-check that the IDs (e.g.,
UA-XXXXXX-YorGTM-XXXXXXX) are correctly entered without extra spaces.- Ensure your website is published and not restricted by browser extensions or ad blockers.
- Use browser developer tools to verify if the script is being loaded correctly on the page.
Reviewku or Triptease widget is not displaying
- Confirm that the integration ID is correct and active from the third-party provider.
- Check if the widget service is temporarily down or under maintenance.
- Refresh the page or try in incognito mode to rule out caching issues.
Changes not saved after clicking Save Changes
- Ensure all required fields are filled properly.
- Try submitting the form again after refreshing the page.
- Check your internet connection to confirm the request was sent.
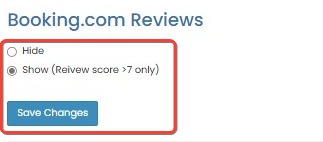
Booking.com Reviews
The Booking.com Reviews section allows you to control whether Booking.com guest review scores are displayed on your Bookingku page.
How to Configure Booking.com Reviews Display
- Navigate to the Settings menu, then scroll down to the Booking.com Reviews section.
- Choose one of the following display options:
- Hide: Booking.com reviews will not be shown.
- Show (Review score >7 only): Only Booking.com reviews with a score higher than 7 will be displayed.
- Click Save Changes to apply your preference.
[!NOTE]
Troubleshooting Booking.com Reviews
Booking.com reviews are not displaying after selecting 'Show' option
- Ensure that there are reviews with a score higher than 7 available on your Booking.com account.
- Double-check that you have selected the correct option and clicked Save Changes.
- Refresh the Bookingku page or try opening it in a new browser tab to confirm the changes.
Changes not applied after clicking Save Changes
- Confirm your internet connection is stable before saving.
- If the setting still doesn’t update, try refreshing the page and repeating the process.
- Clear your browser cache and verify if the issue persists.
Selected option reverts to 'Hide' after refresh
- This could indicate a failed save operation. Try clicking Save Changes again and wait a few seconds.
- Make sure no other conflicting browser extensions or ad blockers are interfering with the save function.
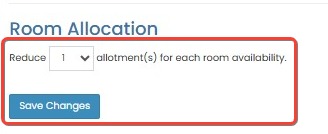
Room Allocation
The Room Allocation setting lets you automatically reduce the available room allotment for each room type, helping manage overbookings or allocate rooms to other sales channels.
How to Adjust Room Allocation
- Go to the Settings menu and find the Room Allocation section.
- Choose the number of allotments to reduce using the dropdown selector.
- Example: Selecting "1" will reduce the availability by 1 unit for each room.
- Click Save Changes to apply the configuration.
[!NOTE]
Troubleshooting Room Allocation
Room availability is not reduced after setting allocation value
- Ensure you have selected a value other than "0" from the dropdown before clicking Save Changes.
- Verify that the room availability shown reflects the reduction on the frontend or in the booking calendar.
- Refresh the page to ensure the setting has been applied correctly.
Allocation setting does not save or reverts after refresh
- Check your internet connection before saving the changes.
- Try reapplying the setting and wait a few seconds after clicking Save Changes.
- If the problem persists, clear your browser cache and attempt the process again.
Room availability becomes zero after applying allocation
- Make sure the number of rooms available before allocation was more than the value being reduced.
- Adjust the allocation value appropriately to avoid making rooms unavailable unintentionally.
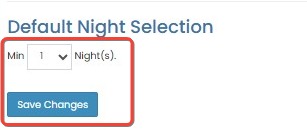
Default Night Selection
The Default Night Selection defines the minimum number of nights selected by default when a guest begins the booking process.
How to Set Default Nights
- In the Settings menu, locate the Default Night Selection section.
- Use the dropdown to set the minimum number of nights (e.g., 1 Night).
- Click Save Changes to update the default booking duration.
[!NOTE]
Troubleshooting Default Night Selection
Default night value does not appear during booking
- Ensure that the selected value has been saved properly by clicking Save Changes after selection.
- Try refreshing the booking page to verify if the default night selection is reflected.
Dropdown value resets after saving
- Check your internet connection before saving changes.
- Wait a few seconds after clicking Save Changes to ensure the system processes the update.
- If the issue persists, try clearing your browser cache and repeating the steps.
Guests can still select fewer nights than the default
- The default night selection only sets the initial value, not a minimum limit.
- If you require a minimum stay policy, ensure it is configured separately in your rate plan or availability settings.
Google Captcha
The Google Captcha feature helps protect the Booking Engine from spam and automated bot submissions during the reservation process. When enabled, the captcha will appear before the guest submits their personal and reservation details, ensuring that only valid human users can complete a booking.
How to Enable or Disable Google Captcha
- Scroll to the Google Captcha section in the Settings menu.
- Toggle the switch:
- Off: Disables captcha protection.
- On: Enables Google Captcha during the booking process.
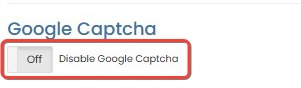
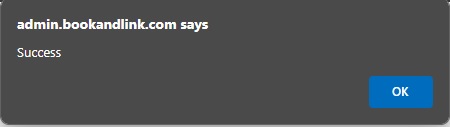
- A “Success” message will appear to confirm the change.
[!NOTE]
Troubleshooting Google Captcha
Captcha toggle does not respond when clicked
- Ensure you have a stable internet connection.
- Try refreshing the page and toggling the switch again.
- If the issue persists, clear your browser cache or try using a different browser.
Google Captcha not appearing during booking
- Verify that the toggle is set to On and the change has been saved successfully.
- Make sure no browser extensions are blocking the captcha script (e.g., ad blockers or privacy tools).
- Check if the browser’s JavaScript is enabled, as captcha requires it to function.
Captcha enabled but still receiving spam bookings
- Google Captcha minimizes but does not completely eliminate spam.
- Consider enabling additional layers of validation or enabling manual booking review.
Compare Rate with Booking.com
This feature allows you to display a rate comparison between your direct booking prices and those listed on Booking.com, which may encourage more direct bookings.
How to Enable or Disable Rate Comparison
- In the Settings menu, go to Compare Rate with Booking.com.
- Toggle the switch:
- On: Display rate comparison on the website.
- Off: Hide the comparison.
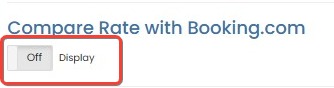
- A “Success” message will appear to confirm the change.
[!NOTE]
Troubleshooting Compare Rate with Booking.com
Toggle does not respond or fails to save
- Ensure you are connected to a stable internet network.
- Refresh the page and try again.
- Clear your browser cache or try a different browser if the issue continues.
Rate comparison does not appear on the website even when enabled
- Make sure the toggle is set to On and saved successfully.
- Ensure that valid rates exist on both your Bookingku and Booking.com listings for the same room and date.
- Check if there are any content blockers or scripts disabled in the browser.
Displayed rates are incorrect or outdated
- Wait a few minutes for the system to sync the latest rates.
- Ensure the rate information on Booking.com is accurate and up to date.
- Contact support if discrepancies persist despite valid pricing on both platforms.
Show WhatsApp Number on Header
This setting displays your configured WhatsApp number on the website header, providing guests with a quick contact method.
How to Display WhatsApp Number on Header
- Navigate to Show WhatsApp Number on Header in the Settings.
- Toggle the switch to:
- On: Show the number.
- Off: Hide it from the header.
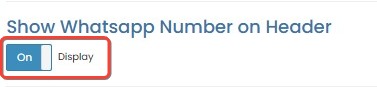
- A “Success” message will appear to confirm the change.
[!NOTE]
Troubleshooting Show WhatsApp Number on Header
Toggle is unresponsive or does not save changes
- Make sure your internet connection is stable.
- Refresh the page and try toggling the setting again.
- Clear your browser cache or try a different browser if the issue persists.
WhatsApp number does not appear on the header after enabling
- Check that the WhatsApp number is correctly filled in the Social Media / Analytic section.
- Ensure the toggle is set to On and changes have been saved.
- Try opening the page in incognito mode to rule out cache-related issues.
WhatsApp number display format or position is incorrect
- Format the number without spaces or special characters (e.g., 081234567890).
- If the display is still incorrect, contact support for further assistance or theme adjustment.
Sold Contact Button
The Sold Contact Button allows guests to contact the property when a room is sold out, giving you a chance to handle inquiries manually.
How to Manage the Sold Contact Button
- Go to the Sold Contact Button section.
- Toggle the display setting:
- On: Show the contact button when rooms are sold out.
- Off: Hide it.
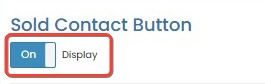
- A “Success” message will appear to confirm the change.
[!NOTE]
Troubleshooting Sold Contact Button
Toggle is not working or changes are not saved
- Ensure you have a stable internet connection.
- Refresh the page and try toggling the setting again.
- If the issue persists, clear your browser cache or try using a different browser.
Contact button does not appear when rooms are sold out
- Make sure the toggle is set to On and changes have been saved.
- Verify that the room availability is truly zero; the button only appears when all rooms are sold out.
- Try accessing the page in incognito mode to bypass any cached versions of the site.
Contact button appears even when rooms are still available
- This may indicate a sync issue with your availability settings.
- Recheck your room availability in the Bookingku dashboard.
- Contact support if the display logic needs to be reviewed or adjusted.
Require to Collect all Customer Information
This setting ensures that all guest information fields are required during the booking process.
How to Require Complete Customer Info
- Scroll to Require to Collect all Customer Information.
- Toggle the switch:
- On: All fields must be filled out by guests.
- Off: Some fields may be optional.

- A “Success” message will appear to confirm the change.
[!NOTE]
Troubleshooting Require to Collect all Customer Information
Toggle does not respond or changes are not saved
- Ensure your internet connection is stable.
- Refresh the page and try toggling again.
Fields still appear optional after enabling
- Clear your browser cache or try using incognito mode.
- Make sure the page reflects the latest settings by reloading it.
Guests unable to proceed due to validation issues
- Verify that all fields shown in the form are relevant and correctly configured.
- Contact support if certain required fields do not behave as expected.