Settings
General
The General section in Settings allows you to configure key preferences for your property, including email notifications, rating format, and automated report scheduling. You can enable or disable alerts for new reviews, add or remove multiple email recipients for notifications, customize how ratings are displayed (using a 5, 10, or 100-point scale), and set up scheduled report delivery on a weekly or monthly basis—all from one centralized page.
How to Manage Email Notifications
In the Email Notification section of the General Settings page.
- To add a recipient:
- Click the Add (+) Email button.
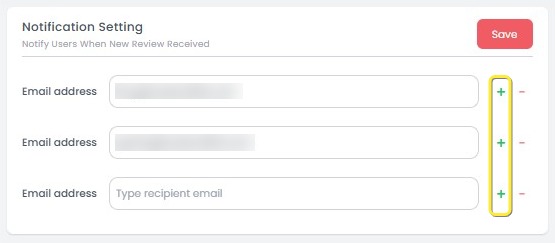
- Enter the email address in the input field.
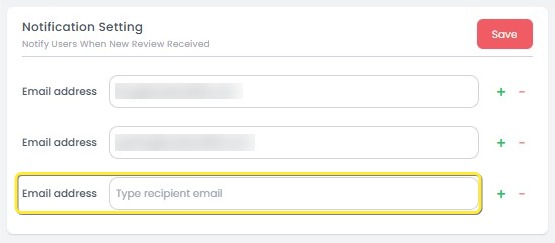
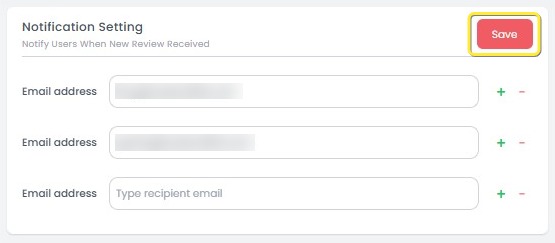
- Click Save to apply.
- Click the Add (+) Email button.
- To remove a recipient:
- Click the remove (-) icon next to the email you want to delete.
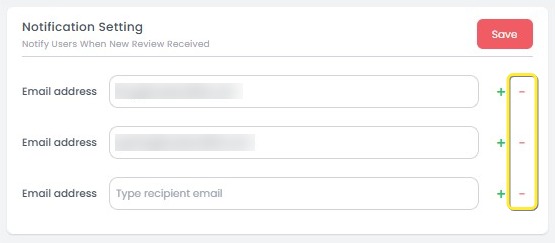
- Click Save to apply the changes.
- Click the remove (-) icon next to the email you want to delete.
[!NOTE]
Troubleshooting Manage Email Notifications
Unable to add a new email address
- Ensure the email address is typed correctly and follows the proper format (e.g., user@example.com).
- Try refreshing the page if the input field does not respond after clicking Add Email.
Save button is disabled after entering an email
- Make sure the email field is not left blank.
- Double-check for any extra spaces or invalid characters in the email address.
Email address not removed after clicking the remove icon
- Ensure you click Save after removing the email address to apply the change.
- Refresh the page if the removed email still appears, and try the action again.
Notification emails are not being received
- Confirm that the notification switch is turned on.
- Check your spam/junk folder in case the email alerts are filtered incorrectly by your email provider.
How to Configure Rating Scale
- In the Rating Configuration section, select your preferred scale:
- 5-point scale
- 10-point scale
- 100-point scale
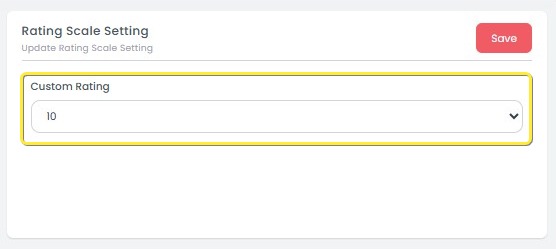
- The selected scale will affect how ratings are shown throughout the dashboard and exported reports.
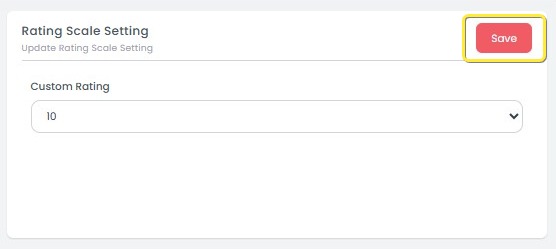
- click Save to apply the rating scale.
[!NOTE]
Troubleshooting Configure Rating Scale
Selected rating scale does not update
- Ensure you click Save after choosing the new rating scale.
- Refresh the page to confirm that the updated scale has been applied.
Save button is not clickable
- Make sure you have selected a different rating scale before clicking Save.
- If no changes are made, the Save button may remain inactive.
Dashboard still shows the old rating format
- Clear your browser cache or try reopening the dashboard page.
- Some sections may require a full page reload to reflect the new scale.
Exported report uses old rating scale
- Confirm the rating scale change was saved before exporting reports.
- Only reports generated after the change will reflect the new scale.
How to Schedule Report Delivery
- Go to the Schedule Report section in the General tab.
- Choose your preferred frequency:
- Weekly: Reports are sent once per week.
- Monthly: Reports are sent once per month.
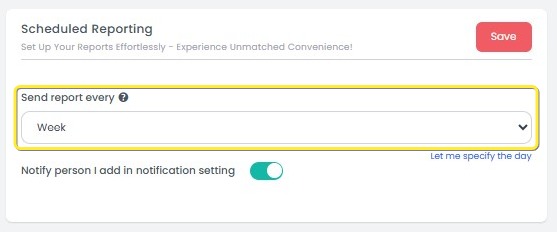
- The report will be automatically delivered to the registered email(s) according to the selected schedule.
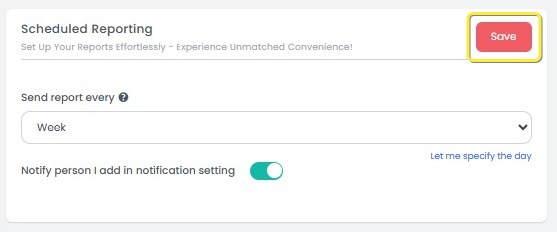
- click Save to apply the schedule.
- Toggle the switch to enable/disable receiving notifications for new reviews.

[!NOTE]
Troubleshooting Schedule Report Delivery
Schedule changes are not saved
- Ensure you click the Save button after selecting the frequency and settings.
- Refresh the page and check if your latest selections were applied correctly.
Weekly or Monthly option is not selectable
- Check your internet connection and reload the page.
- If the problem persists, try clearing your browser cache.
Scheduled reports are not being received
- Verify that the Notification toggle is enabled.
- Confirm that the recipient emails are correctly listed and not removed.
Wrong schedule applied (e.g., report sent on unexpected day)
- Reopen the Schedule Report settings and double-check your selected frequency and options.
- Make sure no changes were accidentally reverted before saving.
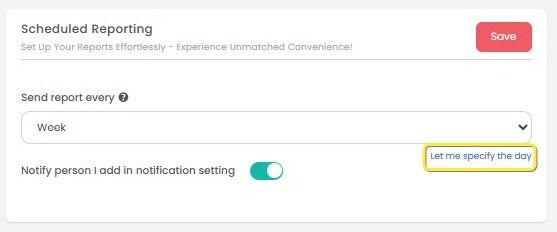
How to Set Specific Day for Weekly Reports
If you select Weekly as the report frequency, you can define a specific day for the report to be sent. Follow these steps:
- Click Let me specify the day below the frequency options.
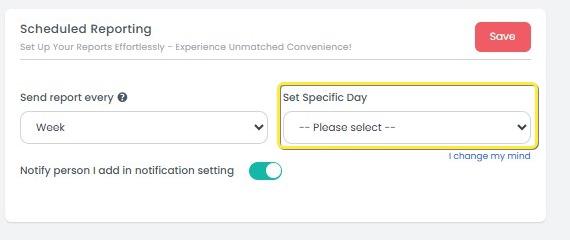
- Choose the day of the week you prefer (e.g., Monday, Wednesday) from the dropdown list.
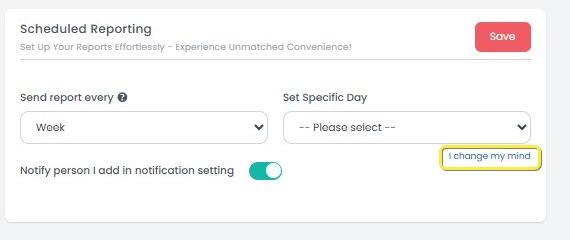
- If you change your mind, click I change my mind to remove the day selection.
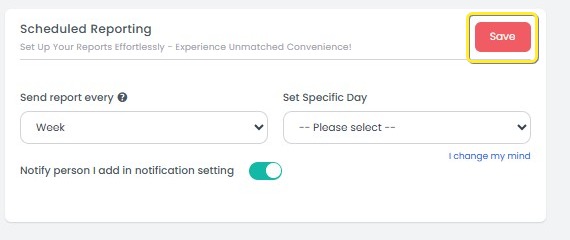
- After finalizing your choice, click Save to apply the settings. The report will then be scheduled to send every week on the selected day.
[!NOTE]
Troubleshooting Set Specific Day for Weekly Reports
"Let me specify the day" option is not visible
- Make sure Weekly is selected as the report frequency—this option only appears when Weekly is chosen.
- Try refreshing the page if the setting does not appear after switching from Monthly.
Day selection dropdown does not respond
- Check your internet connection.
- Try collapsing and reopening the section to reset the dropdown interaction.
Selected day not saved
- Ensure you click the Save button after choosing the day.
- If the issue persists, reload the page and reselect your preferred day.
Saved day reverts to default or disappears
- This may occur if the page is closed before saving. Always confirm changes by clicking Save.
- Avoid switching between Weekly and Monthly too quickly without saving.
Channel
The Channel page allows you to manage your active review sources. On this page, you can enable or disable channel connections, retrieve past reviews manually by selecting a specific date range, and contact the BookandLink support team via WhatsApp for further assistance.
This setup ensures that the latest reviews from various platforms are properly synchronized into the system according to your operational needs.
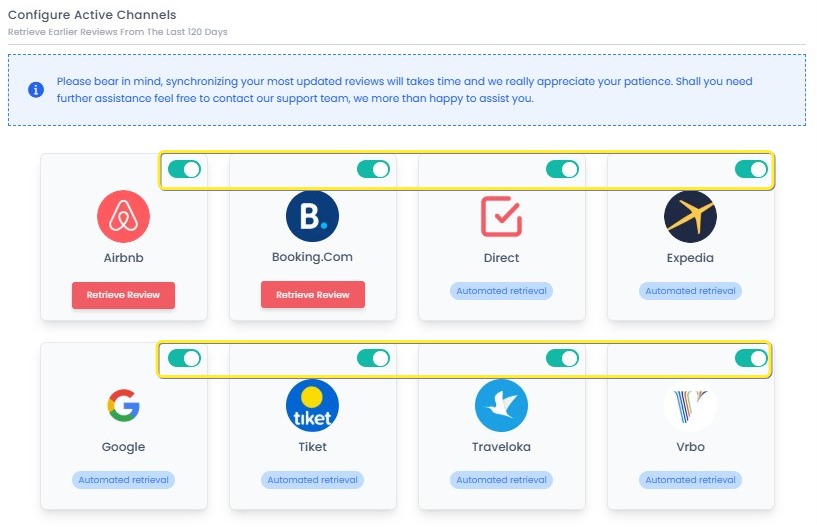
How to Enable or Disable a Channel
- Locate the channel you want to manage from the list.
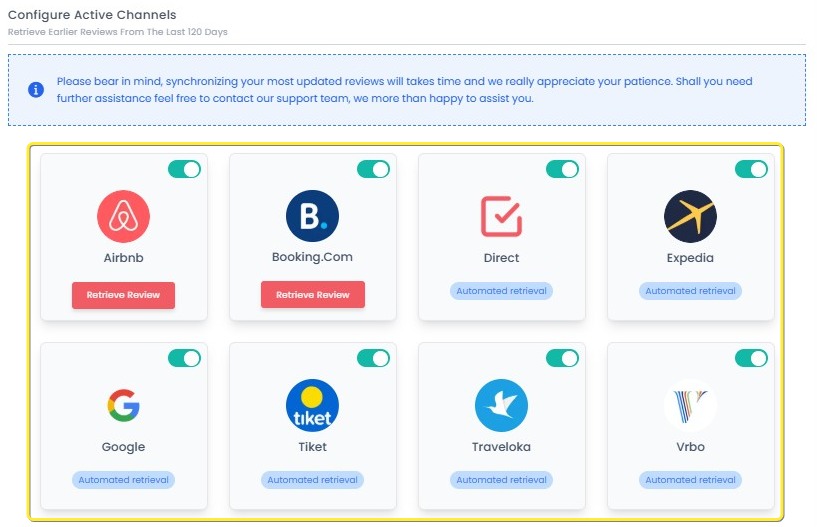
- Toggle the switch at the top-right corner of the channel card:
- Turn on to activate the channel connection.
- Turn off to deactivate the channel connection.
[!NOTE]
Troubleshooting Enable or Disable a Channel
Toggle switch is not responding
- Check your internet connection. A stable connection is required to update the channel status.
- Refresh the page and try toggling the switch again.
Channel status does not change after toggling
- Make sure you wait a few seconds after clicking the toggle to allow the system to update.
- If the status still does not change, refresh the page to verify if the action was applied.
Error message appears when enabling a channel
- This may indicate missing credentials or integration issues. Contact support for assistance.
Previously enabled channel appears disabled after refreshing
The change might not have been saved properly. Try toggling the switch again and wait until it confirms the update.
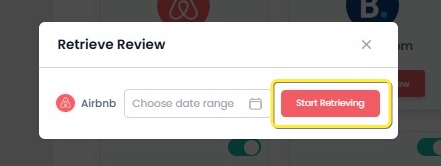
How to Retrieve Past Reviews
- On the channel card, click the Retrieve Review button (available for selected channels).
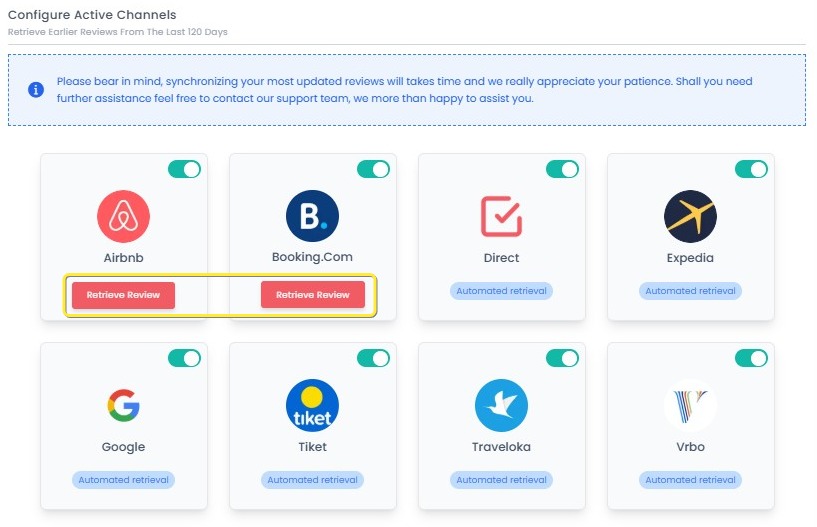
- In the pop-up window, select the Date Range for the reviews you want to retrieve.

- Click Start Retrieving to begin the synchronization process.
[!NOTE]
Troubleshooting How to Retrieve Past Reviews
Retrieve Review button is not appearing
- Make sure the channel you're working with is eligible for review retrieval. Not all channels support this feature.
- Refresh the page to ensure that the button loads properly.
Date Range is not selectable
- Check if the selected channel has reviews for the date range you're trying to retrieve. If no reviews exist within the range, it may not be selectable.
- Try closing and reopening the pop-up window.
Start Retrieving button is not responding
- Ensure that your internet connection is stable. A poor connection can prevent the synchronization process from starting.
- Try refreshing the page and clicking the button again. Wait a few moments before retrying.
No reviews are retrieved after clicking Start Retrieving
- Verify that the selected date range actually contains reviews. If no reviews are available within the selected range, the system will not retrieve any data.
- If reviews are available, check for any error messages and contact support if the issue persists.
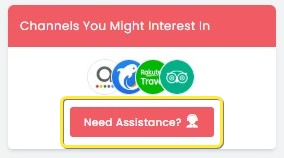
How to Contact Assistance (Need Assistance)
- Click the Need Assistance? button located at the top-left corner of the Channel page.
- You will be redirected to open a WhatsApp chat with the BookandLink support team for further help.
[!NOTE]
Troubleshooting How to Contact Assistance (Need Assistance)
Need Assistance? button is not visible
- Ensure that you are on the Channel page where the button is located. If you're on a different page, navigate back to the Channel page.
- Refresh the page to make sure the button loads properly.
WhatsApp chat does not open
- Check if WhatsApp is installed and configured on your device. You may need to have WhatsApp set up for the link to work.
- Try clicking the button again or copy and paste the link into your browser to start a chat manually.
Unable to connect to the BookandLink support team via WhatsApp
- Make sure your internet connection is stable. A weak connection may prevent the WhatsApp chat from loading.
- If the connection still doesn't work, try restarting your device or use a different network to initiate the chat.
Setup Competitors
The Setup Competitors page allows you to add, view, and manage competitor properties for benchmarking analysis. You can expand each competitor to view detailed information, add associated review channels, or remove competitors with confirmation prompts. This helps ensure that the competitor list remains accurate and relevant for your review comparison and performance tracking.
How to Add a Competitor
- Click the Add Competitor button.
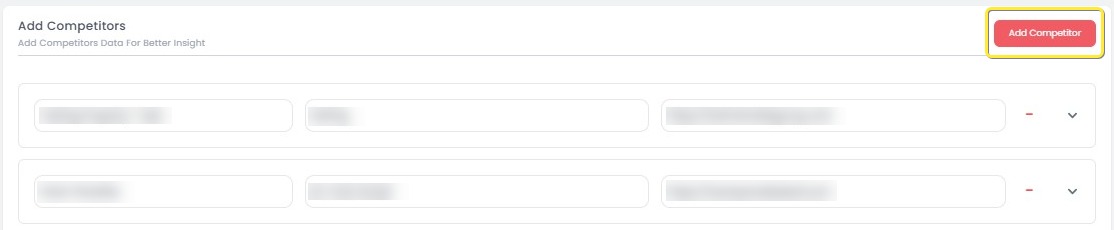
- A field will appear where you can input the website URL of the competitor.

- Enter the competitor’s website URL and click the Search button.

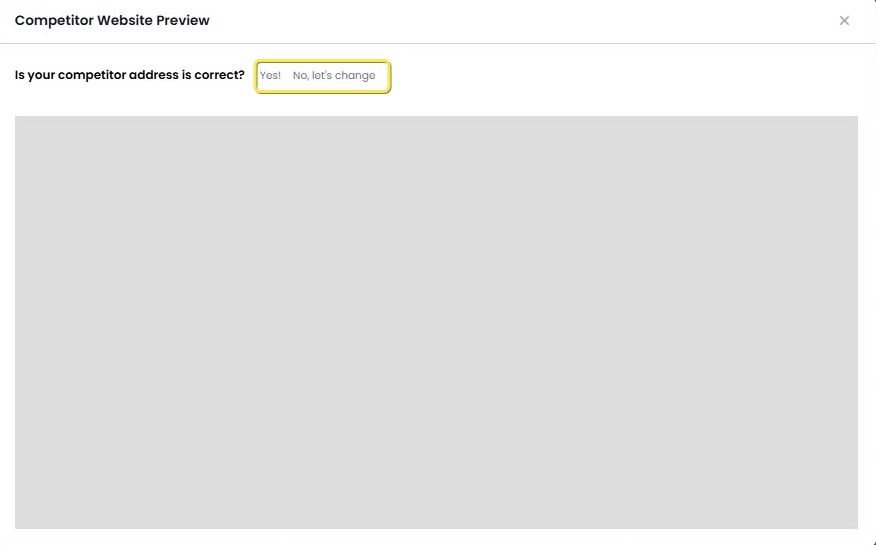
- A modal window will display a preview of the website.
- If the preview matches the intended competitor, click Yes to confirm.
- If not, click No, Let's Change to modify the URL.
- After confirming, you must fill in the Property Name and Address fields.

- Once the Property Name and Address are completed, click the Save button to add the competitor to the list.
- Click Save to finalize the addition of the competitor property.

- After saving, you can proceed to add channels for the competitor.
[!NOTE]
Troubleshooting How to Add a Competitor
Add Competitor button is not responding
- Refresh the page and try clicking the Add Competitor button again.
- Make sure your internet connection is stable.
Unable to search competitor website
- Ensure the URL you entered is valid and publicly accessible.
- Double-check that the URL includes the correct domain (e.g.,
https://format).Website preview does not load
- Confirm that the website is online and not blocked.
- Try re-entering the URL or using a different browser.
Accidentally clicked "No, Let's Change"
- Simply retype the correct website URL and click Search again to fetch a new preview.
Cannot proceed after clicking Yes
- Make sure you complete the Property Name and Address fields before clicking Save.
- These fields are mandatory and must not be left blank.
Save button is disabled or not saving
- Verify that all required fields (Property Name, Address, Website URL) are correctly filled.
- Try refreshing the page and redoing the process if the issue persists.
Competitor does not appear in the list after saving
- Wait a few seconds after saving to allow the system to update.
- Refresh the page to reload the updated competitor list.
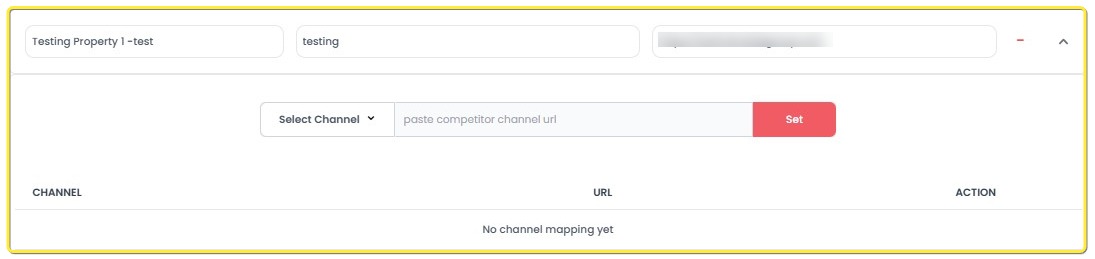
How to Add a Channel to a Competitor
- On the competitor list, click the arrow icon next to the competitor’s name to expand the details.
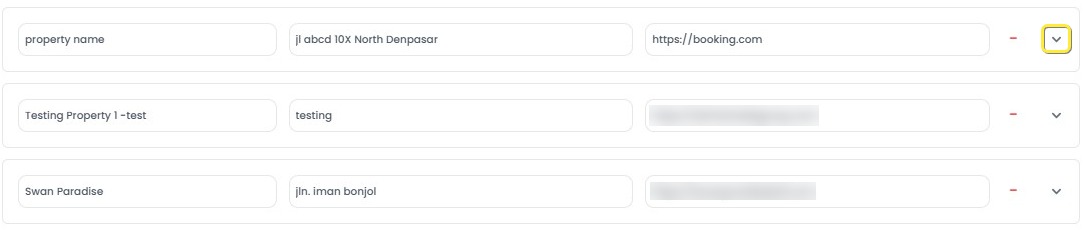
- Click Select Channel to open the channel selection menu.
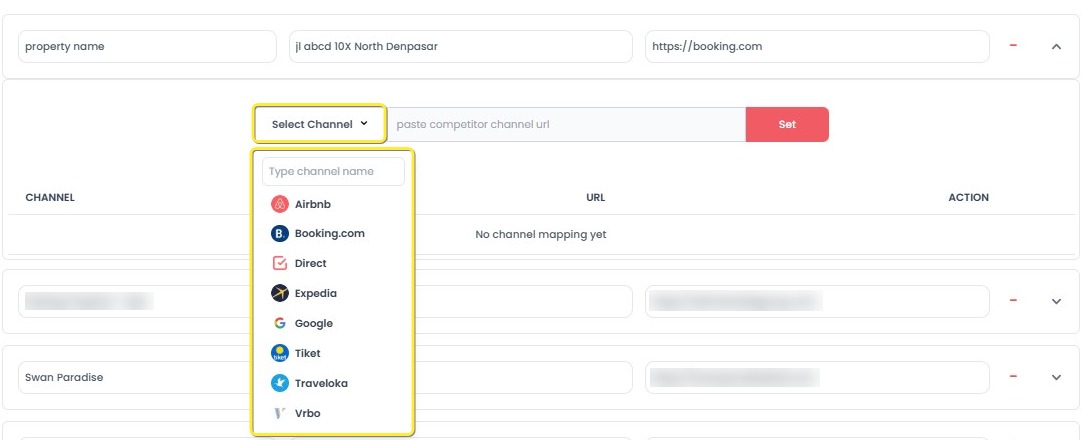
- Select the desired channel from the dropdown list or search for it using the search field.
- Input the competitor’s channel URL (e.g.,
https://www.booking.com/hotel/id/the-westin-resort-nusa-dua-bali.html).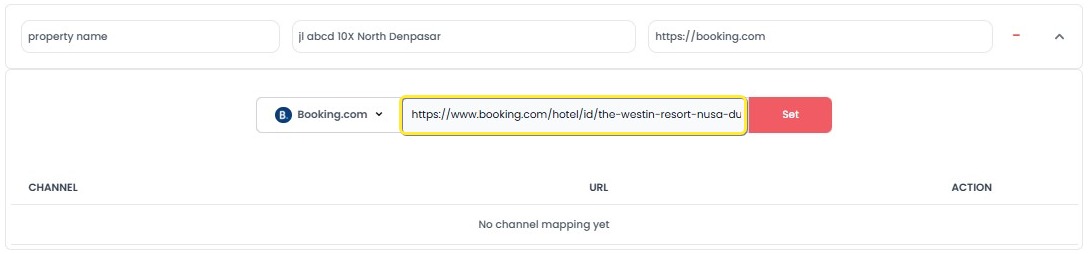
- Click the Set button to link the channel to the competitor.
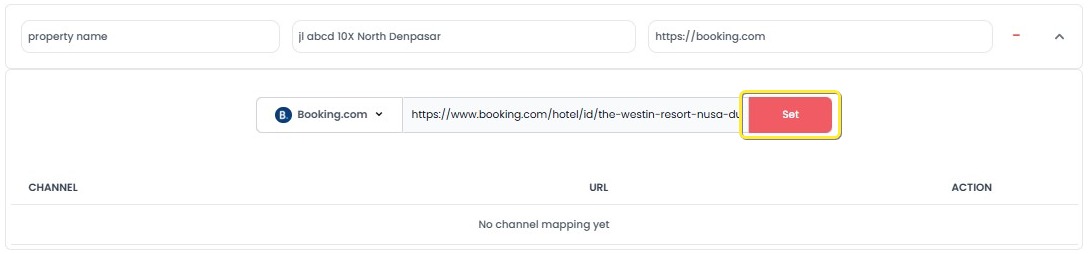
- The channel will be displayed under the competitor’s details, showing:
- The channel name.
- The linked URL, which is clickable and will open in a new browser tab.
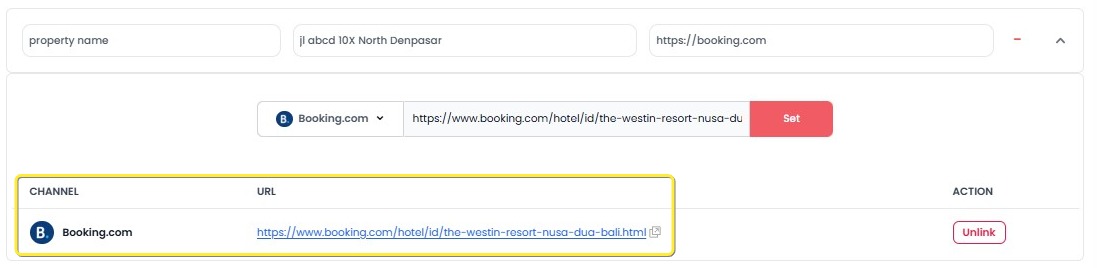
- To unlink a channel:
- Click the Unlink button next to the channel.
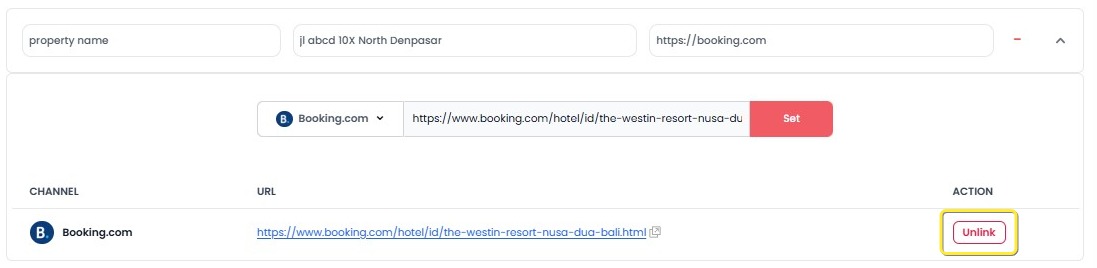
- A success modal will confirm that the channel has been unlinked.
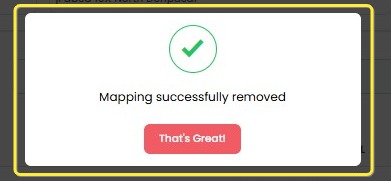
- Click the Unlink button next to the channel.
[!NOTE]
Troubleshooting How to Add a Channel to a Competitor
Cannot expand competitor details
- Ensure you click the arrow icon next to the competitor’s name.
- If it does not expand, refresh the page and try again.
Select Channel dropdown is empty
- Make sure you have an active internet connection.
- Refresh the page to reload the available channel list.
Cannot input or save the competitor’s channel URL
- Verify that the URL is correctly formatted and publicly accessible.
- Ensure the correct channel is selected before inputting the URL.
Set button is not clickable
- Check that both a channel is selected and a valid URL is entered.
- If the problem persists, refresh the page and try again.
Linked URL is incorrect after saving
- Unlink the incorrect entry and re-add the channel with the correct URL.
- Always double-check the URL before clicking the Set button.
Unlink action does not work
- Refresh the page and try clicking the Unlink button again.
- Confirm that a success message appears after unlinking to ensure the action is completed.
How to Expand or Collapse Competitor Details
- On the Setup Competitors page, find the competitor you want to view.
- Click the arrow icon next to the competitor’s name to expand or collapse the details.
- When expanded, additional details about the competitor property will be displayed.
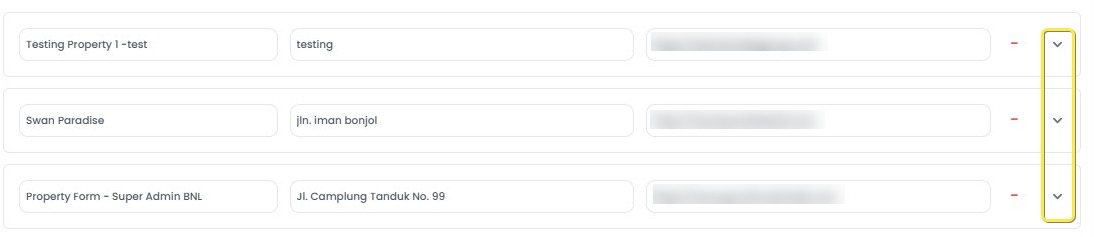
- Click the arrow again to hide the details.
- When expanded, additional details about the competitor property will be displayed.
[!NOTE]
Troubleshooting How to Expand or Collapse Competitor Details
Arrow icon is not responding
- Ensure that the page has fully loaded before attempting to expand or collapse competitor details.
- Refresh the page and try clicking the arrow icon again.
Competitor details do not appear after clicking
- Check your internet connection; a slow connection may delay the display.
- Wait a few seconds after clicking, as data may still be loading in the background.
Expanded view shows incomplete information
- Collapse the competitor entry by clicking the arrow again, then re-expand it.
- If the problem persists, refresh the page to reload full data.
Accidentally expanded/collapsed the wrong competitor
- Simply click the arrow icon again to collapse the incorrect competitor and expand the correct one.
How to Delete a Competitor
- Locate the competitor you wish to remove.
- Click the minus (-) icon next to the competitor’s name.
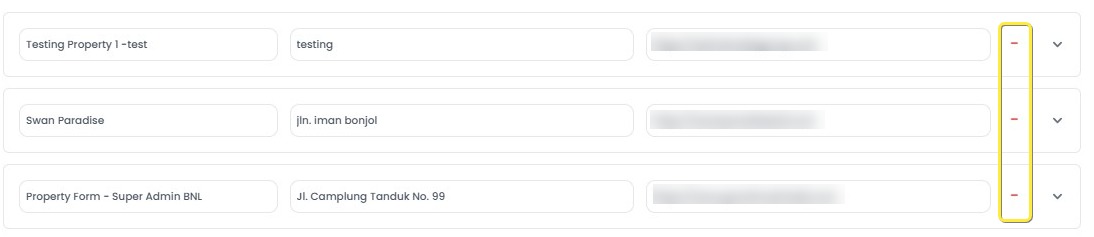
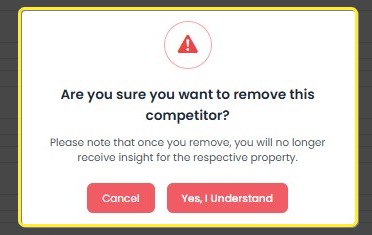
- A confirmation modal will appear asking if you are sure you want to delete the competitor.
- Click Confirm to delete, or click Cancel if you change your mind.
[!NOTE]
Troubleshooting How to Delete a Competitor
Minus (-) icon is not clickable
- Ensure that you have expanded the competitor list fully and that the page has loaded.
- Refresh the page and try again.
Confirmation modal does not appear after clicking the minus icon
- Check if there are internet connection issues causing delayed responses.
- Reload the page and retry the deletion process.
Accidentally clicked delete on the wrong competitor
- Click Cancel on the confirmation modal to prevent deletion.
- No changes will be made if you cancel the action.
Competitor was not removed after confirming delete
- Wait a few seconds; sometimes it takes time to update.
- Refresh the page to verify whether the competitor was successfully deleted.
Widget
The Widget page allows you to create, view, and manage widgets for displaying customer reviews directly on your website. You can monitor the status and total hits of each widget, create a new widget when needed, and easily copy the provided widget tag for integration with the Bookingku Booking Engine. This feature helps you showcase guest feedback seamlessly, enhancing your property's credibility and attracting potential guests.
How to Create a New Widget
- On the Widget page, click the New Widget button at the top-right.
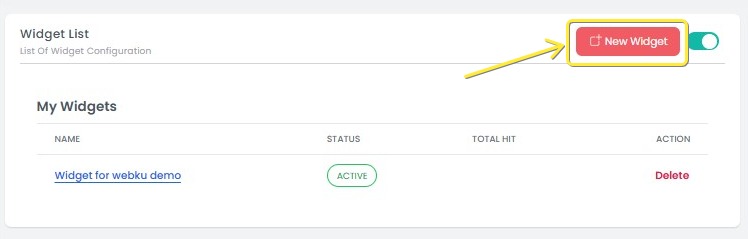
- You will be redirected to the Widget Editor page to configure your widget.
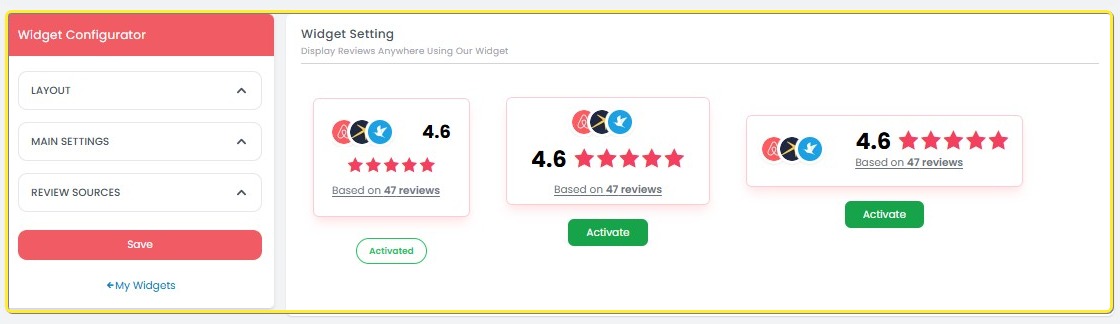
The Widget Editor is divided into several sections:
Layout
- Choose the desired widget layout to match your website design.
- You can switch between layout options to preview the appearance.
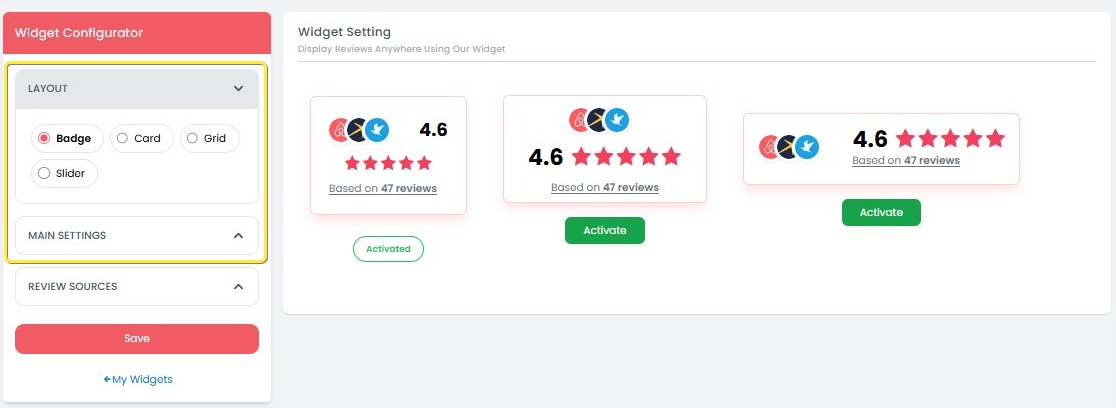
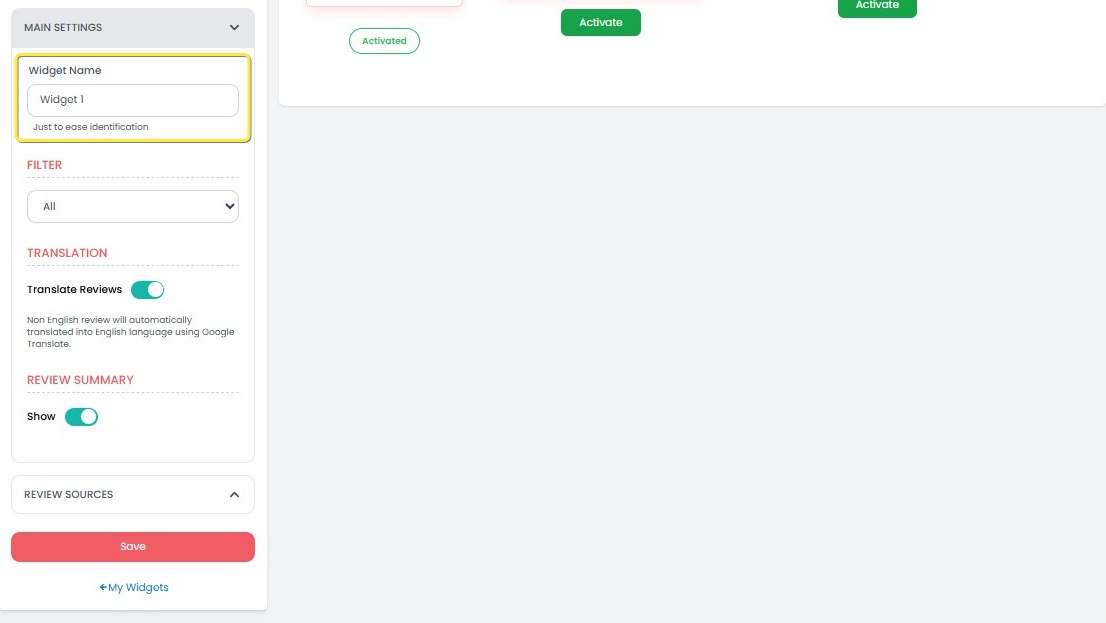
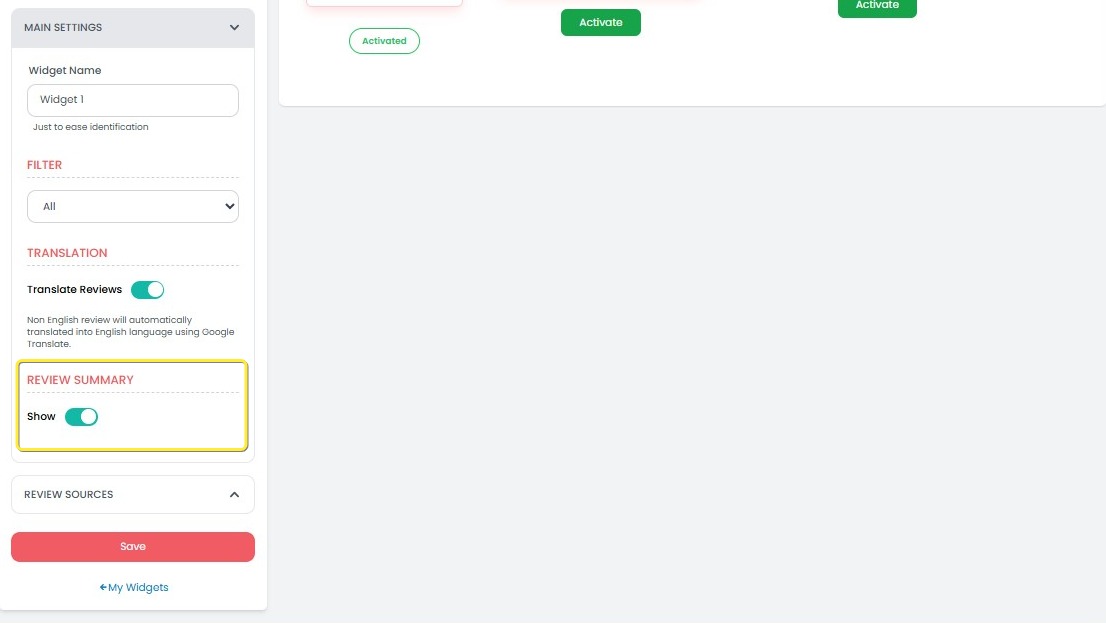
Main Settings
- Widget Name: Enter a name to identify your widget.
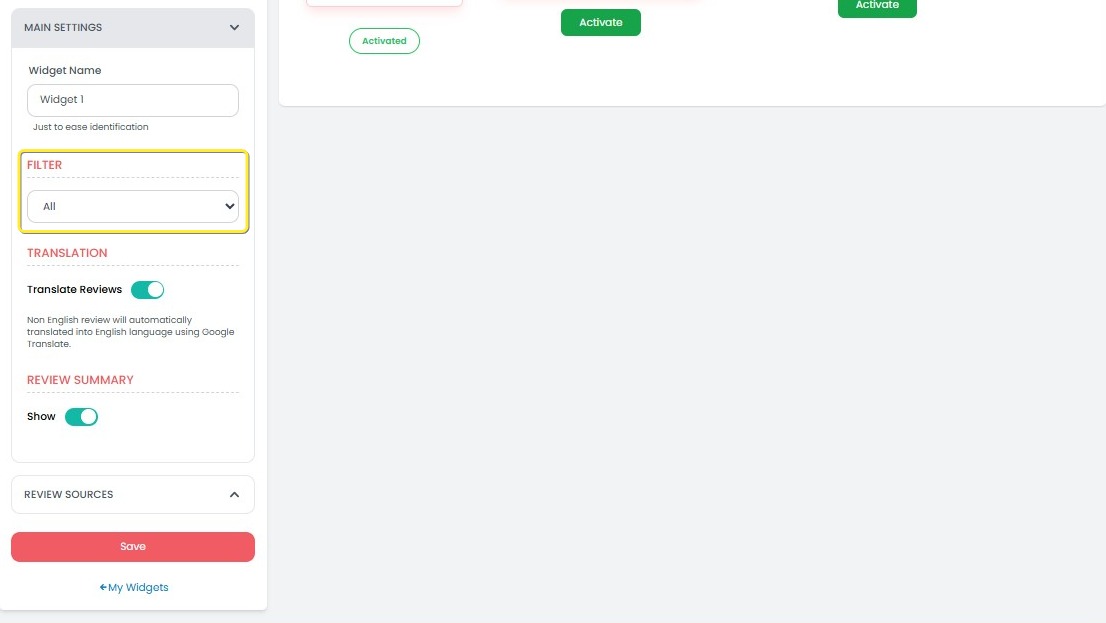
- Filter by Ratings: Choose which reviews to display based on their rating:
- All: Display all reviews regardless of rating.
- 5 Stars Only: Display only 5-star reviews.
- 4-5 Stars Only: Display reviews with 4 and 5 stars.
- 3-5 Stars Only: Display reviews with 3, 4, and 5 stars.
- Translation: Toggle on/off to automatically translate reviews into the user's preferred language.
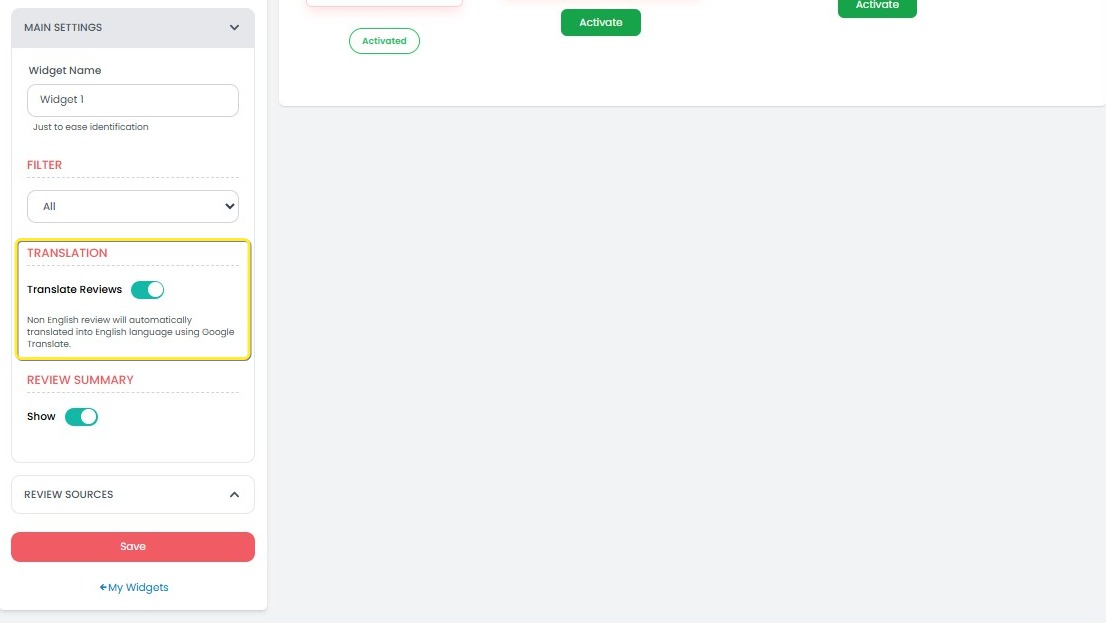
- Review Summary: Toggle on/off to display a summarized overview of the reviews.
Review Source
- Channel:
Select a specific channel to display reviews from (e.g., Google, Booking.com, Airbnb).- Make sure you have the necessary integrations and permissions to display reviews from the selected channel.
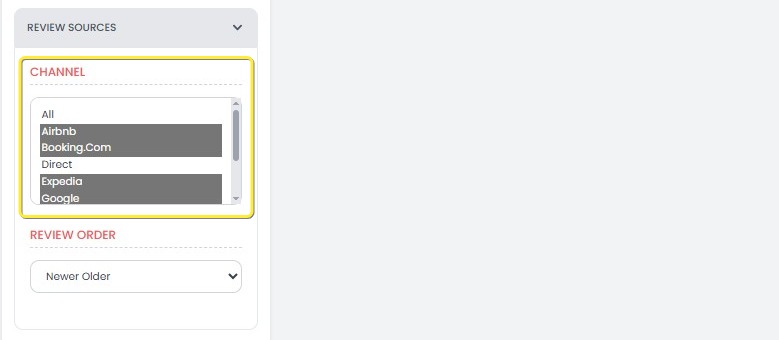
- Make sure you have the necessary integrations and permissions to display reviews from the selected channel.
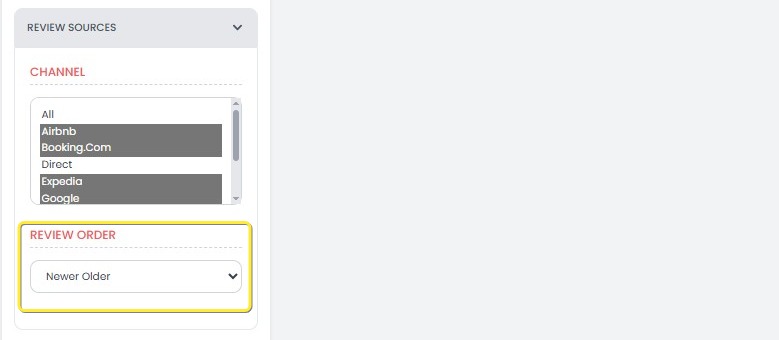
- Review Order:
Set how the reviews are sorted:- Newer to Older: The newest reviews will appear at the top.
- Older to Newer: The oldest reviews will appear at the top.
Save and Apply
- After completing the configuration, click the Save button to create and activate the widget.

[!NOTE]
Troubleshooting Widget
New Widget button is not visible
- Ensure that you are on the Widget page. The New Widget button is located at the top-right of the page.
- Refresh the page to ensure the button appears correctly.
Widget Editor page does not load
- Check your internet connection. A poor connection might prevent the page from loading.
- Try refreshing the page or navigate back to the Widget page and click the New Widget button again.
Layout options are not displaying correctly
- Ensure that you have selected a valid layout option. If no layout is displayed, refresh the page and try again.
- Try clearing your browser cache and reloading the page if the layouts still don't appear.
Unable to save widget settings
- Verify that all required fields, such as Widget Name, are filled in. The Save button may be disabled if these fields are empty.
- Check your internet connection to ensure the settings are saved properly.
- If the issue persists, try saving the widget in a different browser or after clearing the cache.
Translation toggle is not responding
- Ensure that the toggle switch is functioning properly. If it’s not responsive, refresh the page or try using a different browser.
- Check if the translation feature is supported for the selected language in your system settings.
Review Source dropdown is not displaying options
- Verify that you have proper access to the review sources (e.g., Google, Booking.com, Airbnb). If no options appear, check your account permissions.
- Refresh the page and try again. If the issue persists, contact support for further assistance.
Review Order settings are not being applied
- Ensure that you have selected a valid sorting option for Review Order.
- Wait a few seconds after saving the widget settings to allow the changes to take effect.
Widget does not appear on the website after saving
- Double-check the widget tag provided during setup. Ensure it has been correctly copied and integrated into the Bookingku Booking Engine.
- Ensure your website is correctly configured to display the widget and that no conflicts are occurring with other elements on the page.
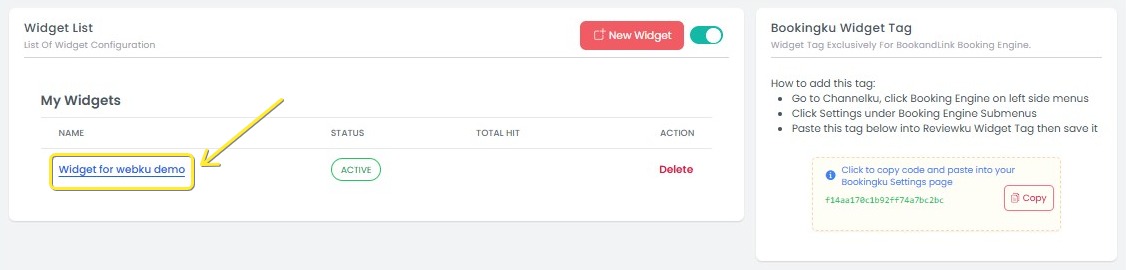
How to Edit an Existing Widget
- On the Widget page, find the widget you want to modify under the My Widgets section.
- Click the widget name (e.g., "Widget for webku demo"). You will be redirected to the Widget Configurator page.
- Adjust any configuration settings as needed, including:
- Widget Code
- Layout
- Main Settings (Widget Name, Filter, Translation, Review Summary)
- Review Souce (Channel, Review Order)
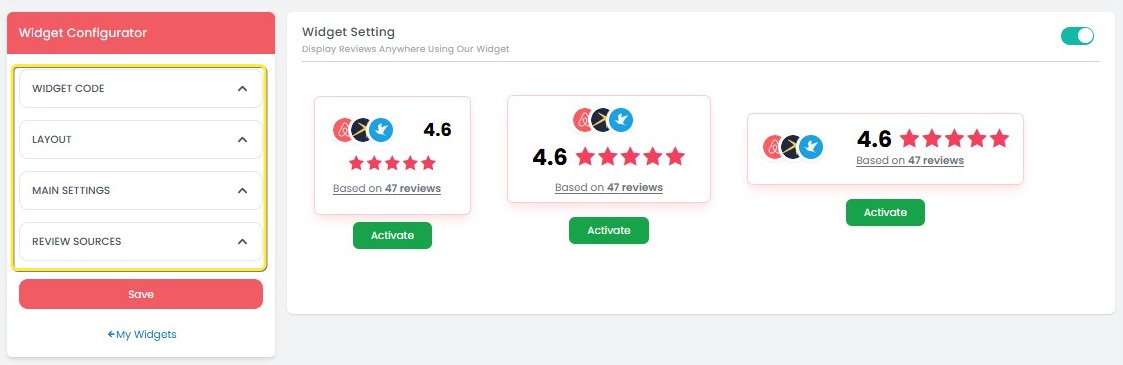
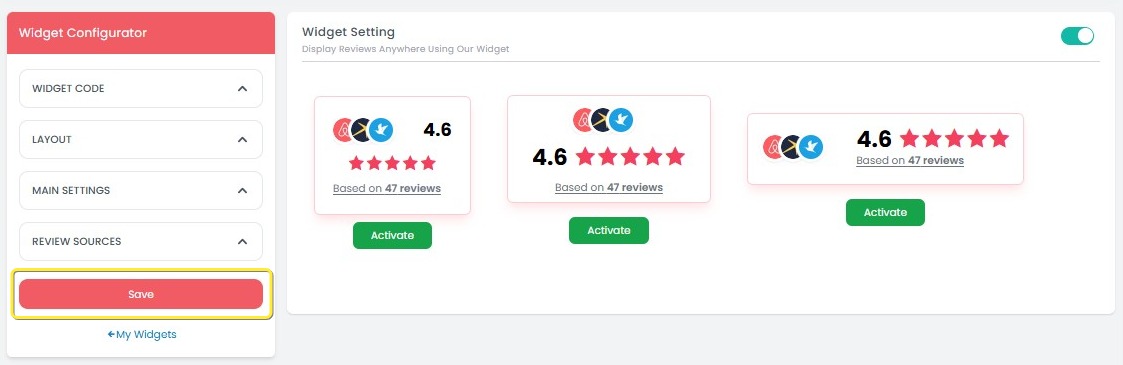
- After making changes, click Save to apply the updates.
[!NOTE]
Troubleshooting How to Edit an Existing Widget
Widget not appearing in the "My Widgets" section
- Make sure the widget you want to edit has been successfully created and saved. It should appear in the My Widgets section once it's saved.
- If the widget is not appearing, try refreshing the page or check if any filters are applied that might be hiding it.
Unable to click on the widget name
- Ensure you are clicking the correct widget name in the My Widgets section. The widget name should be clickable like a link.
- If the name is still not clickable, check your browser settings to make sure JavaScript is enabled, as it is required for the page to function properly.
- If you're unsure about the settings, try opening the page in a different browser.
- If the issue persists, please contact support for further assistance.
Widget Configurator page does not load
- Make sure your internet connection is stable, as a slow or interrupted connection can prevent the page from loading.
- If the page still doesn't load, try clearing your browser cache or use a different browser.
Changes not saved after editing
- After making changes to the widget configuration, ensure you click the Save button to apply the updates.
- If the changes still aren't saved, check if any required fields (such as Widget Name) are empty, as these need to be filled in before saving.
Widget configuration settings are not applying
- Double-check that you have made the desired changes before clicking Save.
- After saving, wait a few seconds for the system to apply the updates. If changes still aren't reflected, try refreshing the page to verify them.
Unable to update widget code
- If the Widget Code field is not responding, make sure you have the necessary permissions to modify the widget code.
- Refresh the page or try editing the widget in a different browser if the issue persists.
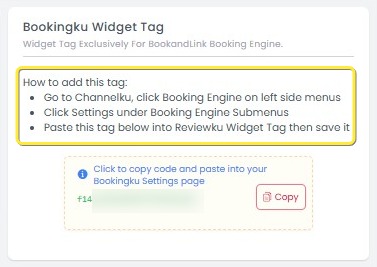
How to Copy and Use the Bookingku Widget Tag
The Bookingku Widget Tag allows you to integrate your Reviewku widget into the Bookingku Booking Engine. You can copy the tag and paste it into your Bookingku system for seamless integration.
- On the Widget page, locate the Bookingku Widget Tag section on the right side.
- If this section is missing, refresh the page or navigate away and back to the Widget page.
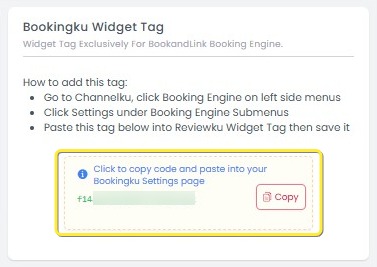
- If this section is missing, refresh the page or navigate away and back to the Widget page.
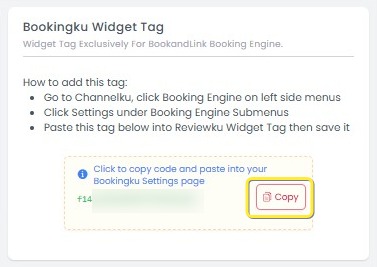
- Click the Copy button next to the widget code.
- Follow the instructions included in the Bookingku Widget Tag section to embed the widget into your website or platform.
[!NOTE]
Troubleshooting How to Copy and Use the Bookingku Widget Tag
Bookingku Widget Tag section is not visible
- Make sure you are on the Widget page and looking at the right section for the Bookingku Widget Tag.
- If the section is missing, try refreshing the page or navigate away and back to the Widget page.
Copy button is not working
- Ensure that you are clicking the correct Copy button next to the widget code.
- Try using a different browser or clearing the cache if the Copy button is unresponsive.
Unable to copy the widget code
- Ensure that you have proper permissions to copy and use the widget tag. If you're encountering issues, check your user role or access permissions.
- If the code still doesn't copy, try manually selecting and copying the code instead of using the button.
Widget tag is not embedding into the website
- Double-check the copied widget code and ensure it is correctly pasted into the designated section of your website's HTML.
- Verify that your website's platform supports external widgets. If you're unsure, consult your website's support or development team.
Instructions for embedding widget are unclear
- Ensure you are following the instructions step by step as provided in the Bookingku Widget Tag section. If any steps are unclear, try contacting support for help.
- If the widget still doesn’t embed correctly, consult the FAQ or documentation for additional troubleshooting steps.
Profile
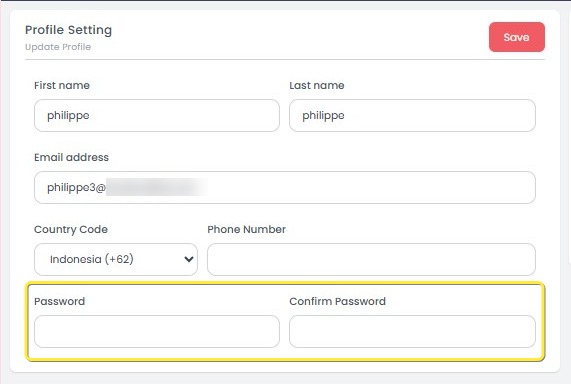
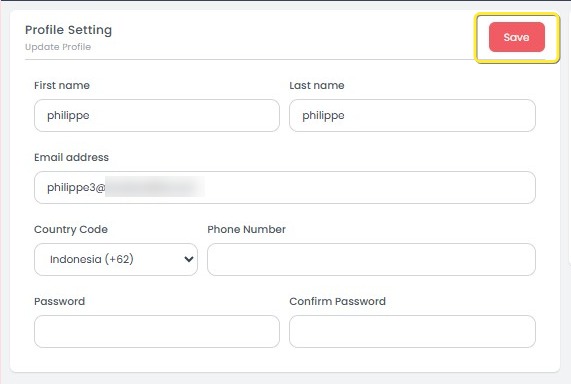
The Profile page allows you to view and update your user account information, including your first name, last name, email address, country code, phone number, and password. Keeping your profile information accurate helps maintain account security and ensures you receive important notifications. After making any changes, click Save to apply and update your profile settings.
How to Update Profile Information
- Go to the Profile page from the left sidebar.
- Update the necessary fields:
- First Name and Last Name: Edit your personal name details.
- Email Address: Update your email if necessary.
- Country Code and Phone Number: Select your country code and input a valid phone number.

- If you want to change your password:
- Fill in the Password and Confirm Password fields with the new password.
- Fill in the Password and Confirm Password fields with the new password.
- After completing all updates, click the Save button at the top-right corner.
[!NOTE]
Troubleshooting How to Update Profile Information
Save button is disabled or unresponsive
- Ensure that at least one field has been modified before clicking Save.
- If changing the password, make sure both the Password and Confirm Password fields are filled and match exactly.
Cannot update email address
- Verify that the new email address is correctly formatted (e.g., user@example.com).
- Refresh the page and try again if the input field seems uneditable.
Phone number is not accepted
- Make sure you have selected the correct Country Code before entering your phone number.
- Only numeric values should be used without special characters (e.g., +, -, space).
Password change fails
- Check that both Password and Confirm Password fields are filled identically.
- Ensure the password meets any system security requirements (such as minimum length if applicable).
Changes are not saved after clicking Save
- Verify that all mandatory fields are filled.
- Check your internet connection and try saving again.
- If the problem persists, log out and log back in before updating.