Introduction
This module explains how to manage and charge Virtual Credit Cards (VCC) using PayKu. Before processing a VCC payment, make sure you understand the payment regulations and charging policies from your OTA partners.
For OTAs that do not support automatic VCC synchronization, the card details must be entered manually.
How to Add Virtual Credit Card (VCC)
Find the reservation
Search for the reservation from the Booking List. You can find the reservation using one of the following methods:
Via Booking Chart
First, navigate to Front Office → Booking Chart.
- From the Calendar tab
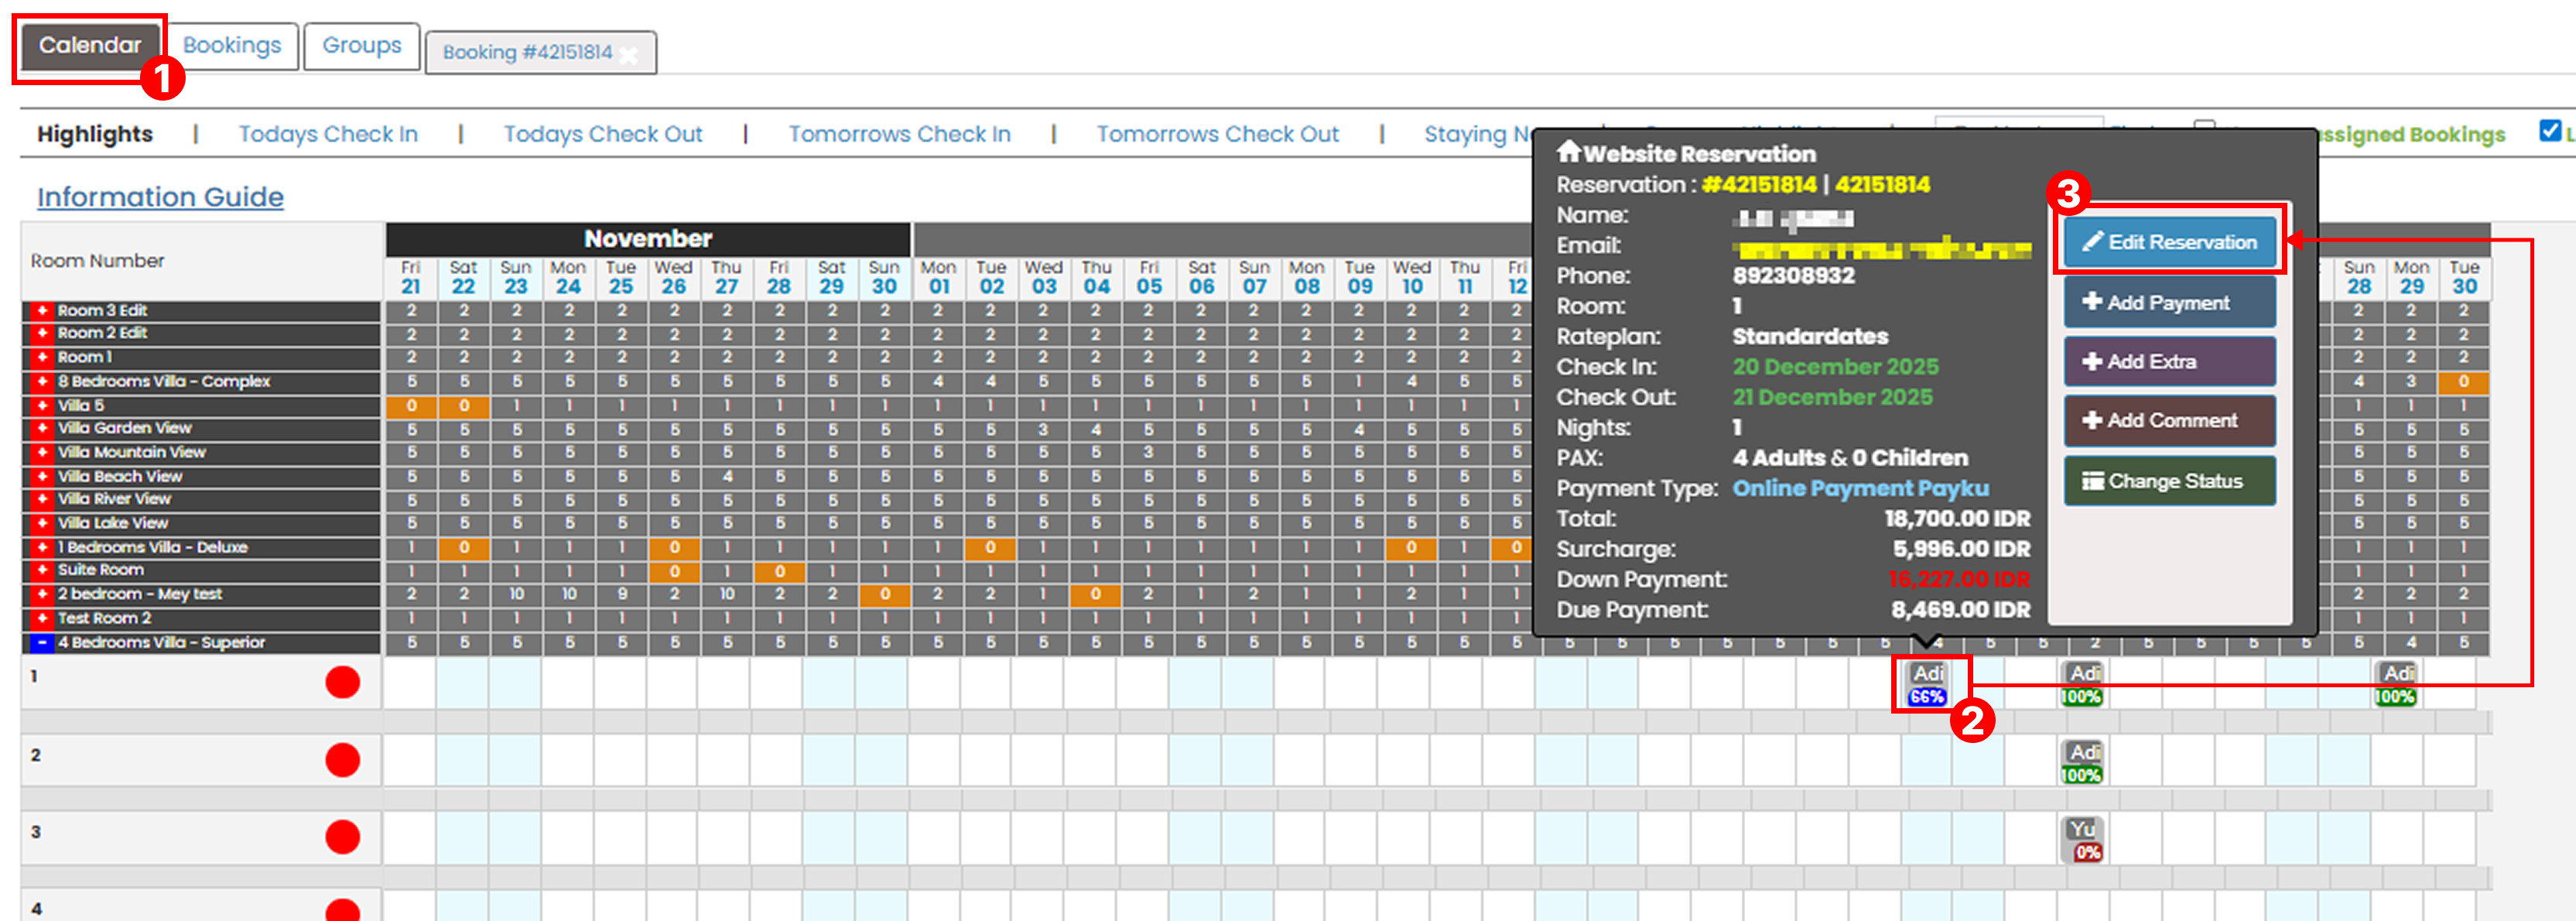
- Go to the Calendar tab.
- Find and click the reservation from the booking chart.
- A pop-up window will appear. Click Edit Reservation.
- On the Edit Reservation pop up, go to Credit Card tab.

- Using Booking ID
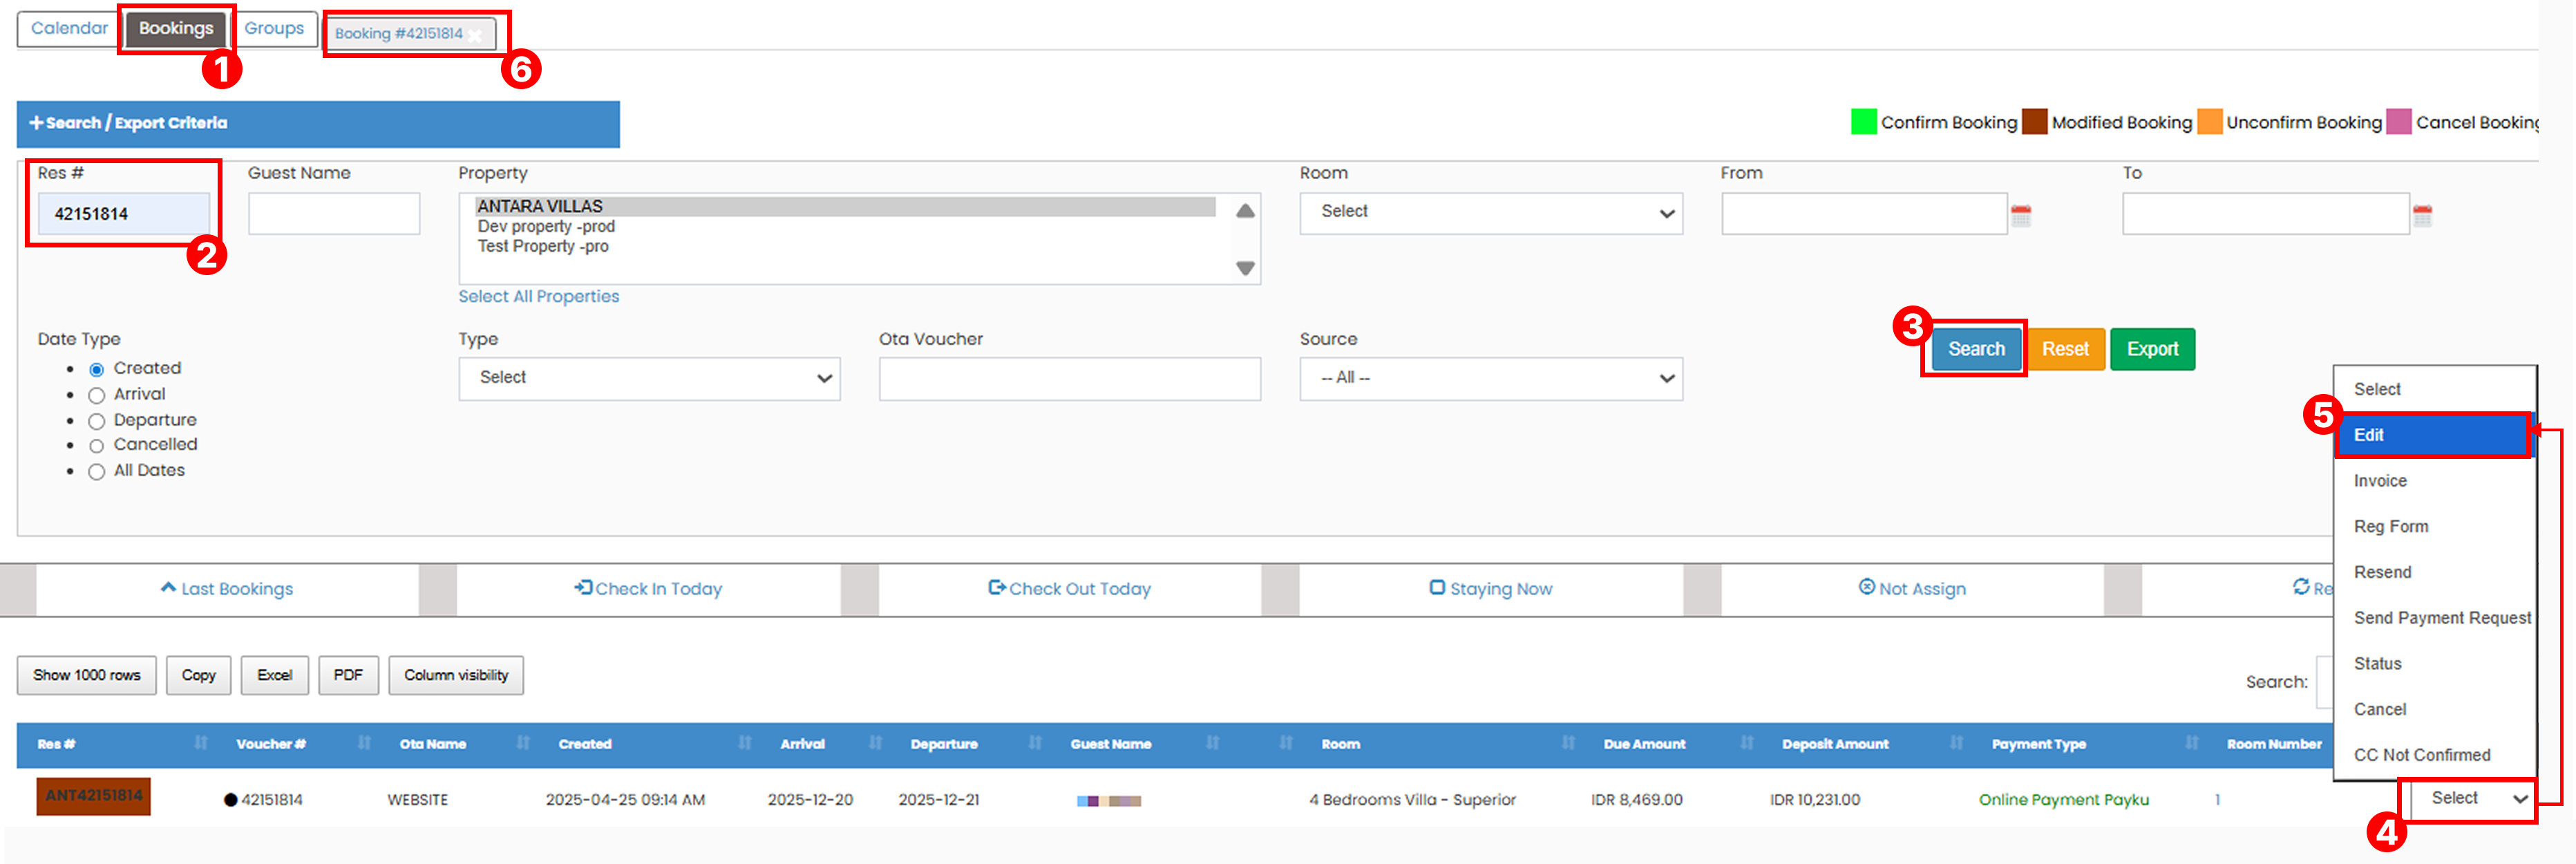
- Go to the Booking tab.
- Enter the Booking ID in the Res# field.
- Click the Search button.
- The matching reservation will appear in the table. Click the Select button in the left column.
- Choose Edit.
- A new tab containing the reservation details will open automatically.
- On the reservation tab, go to Credit Card.

Via Booking List
To find a reservation, go to the Bookings menu, then select Booking List.
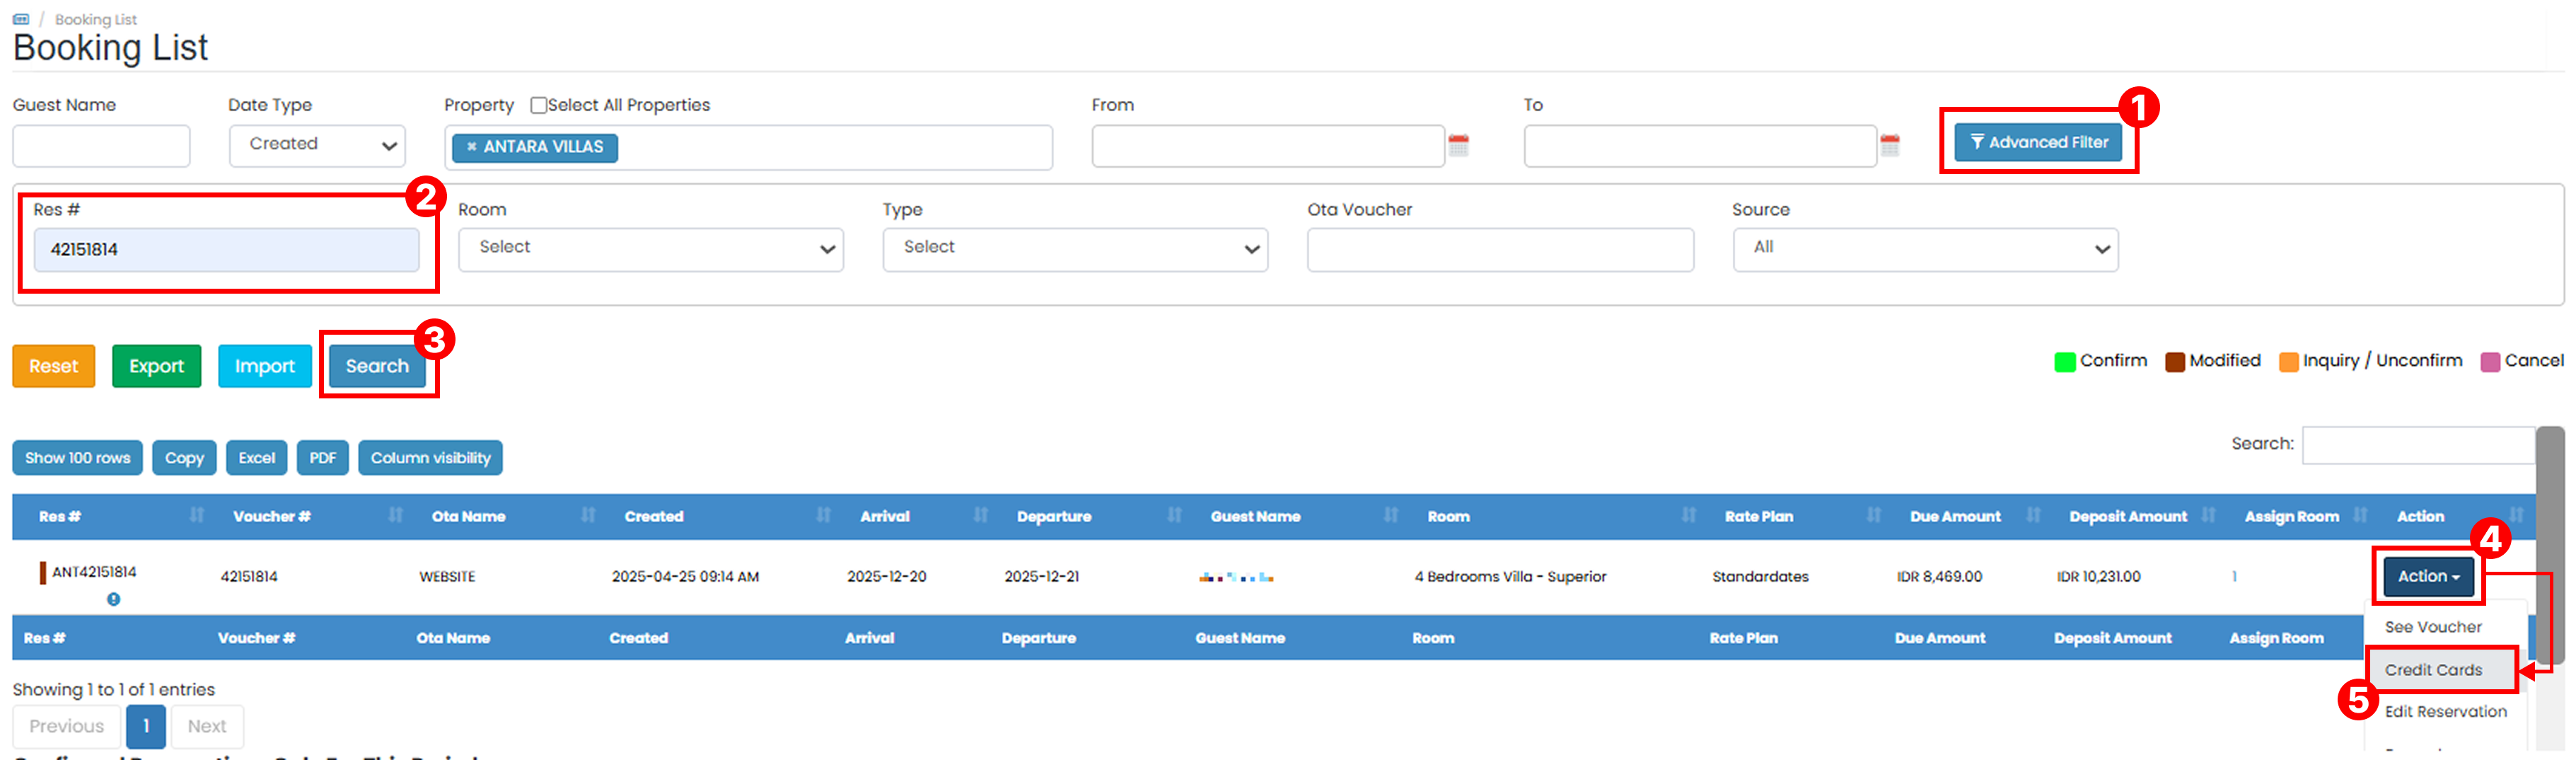
- On the Booking List page, click the Advanced Filter button.
- Enter the booking ID in the Res# field.
- Click the Search button. The table will display the matching reservation.
- Click the Action button.
- Select Credit Cards.
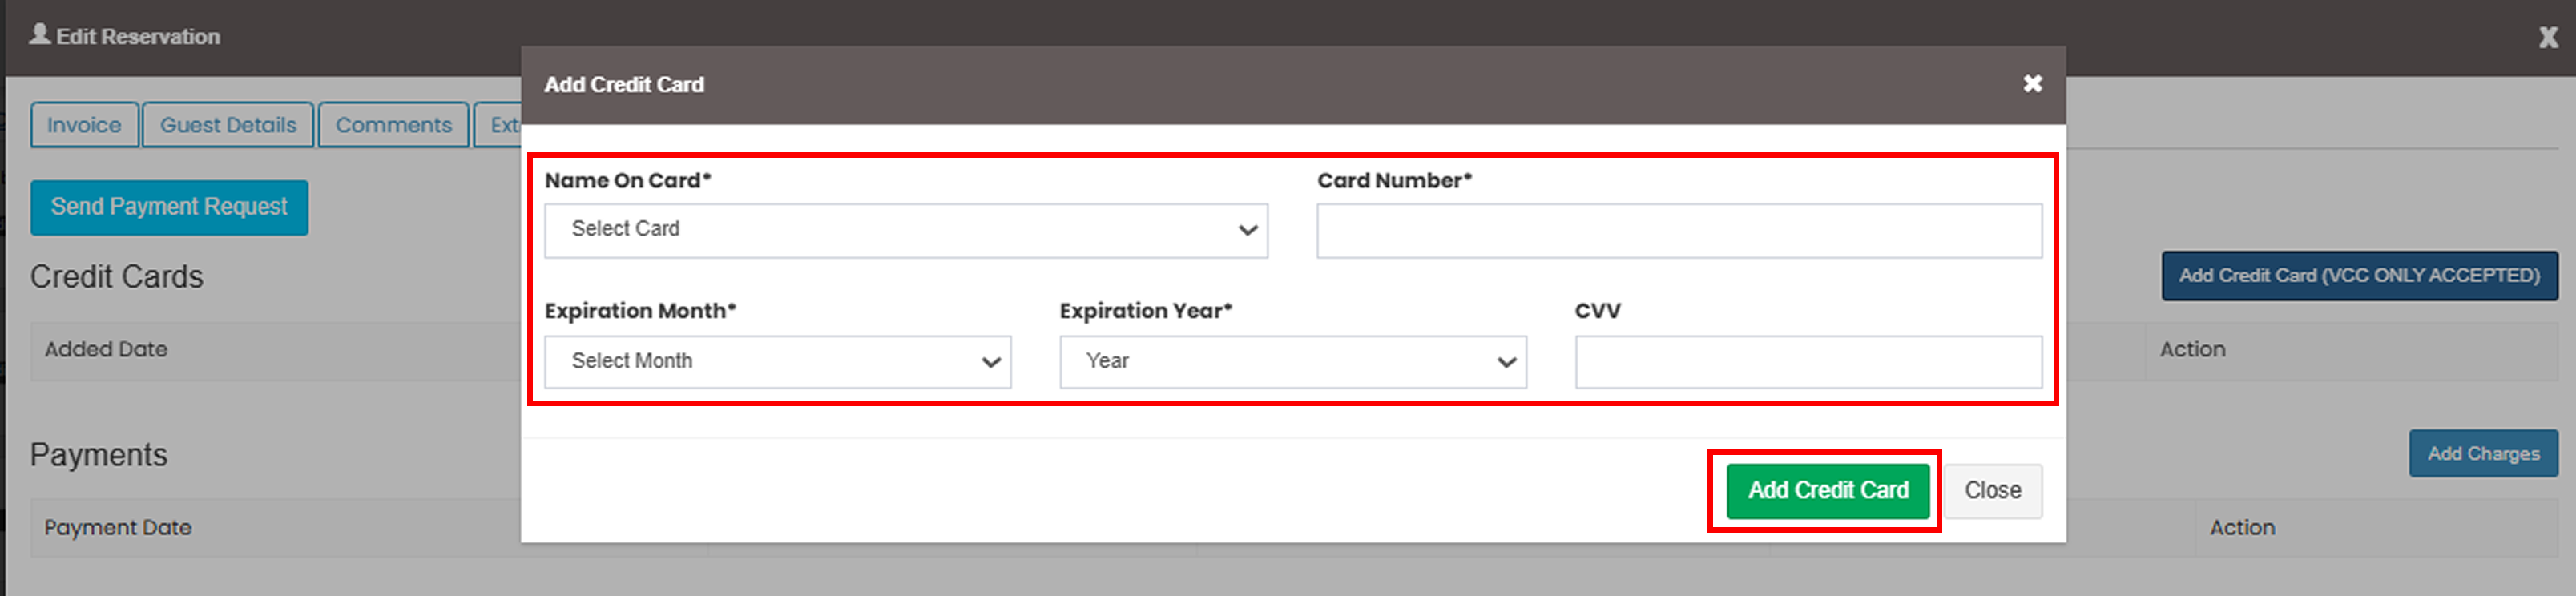
Input VCC Detail
-
After the reservation detail page opens, go to the Credit Card tab and click Add Credit Card (VCC Only Accepted).

-
Enter the Virtual Credit Card (VCC) information, then click Add Credit Card to apply the changes.
Cannot add VCC
- Make sure all required card details are entered correctly.
- Verify that the card number, expiry date, and security code are valid.
- Ensure the reservation has been saved before adding the VCC.
VCC not displayed after saving
- Refresh the reservation page and check the Credit Card tab again.
- Confirm that the VCC was successfully saved.
- Verify that you are viewing the correct reservation.
Invalid card information
- Recheck the card details provided by the OTA.
- Ensure there are no extra spaces or missing digits when entering the card information.
How to Charge the Virtual Credit Card (VCC)
- Open the Credit Card pop-up from the reservation you want to charge, then click the Add Charges button.
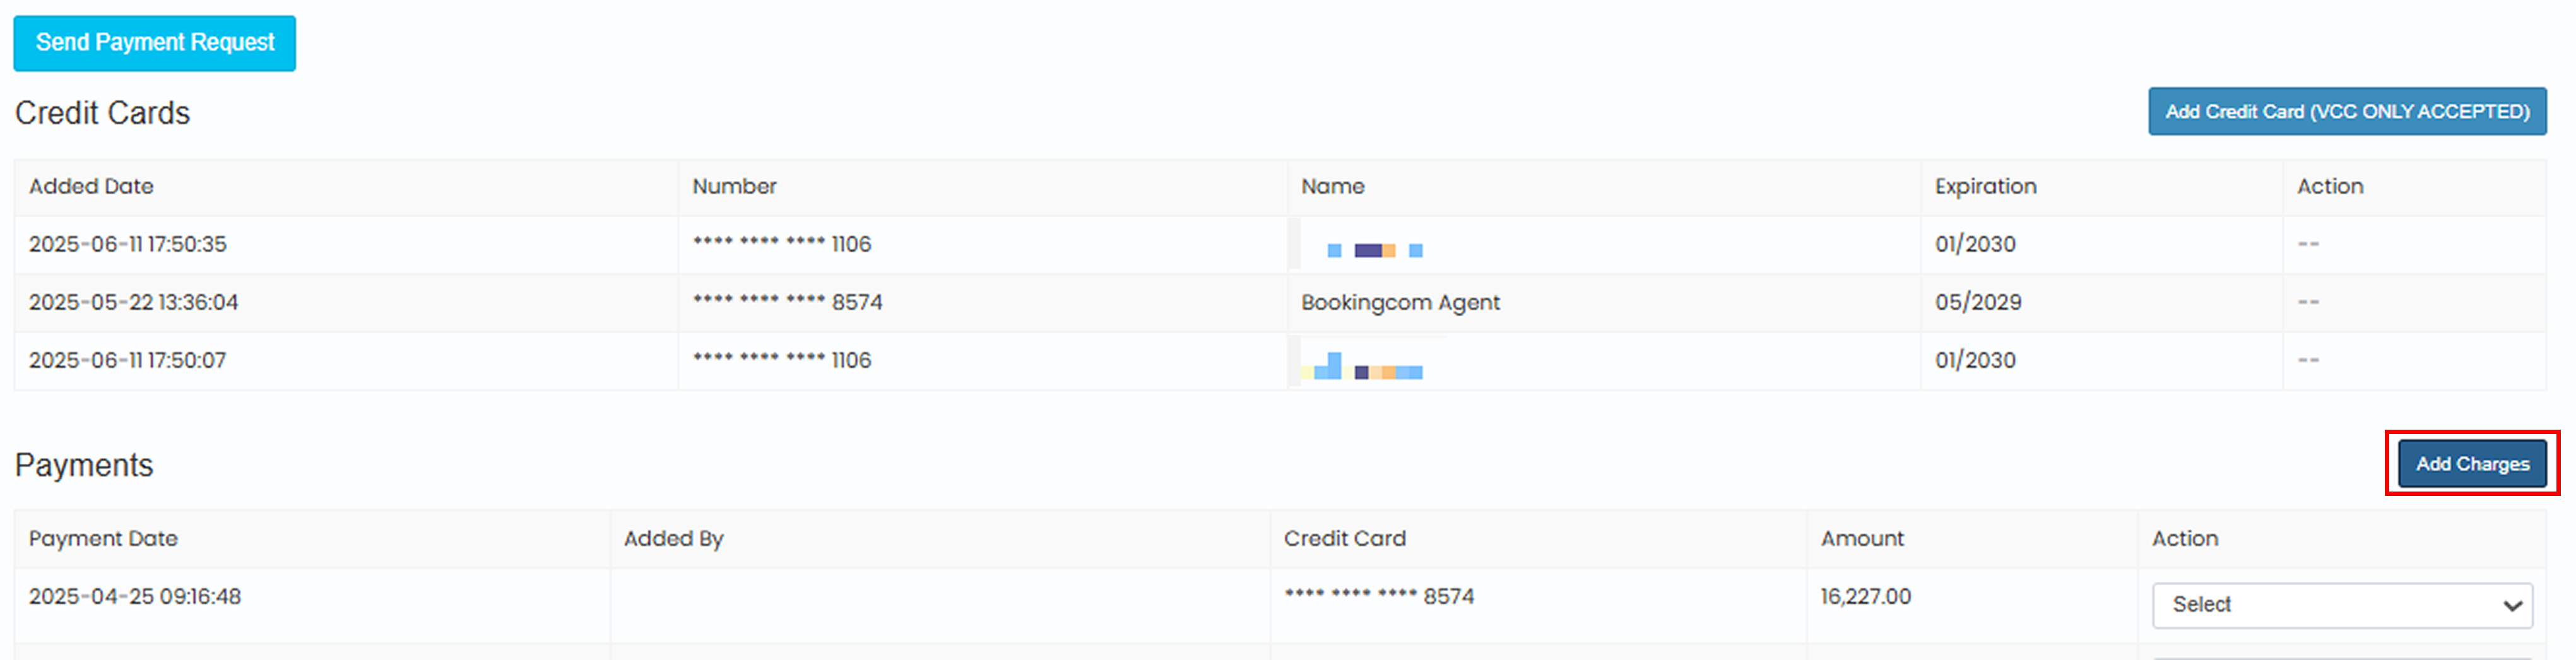
- In the Add Payment pop-up, complete the required fields:

- Select the Virtual Credit Card (VCC) you want to charge.
- Enter the charge amount. Make sure the amount matches the required final digits of the card. In some cases, especially for cards issued in foreign currencies, you may need to slightly reduce the amount (for example IDR 50–100) if the transaction fails.
- Click CHARGE THE CARD to process the payment.
- Once the transaction is successful, the payment status will be updated automatically through the payment gateway.
Charge failed
- Ensure the VCC is active and eligible for charging according to the OTA policy.
- Verify that the charge amount does not exceed the available VCC balance.
- For some foreign-currency VCCs, try reducing the amount slightly (for example IDR 50–100) and retry the transaction.
VCC cannot be charged yet
- Some OTA-issued VCCs can only be charged after check-in, on the arrival date, or after checkout, depending on the OTA policy.
- Verify the card activation date and charging rules with your OTA partner.
Payment status not updated
- Refresh the page and wait a few moments for the payment gateway response.
- Check the transaction status again from the Credit Card section.
- If the status remains unchanged, contact PayKu Support for further assistance.
Incorrect charge amount
- Ensure the amount entered matches the amount authorized for the VCC.
- If the transaction is declined, review the amount and try again.
How to Process Refund
You can also process refunds for charged VCC transactions. For detailed instructions, refer to How to Process VCC Refund documentation.