Introduction
The Account Management & Security section helps you manage your accounts and enhance security. It covers Sub Users, Update Profile, Change Password, Linked Devices, Multi-Factor Authentication (MFA), and Impersonate.
Sub User
The Sub User menu is available only for Master Users. This menu allows you to manage Sub User accounts by adding or removing product access efficiently. To manage Sub User access, go to the Sub User page from the left menu.

How to Add Product Access
- Click the "Detail" button on the user who needs access.

- Click "+ Add Access" to assign a new product.
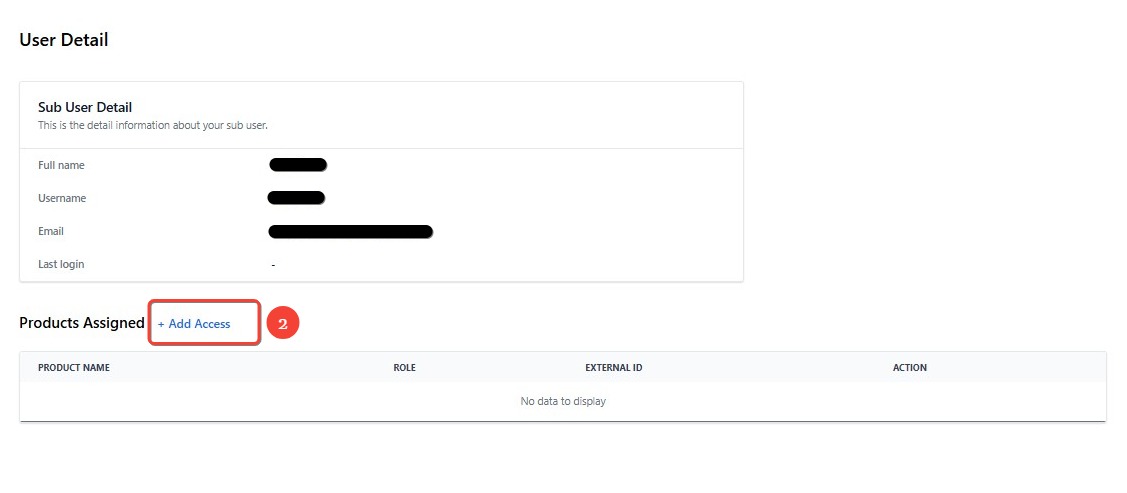
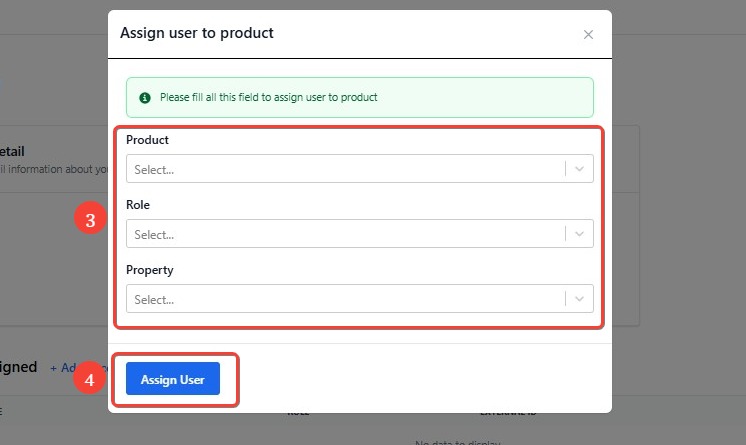
- Fill in the necessary fields by selecting the product, role, and properties that the user is permitted to access.
- Click "Assign User" to grant the Sub User access to the selected product.
How to Remove Product Access
- Click the "Detail" button on the user whose access you want to remove.

- Click the "Remove" button next to the product to revoke access.

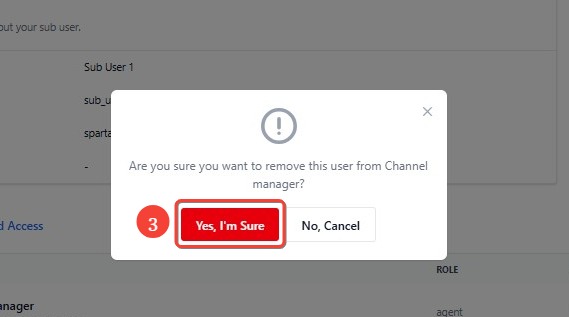
- Confirm the action.
- Click "Yes, I'm Sure" to confirm, and the Sub User will no longer have access to the product.
- Click "No, Cancel" to keep the existing access.
[!NOTE]
Troubleshooting Access Issues
Can't add a product?
- Ensure you have the correct permissions as a Master User.
- Verify that the product is available for assignment.
- Refresh the page and try again.
Unable to remove access?
- Confirm that the user still requires access before proceeding.
- Ensure the product is not a mandatory assignment for the user role.
- Try logging out and logging back in to see updated changes.
Update Profile
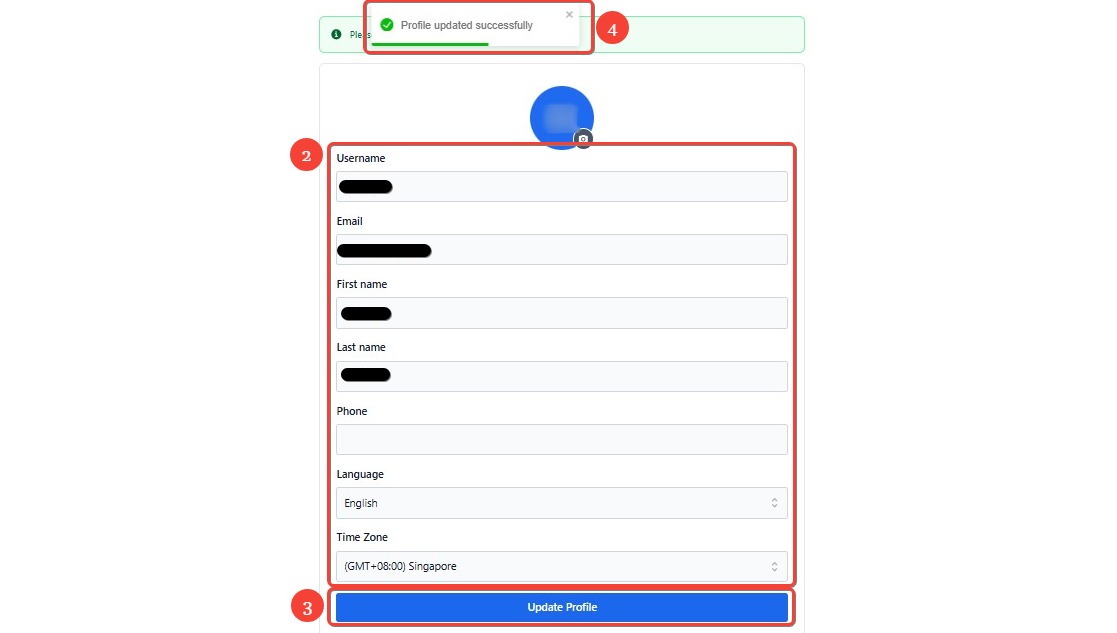
The Update Profile menu allows you to modify your personal information, including username, email, name, phone number, language preference, and time zone.
How to Update Your Profile
Before updating your profile, please ensure the following:
- All required fields, including username, email, first name, and last name, are filled in.
- If changing your email, make sure to use a valid and registered email address.
- Your phone number is correctly entered and follows the proper format.
Steps to Update Your Profile
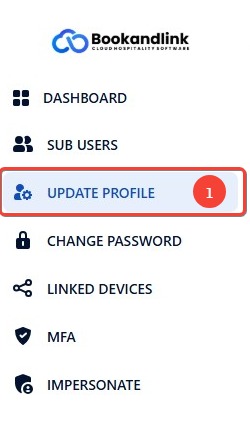
- Click the "Update Profile" menu on the left sidebar.
- Modify the necessary information (e.g., name, email, profile picture).
- Click Update Profile button to update your information.
- A confirmation message will appear if the update is successful.
[!NOTE]
Troubleshooting Profile Update Issues
Profile update failed?
- Ensure all required fields are completed.
- Refresh the page and try again.
- Check your internet connection.
- Log out and log back in before making changes again.
Profile picture not updating?
- Make sure the image format is JPEG, JPG, PNG, or GIF.
- Resize the image if it exceeds the allowed file size limit.
- Try uploading from a different device or browser.
Changes not saving?
- Confirm that no special characters are used in restricted fields.
- Try updating one field at a time instead of multiple at once.
- Clear your browser cache and attempt the update again.
**Change Password
The Change Password menu provides a secure way for you to update your account credentials, ensuring better protection and access control.
How to Change Your Password
Before updating your password, please ensure the following:
- Your new password is at least 8 characters long.
- It includes at least one uppercase letter, one lowercase letter, and one number.
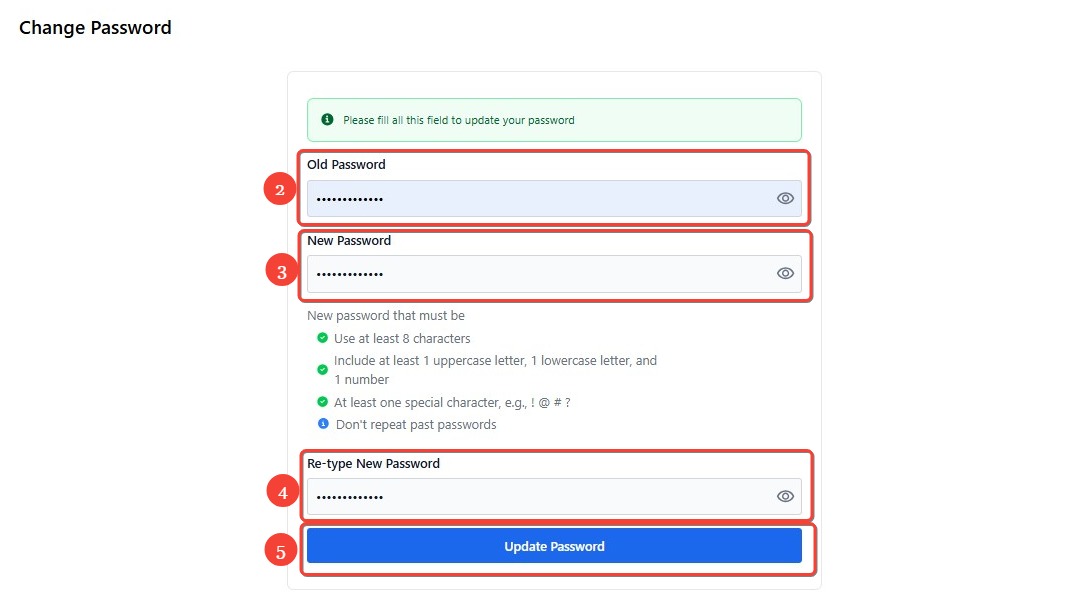
- It contains at least one special character (e.g., ! @ # ?).
- It is not a previously used password.
Steps to Change Your Password
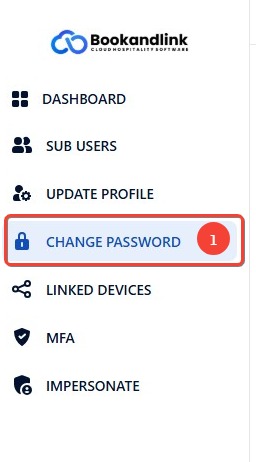
- Click the "Change Password" menu on the left sidebar.
- Enter your current password in the Old Password field.
- Enter your new password in the New Password field.
- Re-enter your new password in the Re-type New Password field.
- Click the "Update Password" button to save changes.
- A confirmation message will appear if the password update is successful.
[!NOTE]
Troubleshooting Password Update Issues
Password update failed?
- Ensure you have entered your current password correctly.
- Make sure your new password meets all the password requirements.
- Refresh the page and try again.
- Check your internet connection.
- Log out and log back in before attempting the change again.
Forgot your current password?
- Use the Forgot Password option on the login page to reset your password.
- Follow the instructions sent to your registered email to create a new password.
Linked Devices
The Linked Devices menu helps you manage and monitor the devices associated with your account, ensuring better security and control over active sessions.
How to Manage Your Linked Devices
Before managing your linked devices, consider the following:
- Review all connected devices to ensure they are recognized and authorized.
- Remove any unfamiliar or unauthorized devices to protect your account.
- Enable Multi-Factor Authentication (MFA) for enhanced security.
Steps to Manage Linked Devices
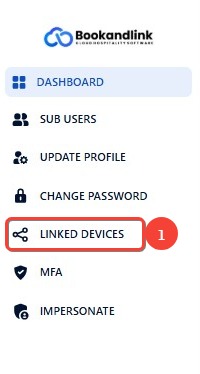
- Click the "Linked Devices" menu on the left sidebar.
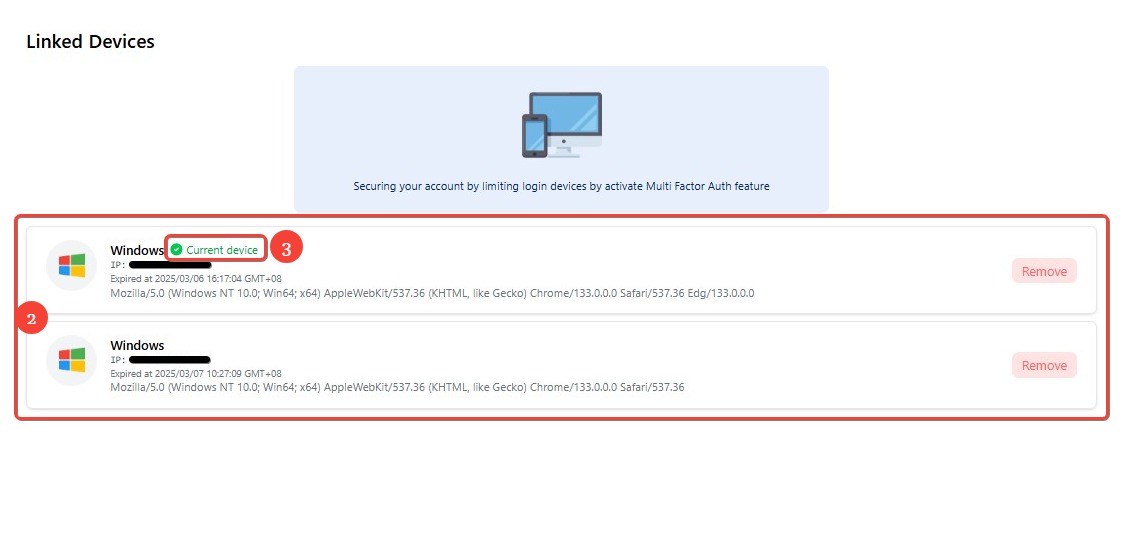
- Review the list of devices currently linked to your account.
- Identify the current device, marked with a green indicator.
- Click the Remove Button
- Click the Remove button next to the device you want to remove.
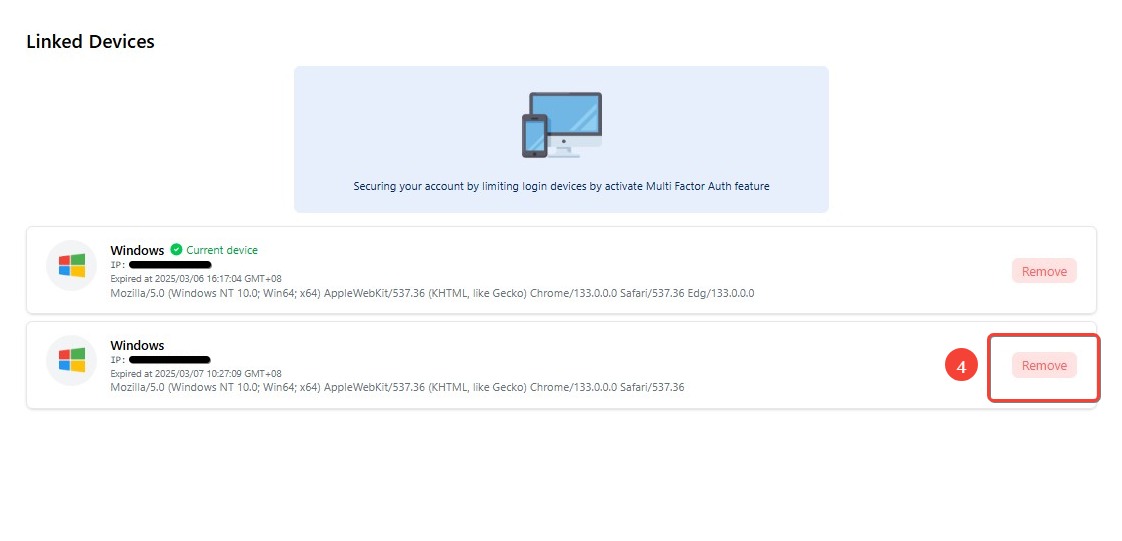
- Click the Remove button next to the device you want to remove.
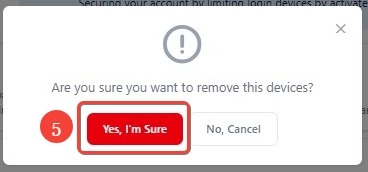
- Click Yes, I'm Sure to confirm the removal.
- If you want to keep the device connected, click 'No, Cancel' to cancel the removal process.
- If you want to keep the device connected, click 'No, Cancel' to cancel the removal process.
- Your session on the removed device will be logged out immediately.
[!NOTE]
Troubleshooting Linked Device Issues
Seeing unfamiliar devices?
- Immediately remove the device from the list.
- Change your password to prevent unauthorized access.
Unable to remove a device?
- Refresh the page and try again.
- Ensure you have a stable internet connection.
- Log out and log back in before attempting again.
Multi-Factor Authentication (MFA)
Multi-Factor Authentication (MFA) enhances account security by requiring additional verification steps beyond just a password. This extra layer of security helps prevent unauthorized access to your account.
How to Set Up Multi-Factor Authentication (MFA)
By default, OTP via email is activated for your account. However, you can set up Google Authenticator for added security.
- Click the "MFA" menu on the left sidebar.
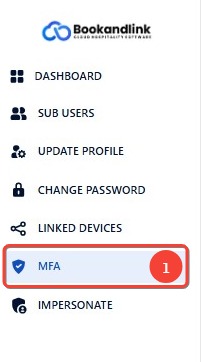
- Choose your preferred authentication method:
- Email: Receive verification codes via email.
- Google App Authenticator: Use a mobile app like Google Authenticator to generate verification codes.
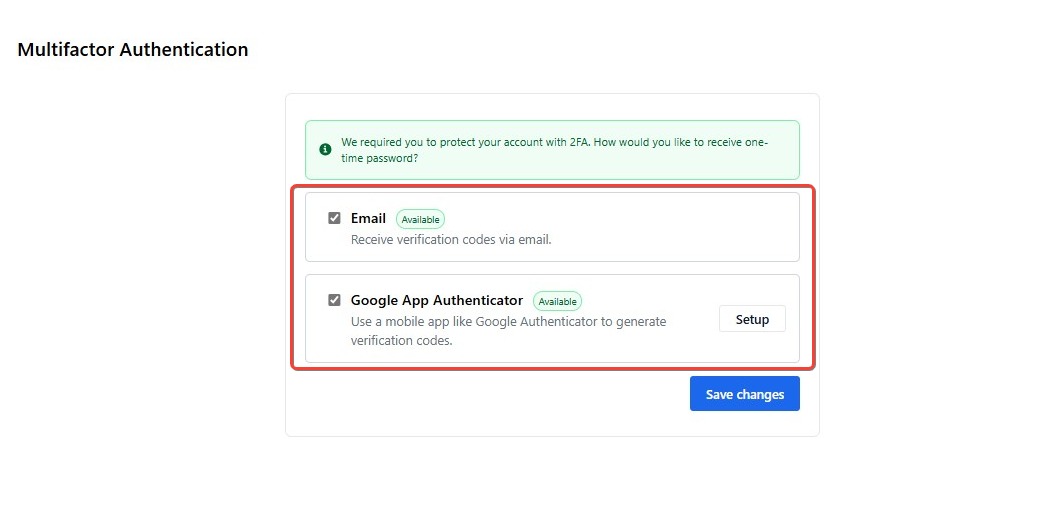
- If using Google Authenticator:
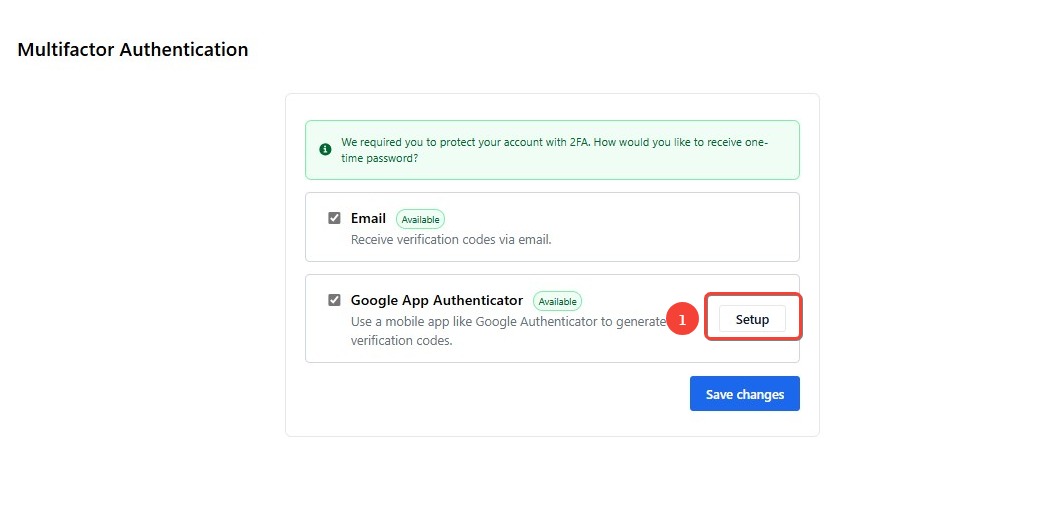
- Click Setup, then scan the QR code using the Google Authenticator app.
- Enter the 6-digit code displayed in the app and click Verify.
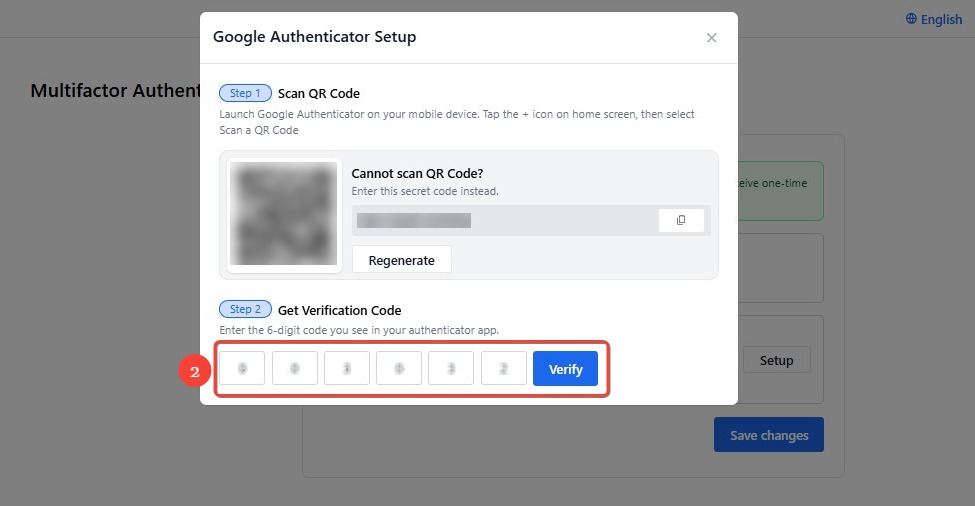
- Click Setup, then scan the QR code using the Google Authenticator app.
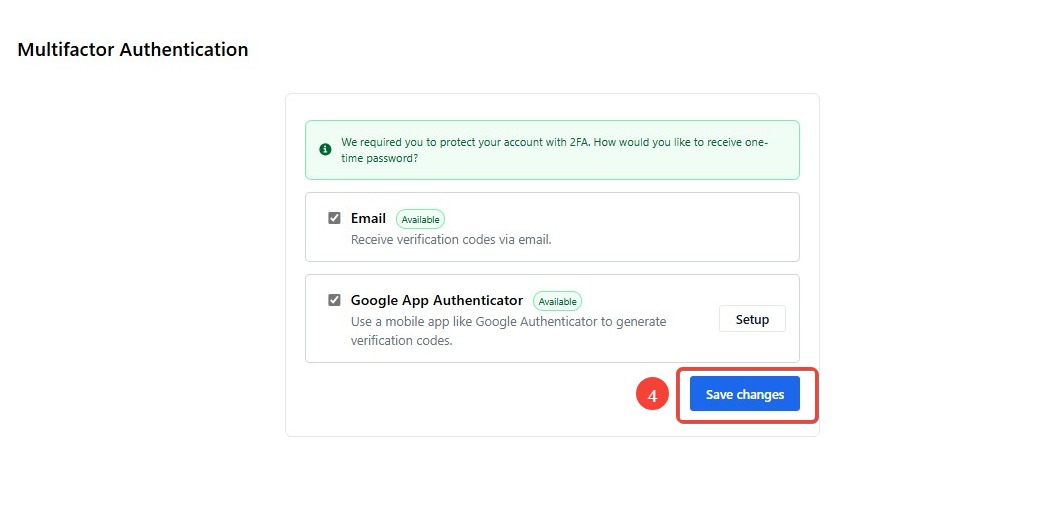
- Click "Save Changes" to apply your selection.
How to Remove Google Authenticator
If you have set up Google Authenticator but want to remove it, follow these steps:
- Click the "MFA" menu on the left sidebar.

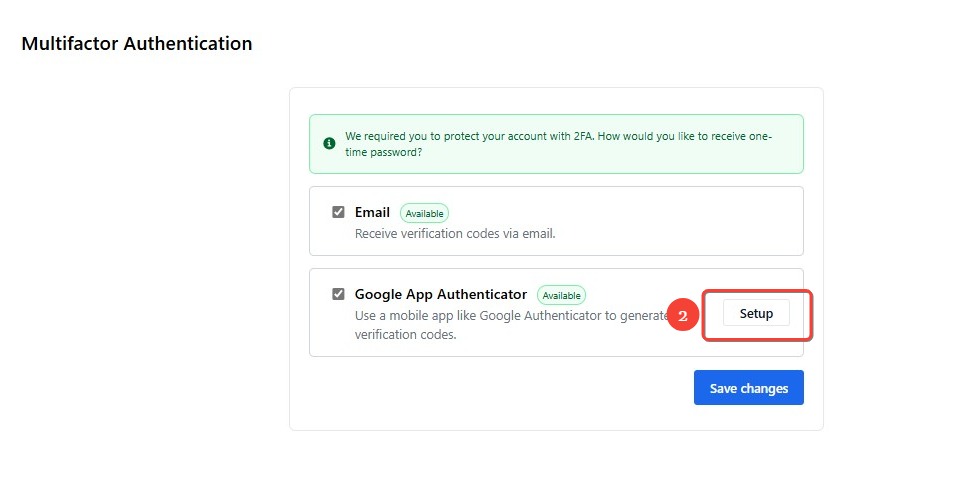
- Click Setup on the Google Authenticator.
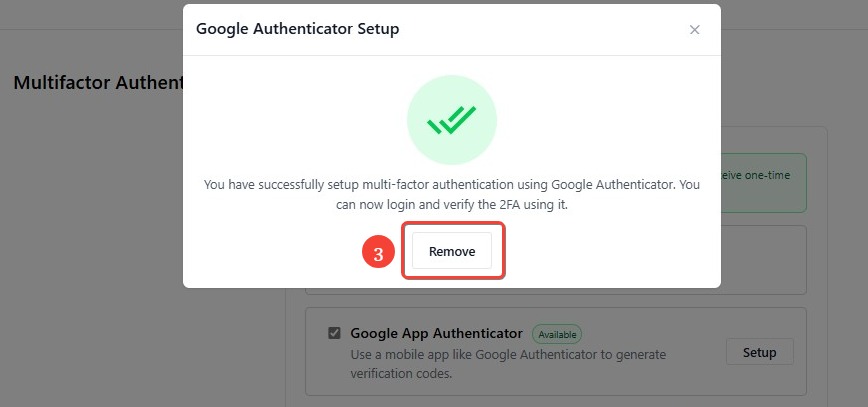
- Click Remove to start the removal process.
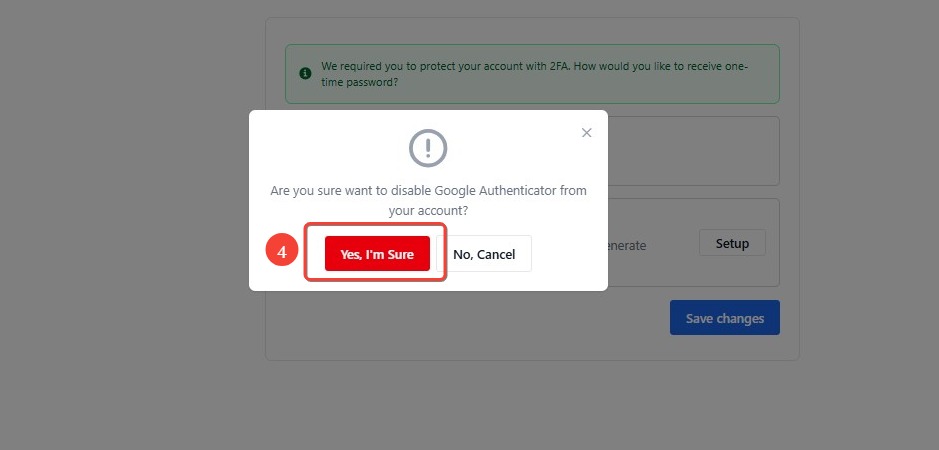
- A confirmation modal will appear. Click "Yes, I'm Sure" to confirm removal or "No, Cancel" to keep it enabled.
- Once removed, your authentication method will revert to OTP via email.
[!NOTE]
Important Notes
- Users must set up Google Authenticator first before they can select it as a login method.
- Users can choose to use either OTP via email or Google Authenticator for login authentication.
- If both OTP via email and Google Authenticator are enabled, users can select their preferred method when logging in.
- MFA cannot be disabled from the SSO Dashboard.
[!NOTE]
Troubleshooting MFA Issues
Cannot Enable Google Authenticator
- Ensure that you have completed the setup process by scanning the QR code and verifying the 6-digit code.
- Try resyncing the time on your Google Authenticator app.
- Make sure you have a stable internet connection when setting up MFA.
- If the issue persists, try removing and re-adding Google Authenticator.
Unable to Log in with Google Authenticator
- Ensure that you are entering the correct 6-digit code from the Google Authenticator app.
- Check that your device time is synchronized with internet time.
- If you cannot access Google Authenticator, use OTP via email instead.
- If both methods fail, contact support for account recovery.
Cannot Remove Google Authenticator
- Ensure you have selected the correct MFA setup option before clicking Remove.
- Try refreshing the page and attempting the removal process again.
- If the removal option is unavailable, check if your account has restrictions on disabling MFA.
- Contact support if you are unable to disable Google Authenticator after multiple attempts.