


Booking.com Set-up
Now not only connect with Booking.com for room availability, prices, reviews and messaging. You can create your own Booking.com account via Bookandlink channel manager and can manage content and promos if you already have a Booking.com account
Create Booking.com Account through Bookandlink Channel Manager
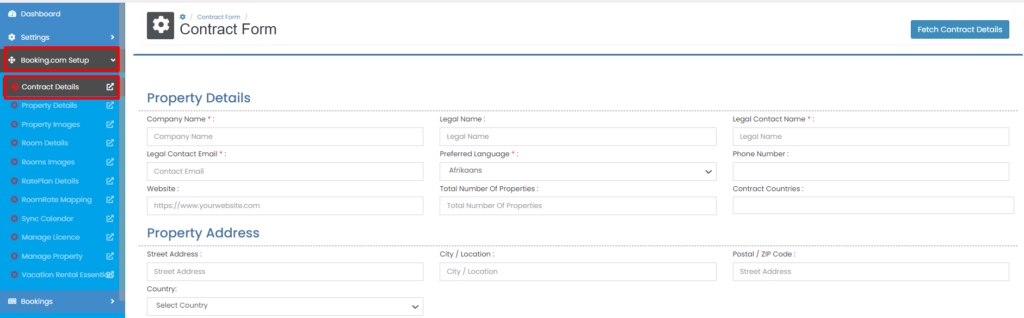
Step 1. Click menu Booking.com Setup and click Contract Details

Step 2. A pop up will appear asking if you already have a Booking.com account, select No
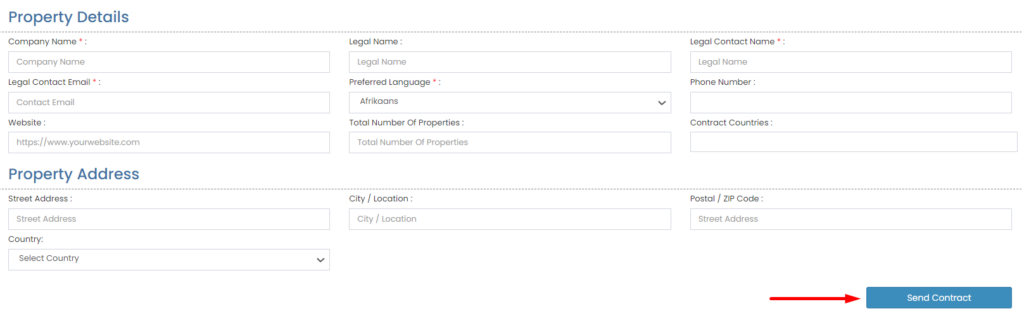
Step 3. Please fill in the contract form provided, click send contract when finished
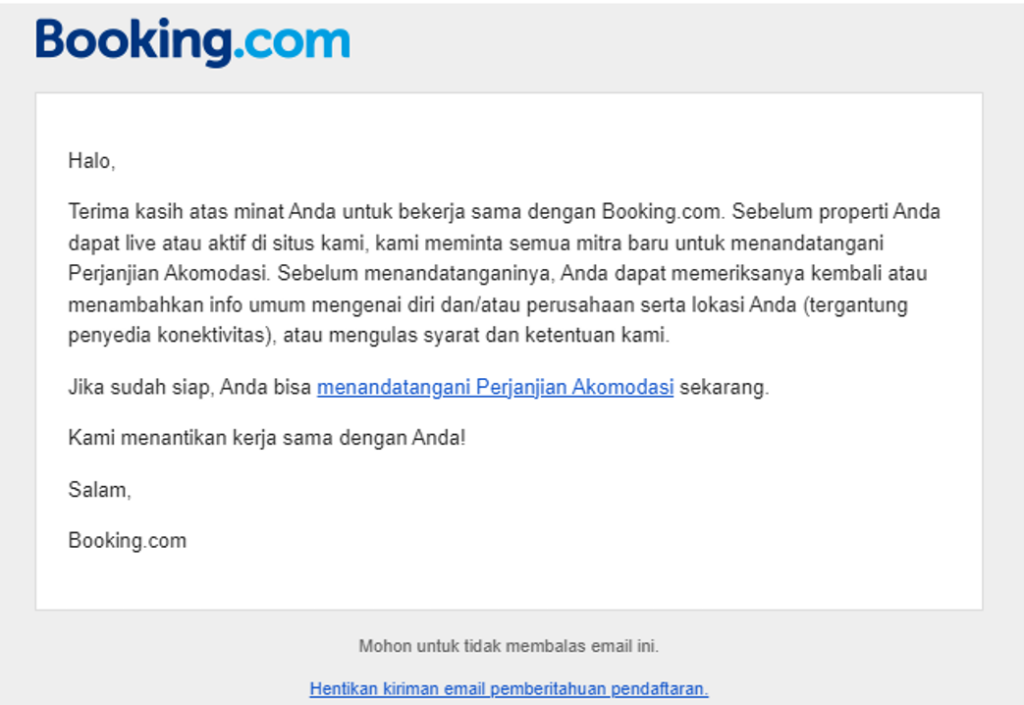
Step 4. Within a few minutes and up to several hours, you will receive an email from Booking.com with a link to sign a contract. You may receive an additional email requesting you to sign in to Booking.com. During the signing process, a LEID (Legal Entity Identifier) will automatically be created for your account.
Connecting Your Existing Booking.com Account to Bookandlink Channel Manager
Not only create a new account on Booking.com, you can also connect existing listings to the Bookandlink channel manager. Connection is not just about inventory and prices, but also the content inside. First of all please make sure Content are tick when you do request connect on Booking.com extranet, see picture below for your referrence.
Below guideline for the next step :
Step 1. Please got to menu Booking.com Set up -> Contract Details.
Step 2. After that you will direct to new page and a pop up will show up, please choose Yes.
Step 3. Another pop up will show up after choose Yes, you can put Legal Entity ID and the system will be fetch your Booking.com contract to Bookandlink.
Notes :
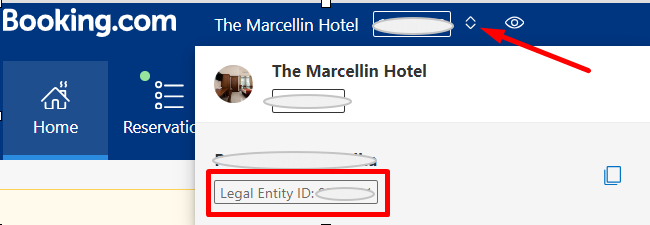
You can find your Legal Entity ID by click arrow icon on Booking.com extranet. Please see screenshot above for your reference.
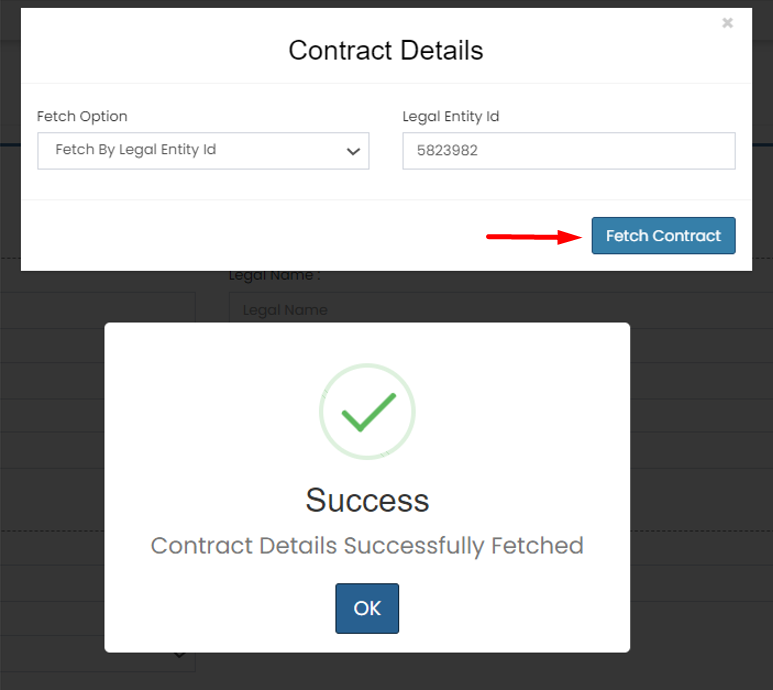
Step 4. After input the Legal Entity ID, click Fetch Contract and please wait until success notification appear.
Notes :
- 1. Before fetch contract please make sure you already put Booking.com property id on Bookandlink control panel.
- 2. If fetch contract failed, please check again your Booking.com property id on control panel and make sure you are put the correct one.
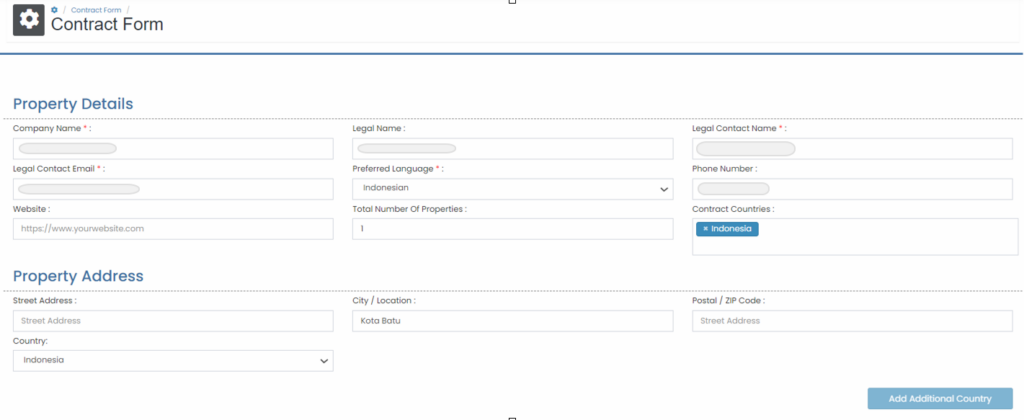
Step 5. After success fetch Contract Detail, Contract Form will be show up with your Booking.com listing detail
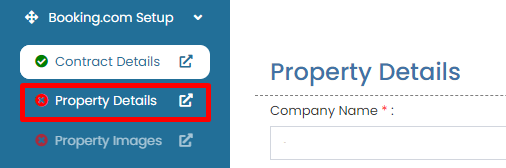
Step 6. You can go to next stage after "Contract Details" turn into green.
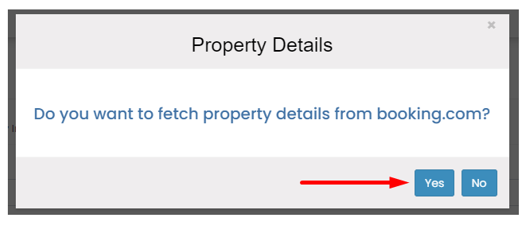
Step 7. Click on submenu Property Detail, and pop up will appear. Please choose Yes.
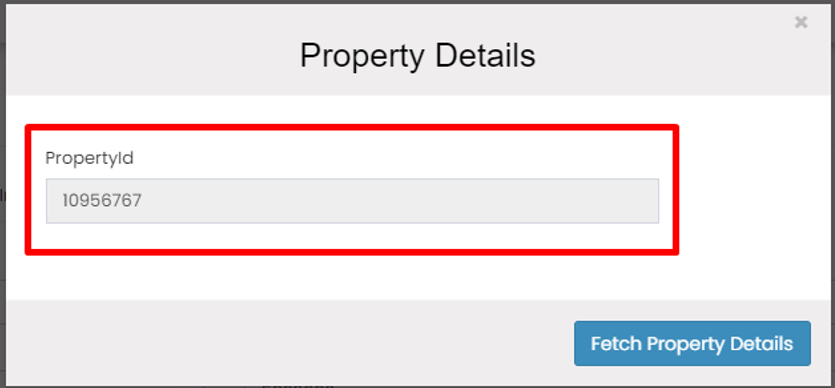
Step 8. Please input your Booking.com listing ID and click Fecth Property Details
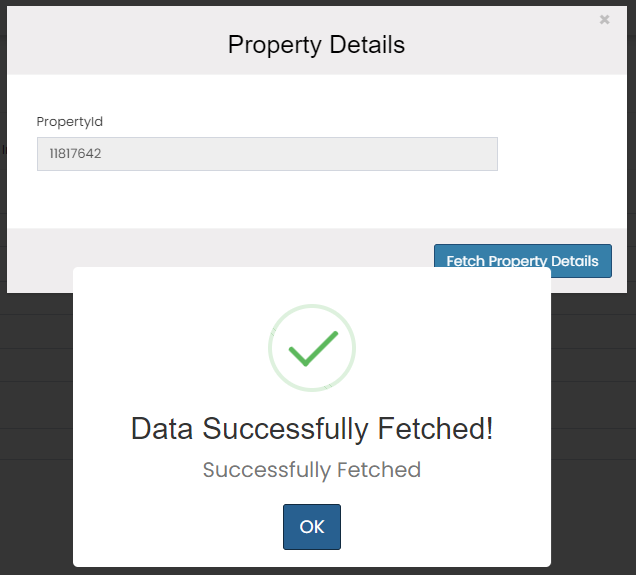
Step 9. After click Fetch Property Details, succes notification will appear.
Notes :
- 1. Before fetch contract please make sure you already put Booking.com property id on Bookandlink control panel.
- 2. If fetch contract failed, please check again your Booking.com property id on control panel and make sure you are put the correct one.
How to Export Photo from Bookandlink Channel Manager to Booking.com Extranet
Now you can upload photo from Bookandlink channel manager and its will be synchronize with Booking.com extranet, follow guidance below for how to do it.
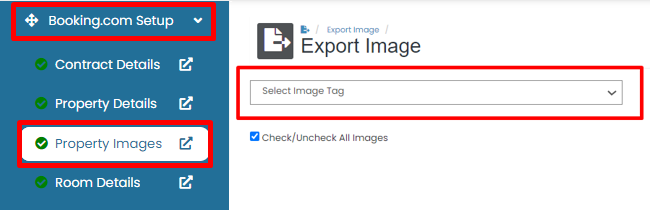
Step 1. Please go to Booking.com Setup -> Property Images and click select Image Tag
Notes : Please make sure you have completed the previous stages.
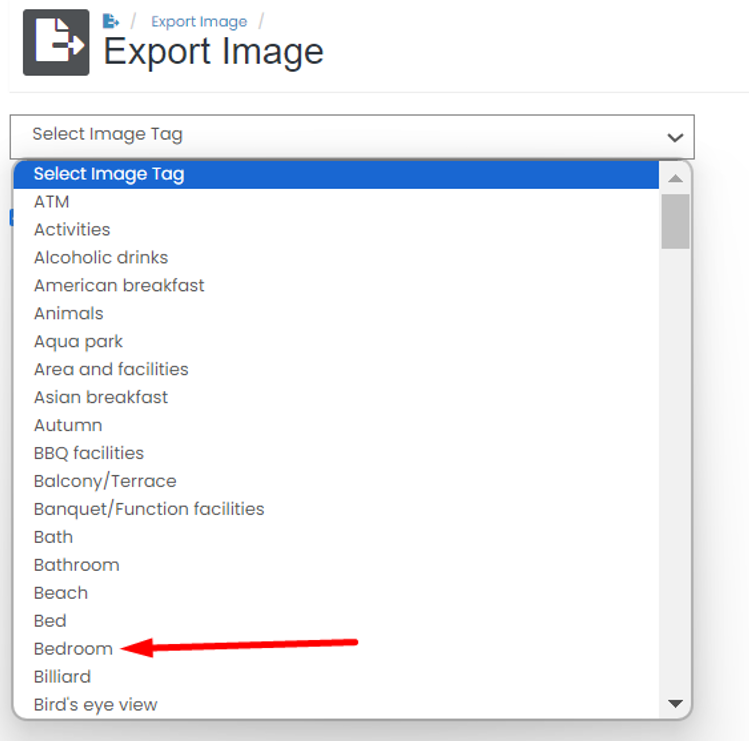
Step 2. Please select the Tag for the photo you want to upload. For example, we chose the Bedroom Tag
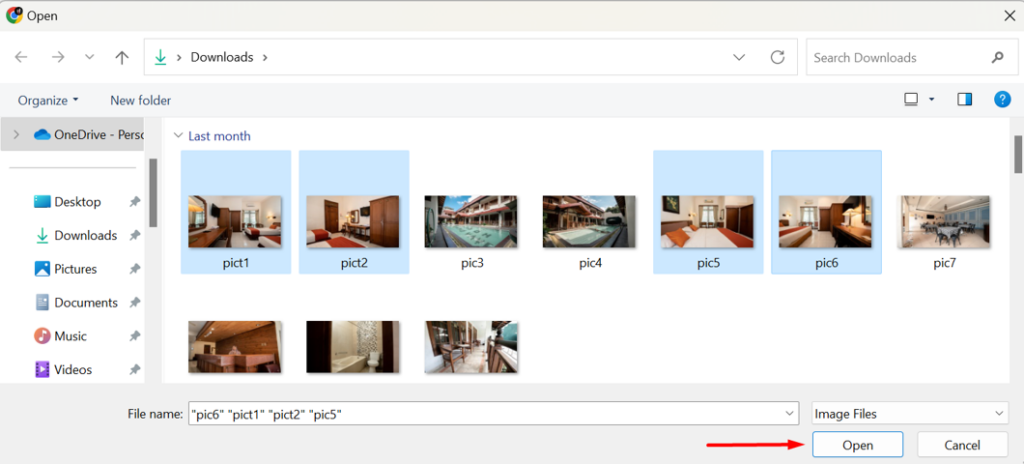
Step 3. After selecting tagging, your document file will pop up. Please search and select the photo you want to upload, then click Open
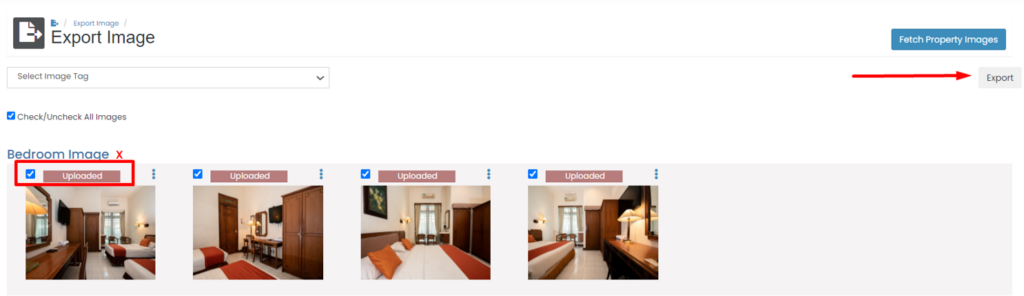
Step 4. After the successful upload notification appears, please click OK and the photo will appear with the upload status. At this stage the photo has been successfully uploaded but only on the channel manager and it is not yet in sync with the booking.com extranet.
Step 5. Please click Export to continue uploading photos to the Booking.com extranet
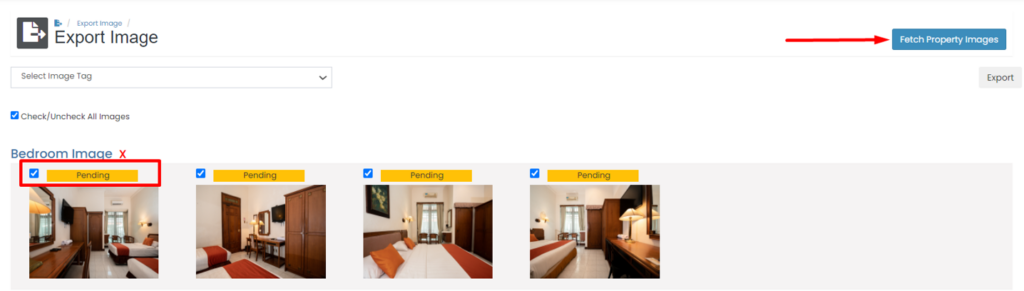
Step 6. After the successful Export notification appears, Please refresh your browser and status of the photo will change to pending. At this stage, please click Fetch Property Images to continue the synchronization process
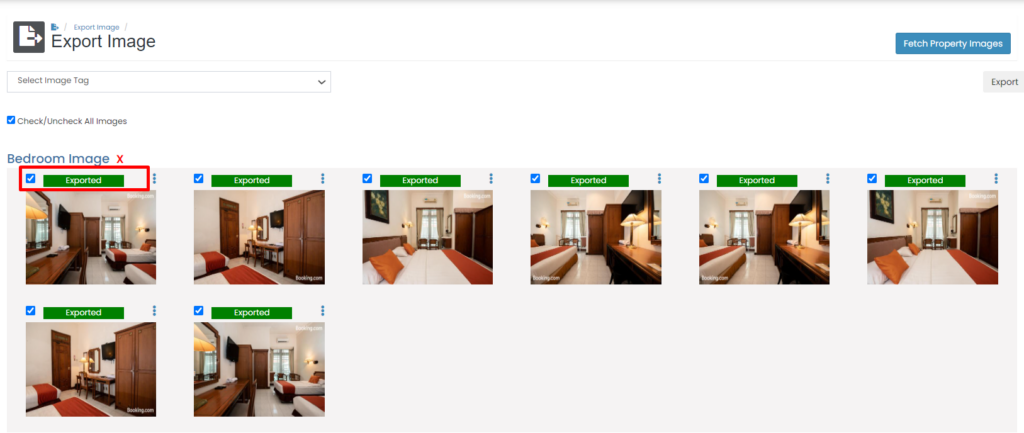
Step 7. After the successful Fetch notification appears, Please refresh your browser and status of the photo will change to Exported. Congratulation your photos are sync with Booking.com extranet.
Notes : If the Fetch process fails, please check again the username installed in the control panel, is the Booking.com ID property correct? (click here for control panel -> booking.com article)
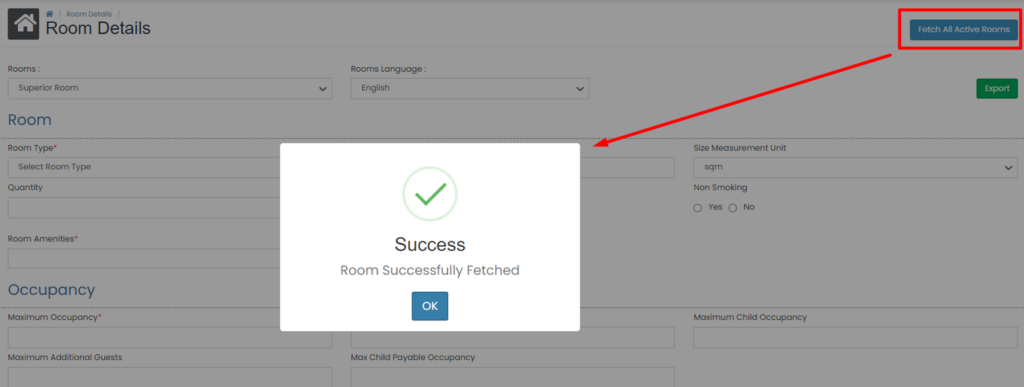
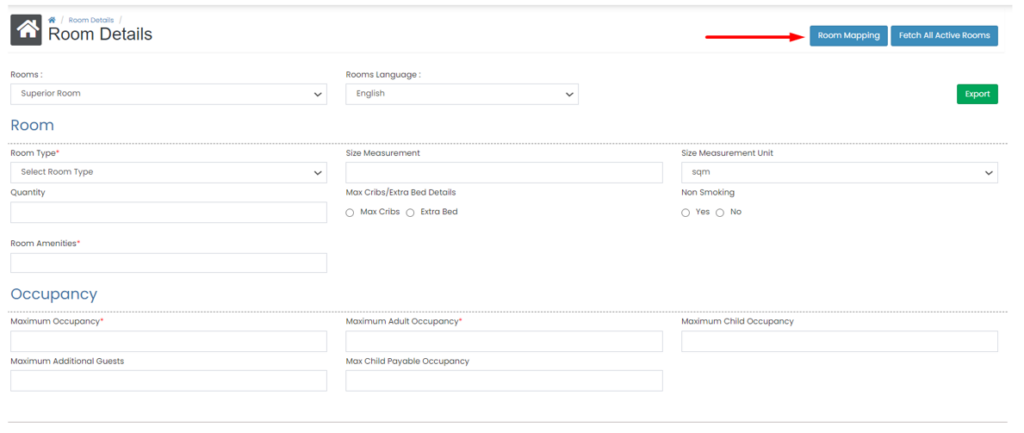
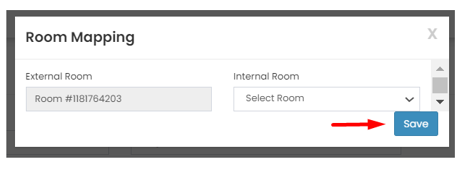
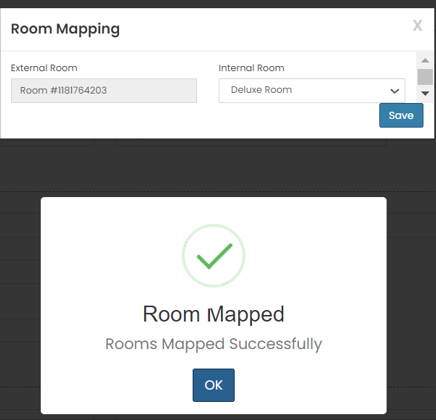
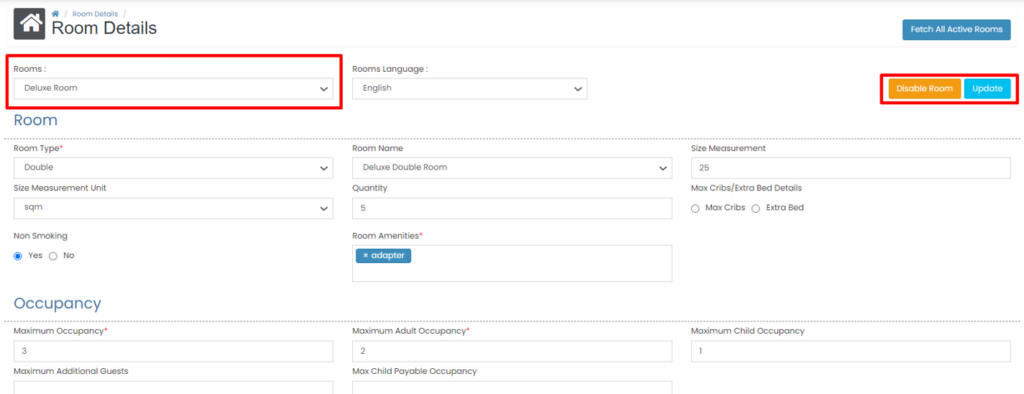
How to Fetch Room Detail from Existing Booking.com Listing